
Mazda 3 Service Manual: Seal Plate Removal/Installation
1. Disconnect the negative battery cable..
2. Remove the front bumper..
3. Remove the bolt.
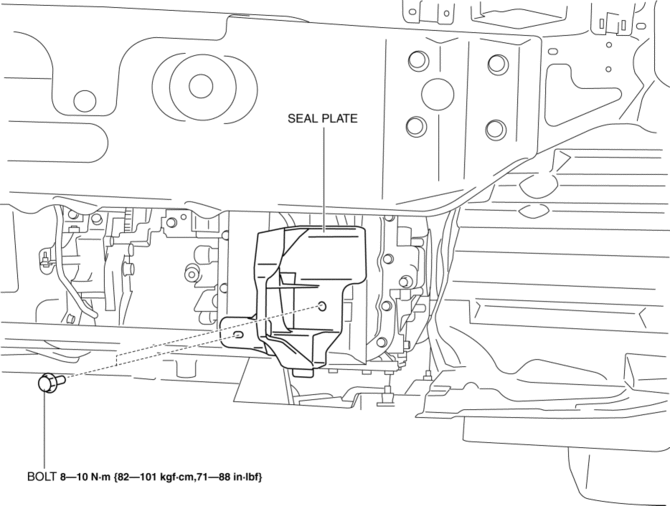
4. Pull the seal plate in the direction of arrow shown in the figure, then remove the hook.
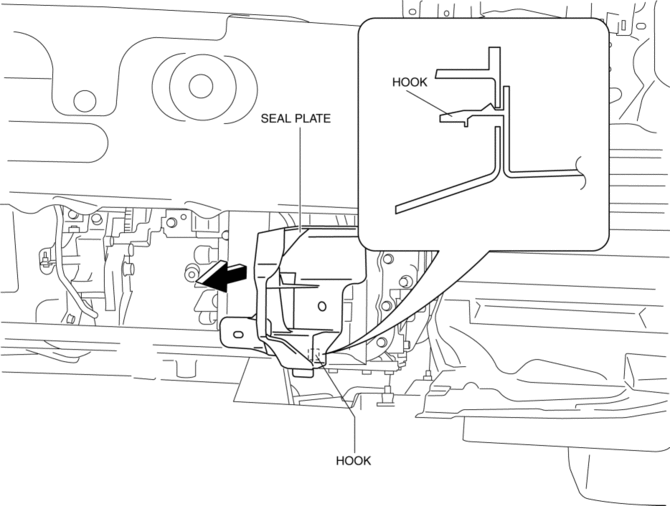
5. Install in the reverse order of remove.
 Rear Spoiler Removal/Installation
4SD
1. Remove the trunk lid trim..
2. Remove the nuts.
3. While cutting the double-sided adhesive tape using a flathead screwdriver
or a razor, separate the rear spoiler from the trunk lid. ...
 Side Panel Removal/Installation
1. Insert a tape-wrapped fastener remover into the position indicated by the
arrow in the figure.
2. Pull the side panel in the direction of the arrow shown in the figure, then
remove the clips ...
Other materials:
Automatic Transaxle Fluid (ATF) Replacement [FS5 A EL]
WARNING:
A hot transaxle and ATF can cause severe burns. Turn off the engine and wait
until they are cool before changing the ATF.
1. Drain the ATF.
a. Remove the oil dipstick.
b. Remove the aerodynamic under cover NO.2..
c. Remove the drain plug and washer to drain the ATF in ...
LTA (Lane Tracing Assist)
LTA functions
In the Subaru Solterra, when driving on roads with clearly visible lane
markings and with dynamic radar cruise control activated, the system uses a
front camera and radar sensors to detect lane boundaries as well as surrounding
and preceding vehicles. Based on this data, t ...
Auxiliary Jack/Usb Port
NOTE:
“iPod” is a registered trademark of Apple Inc. in the United States and other
countries.
Purpose, Function
The Auxiliary jack/USB port outputs the audio signals of commercially-available
portable audio, a USB device, or an iPod connected to the Auxiliary jack/USB ...
