Mazda 3 Service Manual: Accessory Socket Removal/Installation
Front
1. Disconnect the negative battery cable..
2. Remove the upper panel..
3. Remove the shift lever knob. (MTX).
4. Remove the selector lever knob. (ATX).
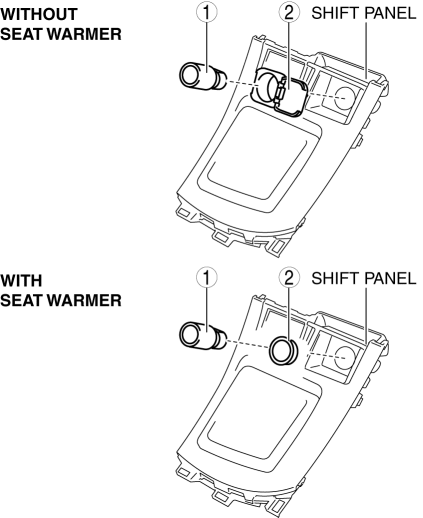
5. Remove the shift panel.
6. Remove in the order indicated in the table.
|
1 |
Socket (See Socket Removal Note.) |
|
2 |
Cap (See Cap Removal Note.) |
7. Install in the reverse order of removal.
Rear
1. Disconnect the negative battery cable..
2. Remove the following parts:
a. Upper panel.
b. Shift lever knob (MTX).
c. Selector lever knob (ATX).
d. Shift panel.
e. Side wall.
f. Console.
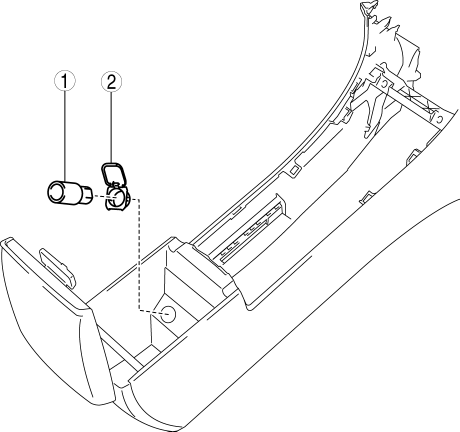
3. Remove in the order indicated in the table.
|
1 |
Socket (See Socket Removal Note.) |
|
2 |
Cap (See Cap Removal Note.) |
4. Install in the reverse order of removal.
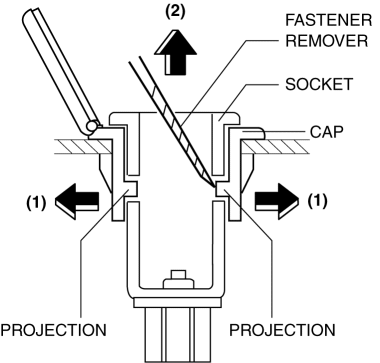
Socket Removal Note
1. Remove the socket in the direction of the arrow (2) shown in the figure while opening the caps in the direction of the arrow (1) using a tape-wrapped fastener remover.
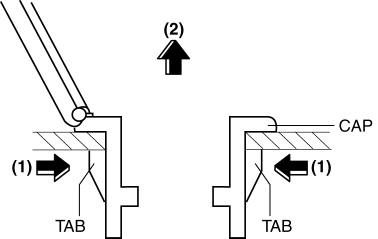
Cap Removal Note
1. Remove the cap in the direction of the arrow (2) shown in the figure while pressing the cap tabs in the direction of the arrow (1).
 Accessory Socket Inspection
Front
1. Disconnect the negative battery cable..
2. Remove the upper panel..
3. Remove the shift lever knob. (MTX).
4. Remove the selector lever knob. (ATX).
5. Remove the shift panel.
6. R ...
 Safety Systems
...
Other materials:
Camshaft Position (CMP) Sensor Inspection [Mzr 2.0, Mzr 2.5]
Visual Inspection
CAUTION:
When replacing the CMP sensor, make sure there is no foreign material on
it such as metal shavings. If it is installed with foreign material, the sensor
output signal will malfunction resulting from fluctuation in magnetic flux and
cause a deterioration i ...
System
The system operates only when the driver
is in the vehicle or within operational
range while the key is being carried.
NOTE
When the battery power is low, or in
places where there are high-intensity radio
waves or noise, the operational range
may become narrower or the system may
not operate ...
Valve Clearance Adjustment [Mzr 2.0, Mzr 2.5]
1. Remove the battery cover..
2. Disconnect the negative battery cable.
3. Remove the plug hole plate..
4. Disconnect the wiring harness.
5. Remove the ignition coils..
6. Remove the spark plugs..
7. Remove the ventilation hose.
8. Remove the oil level gauge.
9. Remove the cylinder h ...
