Mazda 3 Service Manual: Air Bleeding
CAUTION:
-
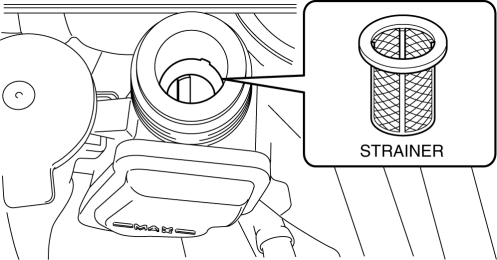
If the strainer is removed, impurities may penetrate the power steering system and damage it. To prevent this, always bleed air with the strainer installed.

-
Do not maintain the steering wheel fully turned for 5 s or more. The oil temperature could rise and damage the oil pump.
NOTE:
-
Add fluid and bleed air using the following procedure. Otherwise, additional time will be required to add fluid because of mesh resistance.
Fluid Level Adjustment
NOTE:
-
The following procedure is for adding (adjusting) fluid if the lack of fluid level has dropped as a result of fluid leakage.
1. Working with two people, one person protects the area around the sub tank using a cloth and adds fluid to the sub tank.
CAUTION:
-
Do not spread a cloth near the drive belt, otherwise the cloth could get caught in the drive belt when starting the engine causing damage to parts in the engine compartment.
2. The other person starts the engine and idles it.
3. Turn the steering wheel fully to the left and right slowly several times.
-
If the steering wheel operation speed is too fast, the fluid may spatter from the filler port. Do not exceed the steering wheel operation speed reference value.
-
Steering wheel operation speed (reference value)
-
90 °/s
4. Inspect the fluid level and, if the fluid level has dropped, repeat Step 1—3 until the level is between MAX and MIN on the sub tank while idling the engine.
Power Steering Component Parts Replacement
NOTE:
-
The following procedure is for adding fluid to the tank (full amount) after replacing the electric power steering oil pump component or steering gear and linkage.
1. Remove the aerodynamic undercover No.2..
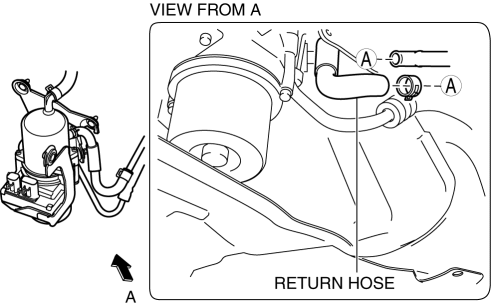
2. Disconnect the return hose from the power steering pipe component.

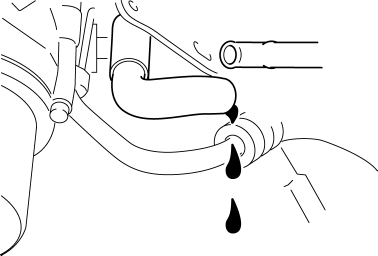
3. Add fluid until fluid escapes from the return hose.

4. Assemble the return hose to the power steering pipe component.
5. Working with two people, one person protects the area around the sub tank using a cloth and adds fluid to the sub tank.
CAUTION:
-
Do not spread a cloth near the drive belt, otherwise the cloth could get caught in the drive belt when starting the engine causing damage to parts in the engine compartment.
6. The other person starts the engine and idles it.
7. Turn the steering wheel fully to the left and right slowly several times.
-
If the steering wheel operation speed is too fast, the fluid may spatter from the filler port. Do not exceed the steering wheel operation speed reference value.
-
Steering wheel operation speed (reference value)
-
90 °/s
8. Inspect the fluid level and, if the fluid level has dropped, repeat Step 5—7 until the level is between MAX and MIN on the sub tank while idling the engine.
 PID/Data Monitor Inspection [Instrument Cluster]
1. Connect the M-MDS (IDS) to the DLC-2.
2. After the vehicle is identified, select the following items from the initialization
screen of the IDS.
a. Select “DataLogger”.
b. Select “Module ...
 Fuel Gauge Sender Unit Inspection
MZR 2.3 DISI Turbo, SKYACTIV-G 2.0
NOTE:
The fuel gauge sender unit is integrated with the fuel pump unit.
1. Disconnect the negative battery cable..
2. Remove the rear seat cushion.. ...
Other materials:
Input/Turbine Speed Sensor Inspection [FS5 A EL]
CAUTION:
Water or foreign objects entering the connector can cause a poor connection
or corrosion. Be sure not to drop water or foreign objects on the connector
when disconnecting it.
On-Vehicle Inspection
1. Perform the following procedures.
a. Remove the battery cover..
b. ...
Information Display Input/Output Check Mode
NOTE:
In this mode, it is possible to verify the items in the following chart.
Check Code Table
Check code
Check item
Related items
01
Information display
Multi information display
...
Parking Brake Switch Inspection
1. Remove the upper panel..
2. Disconnect the parking brake switch connector.
3. Verify that the continuity is as indicated in the table.
If not as indicated in the table, replace the parking brake lever.
...
