Mazda 3 Service Manual: Front Combination Light Bracket Replacement
NOTE:
-
Verify that the front combination light is not damaged before using the repair bracket for installation when the original brackets are damaged. If the front combination light component is damaged, replace the light as a single unit.
1. Cut off the front combination light bracket at the locations shown in the figure.
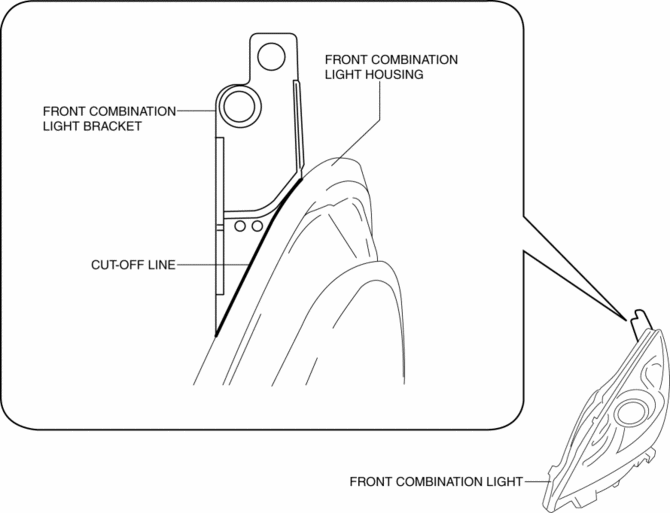
2. Smoothen the cut surfaces using sandpaper so that the repair bracket can be properly installed.
3. Cut the projection at the position shown in the figure.
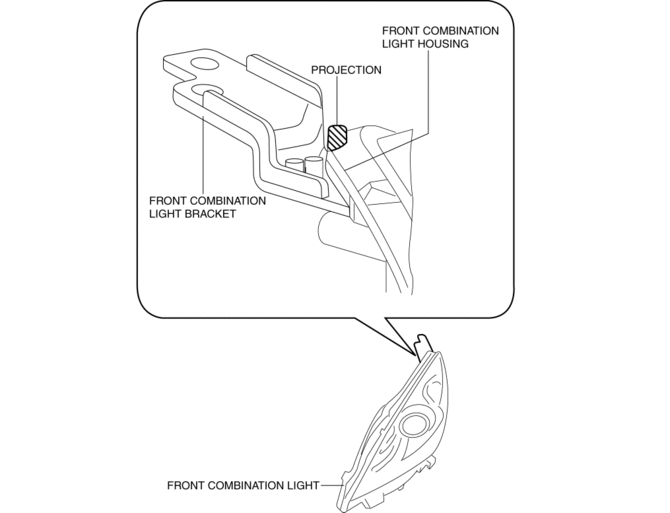
4. After disconnecting the projection, verify that the projection is less than 1mm {0.04 in} from the front combination light housing.
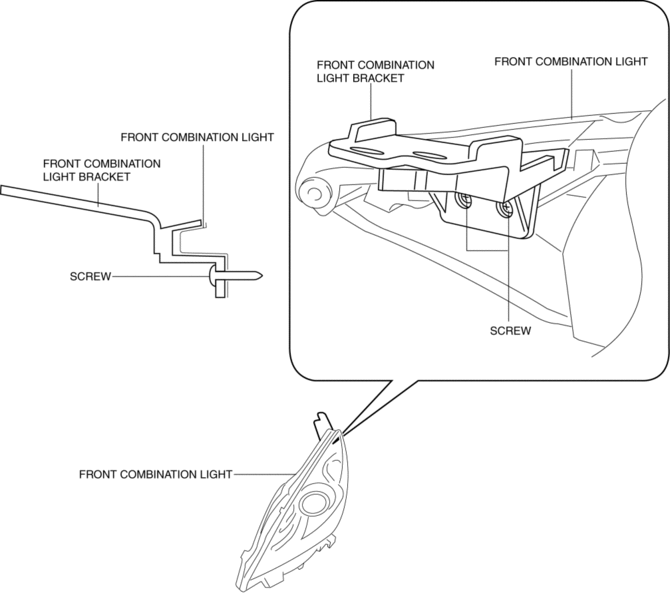
5. Securely attach the repair bracket to the front combination light using the screws.
 Discharge Headlight System Inspection
Discharge headlight inoperative
WARNING:
Incorrect servicing of the discharge headlight bulb could result in electrical
shock. Before servicing the discharge headlight bulb, always refer t ...
 Front Combination Light Removal/Installation
WARNING:
Incorrect servicing of the discharge headlights could result in electrical
shock. Before servicing the discharge headlights, always refer to the discharge
headlight service warn ...
Other materials:
Installing Child-Restraint Systems
Accident statistics reveal that a child is
safer in the rear seat. The front passenger's
seat is clearly the worst choice for any
child under 12, and with rear-facing childrestraint
systems it is clearly unsafe due to
air bags.
NOTE
Even if your vehicle is equipped with front passenger seat w ...
Roof Carrier Bracket Removal/Installation
4SD
1. Disconnect the negative battery cable..
2. Remove the following parts:
a. Sunroof seaming welt (vehicles with sunroof)
b. Front scuff plate.
c. Rear scuff plate.
d. A-pillar trim.
e. B-pillar lower trim.
f. Upper anchor of the front seat belt installation bolt.
g. B-pillar up ...
Rear Shock Absorber Removal/Installation
1. Remove in the order indicated in the table.
2. Install in the reverse order of removal.
1
Rear shock absorber upper nut
2
Rear shock absorber under bolt
3
Rear shock absorber
...
