Mazda 3 Service Manual: Front Door Removal/Installation
WARNING:
-
Removing the front door without supporting it could cause the front door to fall and cause serious injury. Always perform the procedure with at least another person to prevent the front door from falling.
1. Disconnect the negative battery cable..
2. Remove in the order indicated in the table.
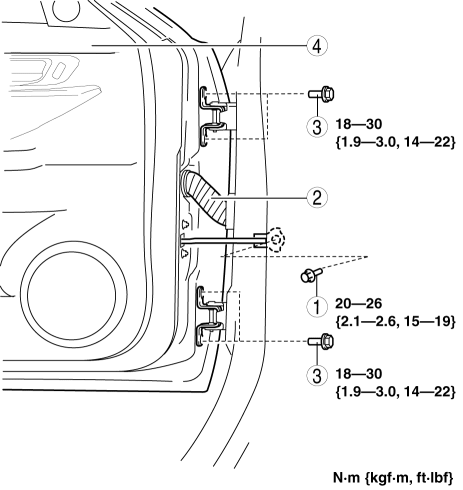
|
1 |
Bolt A |
|
2 |
Connector (See Connector Removal Note.) |
|
3 |
Bolt B |
|
4 |
Front door |
3. Install in the reverse order of removal.
4. Adjust the front door..
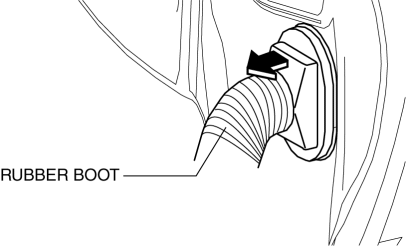
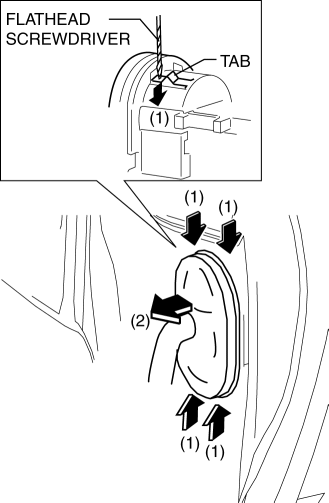
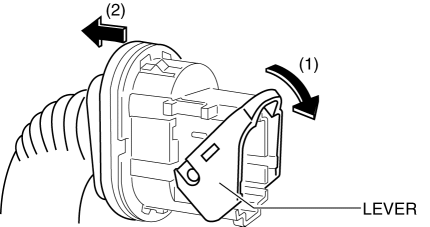
Connector Removal Note
1. Pull the rubber boot outward.
2. Press the tab in the direction of arrow (1) shown in the figure using a tape-wrapped flathead screwdriver, and remove the connector from the body in the direction of arrow (2) shown in the figure.
3. Lower the lever in the direction of arrow (1), and disconnect the connector in the direction of arrow (2).
 Front Door Module Panel Removal/Installation
1. To access the glass installation bolt, position the front door glass so that
the distance from the top of the front door glass to the upper part of the front
beltline molding is approx. 80 mm { ...
 Front Outer Handle Removal/Installation
1. To access the glass installation bolt, position the front door glass so that
the distance from the top of the front door glass to the upper part of the front
beltline molding is approx. 80 mm { ...
Other materials:
Spark Plug Inspection [Mzr 2.3 Disi Turbo]
Specification
Spark plug type
L3BD-18110, L3YD-18110
Plug Gap Inspection
CAUTION:
To avoid possible damage to the tip, do not adjust the plug gap.
To prevent damaging the tip, use a wire type plug gap gauge when inspecting
the plug gap.
1. Measure the spark p ...
Liftgate Hinge Removal/Installation
1. Disconnect the negative battery cable..
2. Remove the following parts:
a. Rear scuff plate.
b. Rear seat cushion.
c. Rear seat back.
d. Lower anchor installation bolts on the rear seat belt.
e. Tire house trim.
f. Trunk end trim.
g. Trunk side upper trim.
h. Trunk side trim.
i ...
A/C Unit Disassembly/Assembly
1. Disassemble in the order indicated in the table.
CAUTION:
If a non-specified grease is used, it may result in abnormal noise or improper
operation of the links. Apply only the specified grease to each link.
2. Assemble in the reverse order of disassembly.
X: Applicable— ...
