Mazda 3 Service Manual: Front Outer Handle Removal/Installation
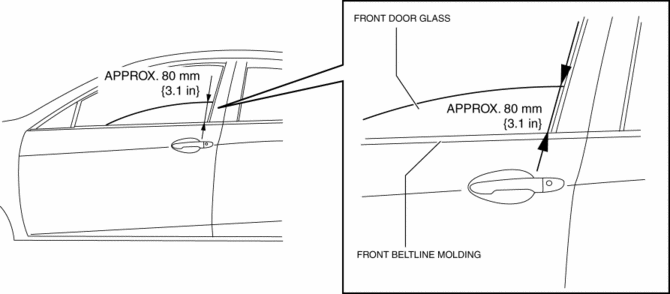
1. To access the glass installation bolt, position the front door glass so that the distance from the top of the front door glass to the upper part of the front beltline molding is approx. 80 mm {3.1 in}
.
2. Disconnect the negative battery cable..
3. Remove the following parts:
a. Inner garnish.
b. Front door trim.
c. Front door speaker.
d. Front door glass.
e. Front door module panel.
f. Front door key cylinder.
4. Disconnect the keyless antenna connector (With advanced keyless entry and push button start system).
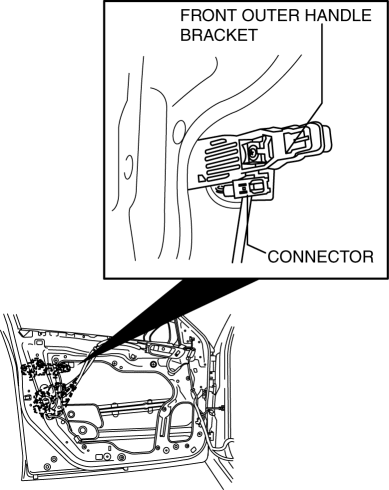
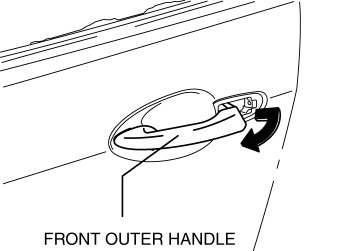
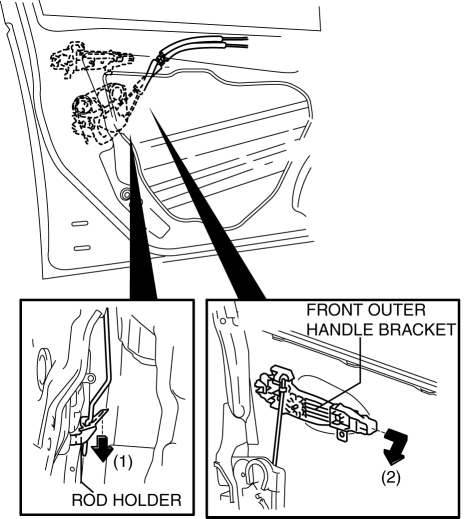
5. Remove the front outer handle.
6. Remove the screw.
NOTE:
-
The screw cannot be removed because of the stopper.
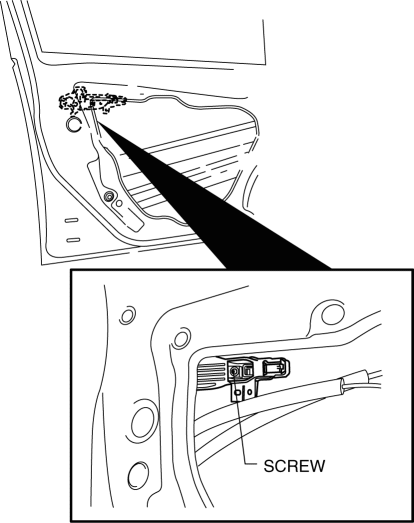
7. Press down the rod holder in the direction of arrow (1) and remove the front outer handle bracket in the direction of arrow (2).
8. Install in the reverse order of removal.
 Front Door Removal/Installation
WARNING:
Removing the front door without supporting it could cause the front door
to fall and cause serious injury. Always perform the procedure with at least
another person to prevent t ...
 Hood Adjustment
Gap Adjustment
1. Verify that the gap between the hood and the body is within the specification.
Standard clearance
a: -2.8—0.8 mm {-0.11—0.03 in}
b: –1.2—1.2 mm {–0. ...
Other materials:
Steering wheel
Adjustment procedure
1. Firmly hold the Subaru Solterra steering wheel and push the adjustment lever
downward to release the lock.
2. Move the steering wheel vertically and horizontally to achieve the most comfortable
driving position.
Once the desired position is reached, pull the leve ...
Controller Area Network (Can) System
Outline
With the addition of the following, the system wiring diagram and CAN communication
table have been added.
USB adapter
System Wiring Diagram
CAN Signal Table
Signals transmitted using the CAN system are as follows:
MS-CANOUT: Output (send ...
Operational Range
WARNING
Always take all children and pets with
you or leave a responsible person with
them:
Leaving a child or a pet unattended in
a parked vehicle is dangerous. In hot
weather, temperatures inside a vehicle
can become high enough to cause
brain damage or even death.
...
