Mazda 3 Service Manual: Hole Cover Removal/Installation
With Car-navigation system
1. Disconnect the negative battery cable..
2. Remove the following parts:
a. Upper column cover.
b. Instrument cluster.
c. Center panel.
d. Center cover.
e. Dashboard upper panel.
f. Multi information display.
3. Pull the hole cover in the direction of arrow (1), (2) shown in the figure, while remove the clip A, hook B and clips C.
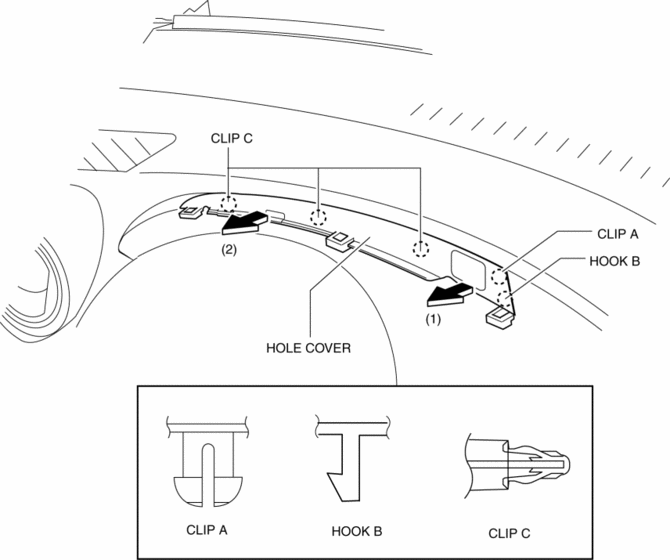
4. Remove the hole cover.
5. Install in the order of removal.
Without Car-navigation system
1. Disconnect the negative battery cable..
2. Remove the following parts:
a. Upper column cover.
b. Instrument cluster.
c. Center panel.
d. Center cover.
e. Dashboard upper panel.
3. Pull the hole cover in the direction of arrow (1), (2) shown in the figure, while remove the hook and clips.
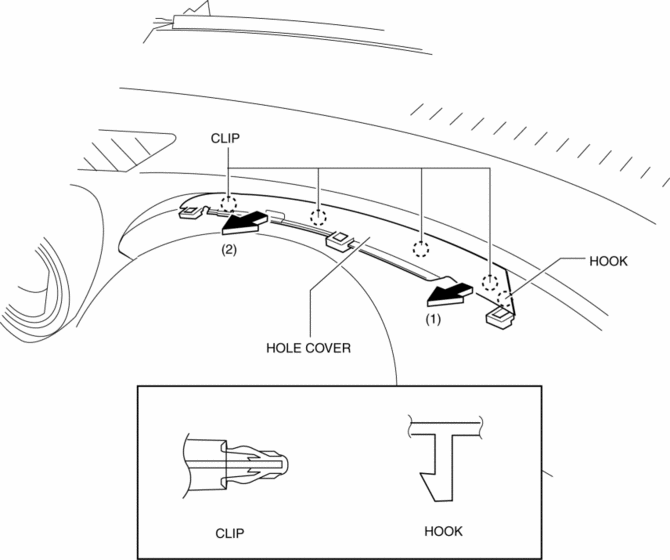
4. Remove the hole cover.
5. Install in the order of removal.
 Headliner Removal/Installation
1. Shift to the D (ATX) or 4th gear (MTX) position. (4SD)
2. Disconnect the negative battery cable..
3. Remove the rain sensor cover. (Vehicles with auto light/wiper system).
4. Disconnect the r ...
 Inner Garnish Removal/Installation
1. Disconnect the negative battery cable..
2. Pull the inner garnish in the direction of the arrow shown in the figure and
remove it while detaching clips and tab.
CAUTION:
When pull ...
Other materials:
If your vehicle overheats
If the message "EV System overheated Output power reduced" appears
on the multi-information display of your Subaru Solterra, it indicates that the
system temperature has risen beyond optimal limits and immediate action is required
to prevent potential damage.
NOTICE
■ Cooling system coolan ...
Clutch Pedal Removal/Installation [C66 M R]
CAUTION:
Secure the steering wheel using tape or a cable to prevent the steering shaft
from rotating after disconnecting the steering shaft. If the steering wheel
rotates after the steering shaft and the steering gear and linkage are disconnected,
the internal parts of the clock spr ...
Restraints SST [Standard Deployment Control System]
49 H066 002
Deployment tool
49 D066 002
Adapter harness
49 L066 002
Adapter harness
49 B066 004
Adapter harness
49 N088 0A0
Fuel and Therm ...
