Mazda 3 Service Manual: Keyless Antenna Removal/Installation
Interior, Front
1. Disconnect the negative battery cable..
2. Remove the following parts:
a. Upper panel.
b. Shift knob (MTX).
c. Selector lever knob (ATX).
d. Shift panel.
e. Side wall.
f. Center panel.
g. Audio unit.
h. Rear heat duct (1).
3. Disconnect the connector.
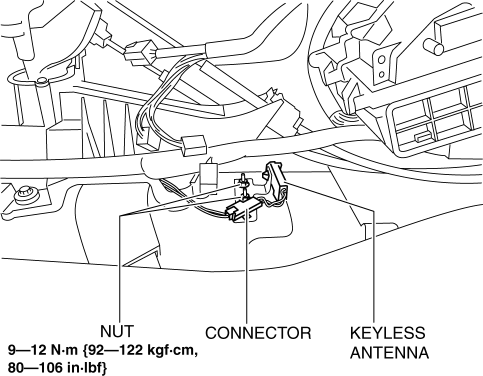
4. Remove the nuts.
5. Remove the keyless antenna.
6. Install in the reverse order of removal.
Interior, Rear
1. Disconnect the negative battery cable..
2. Remove the rear seat cushion..
3. Disconnect the connector.
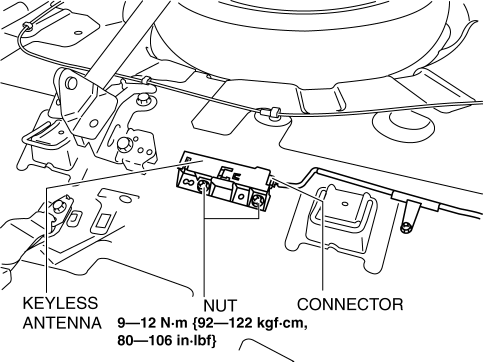
4. Remove the nuts.
5. Remove the keyless antenna.
6. Install in the reverse order of removal.
Exterior, Rear
1. Disconnect the negative battery cable..
2. Remove the rear combination light..
3. Remove the rear bumper..
4. Remove the nuts.
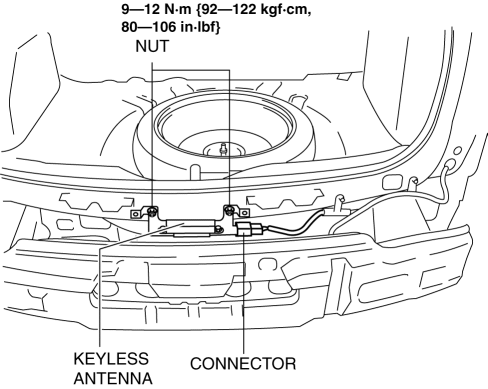
5. Disconnect the connector.
6. Remove the keyless antenna.
7. Install in the reverse order of removal.
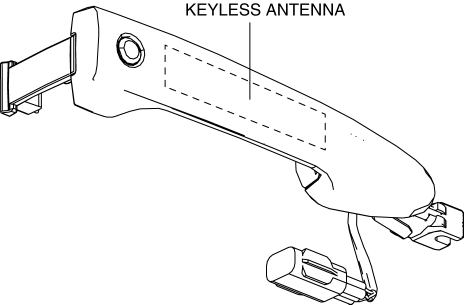
Exterior, LF/RF
NOTE:
-
The keyless antenna (vehicle exterior, LF/RF) is built into the front outer handle..
 Installation Of Radio System
The control modules and control unit have been designed with sufficient attention
to radio wave disturbances from the outside. However, observe the following precautions
when installing the radio ...
 Rear Center Speaker Inspection
1. Disconnect the negative battery cable..
2. Remove the following parts:
a. Rear seat cushion.
b. Rear scuff plate.
c. Tire house trim.
d. C-pillar trim.
e. Rear package trim.
f. Rear c ...
Other materials:
Air Bag Module And Pre Tensioner Seat Belt Deployment Procedures [Two Step Deployment
Control System]
WARNING:
A live (undeployed) air bag module or pre-tensioner seat belt may accidentally
operate (deploy) when it is disposed of and cause serious injury. Do not dispose
of a live (undeployed) air bag module and pre-tensioner seat belt. If the SSTs
(Deployment tool and Adapter harn ...
Driver Side Air Bag Module Removal/Installation [Two Step Deployment Control
System]
WARNING:
Handling the air bag module improperly can accidentally deploy the air bag
module, which may seriously injure you. Read the air bag system service warnings
and cautions before handling the air bag module..
Due to the adoption of 2-step deployment control in the driver- ...
Steering Wheel And Column Removal/Installation [Without Advanced Keyless Entry
And Push Button Start System]
WARNING:
Handling the air bag module improperly can accidentally operate (deploy)
the air bag module, which may seriously injure you. Read the service warnings
before handling the air bag module..
1. Remove the driver-side front scuff plate..
2. Remove the driver-side front sid ...
