Mazda 3 Service Manual: Hood Adjustment
Gap Adjustment
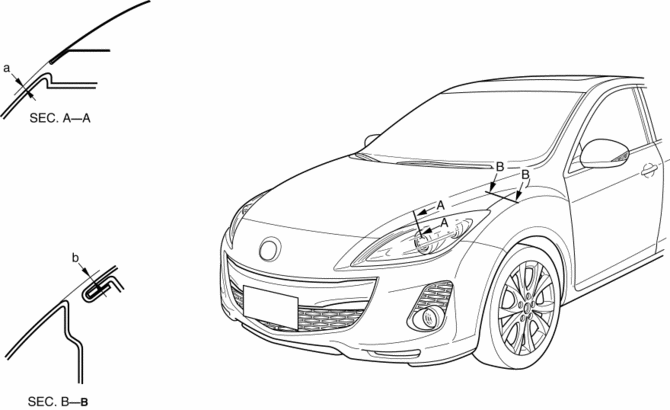
1. Verify that the gap between the hood and the body is within the specification.
-
Standard clearance
-
a: -2.8—0.8 mm {-0.11—0.03 in}
-
b: –1.2—1.2 mm {–0.047—0.0.47 in}
2. Disconnect the negative battery cable..
3. Remove the following parts:
a. Front bumper.
b. Front combination light.
c. Front fender molding.
d. Side step molding.
e. Front fender panel.
4. Loosen the hood hinge installation bolts and adjust the hood.
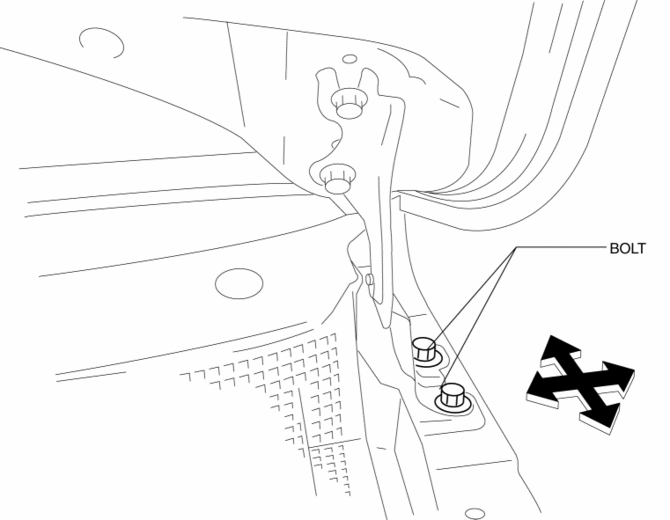
5. Tighten the bolts..
6. Install the following parts:
a. Front fender panel.
b. Side step molding.
c. Front fender molding.
d. Front combination light.
e. Front bumper.
7. Connect the negative battery cable..
Height Difference Adjustment
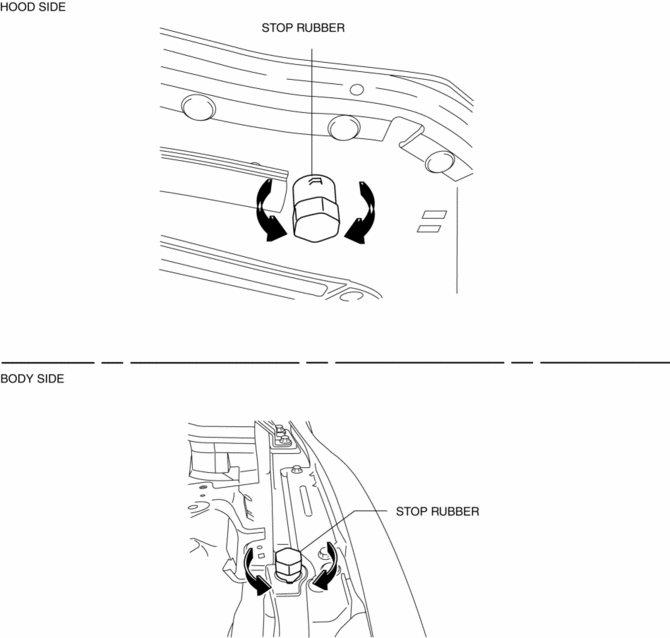
1. Verify that the height difference between the hood and the body is within the specification.

-
Standard clearance
-
a: 3.0—6.0 mm {0.12—0.23 in}
-
b: 1.9—5.1 mm {0.08—0.20 in}
-
c: 2.5—4.9 mm {0.10—0.19 in}
2. Turn the stop rubber to adjust the height of the hood.
 Front Outer Handle Removal/Installation
1. To access the glass installation bolt, position the front door glass so that
the distance from the top of the front door glass to the upper part of the front
beltline molding is approx. 80 mm { ...
 Hood Disassembly/Assembly
Except Mazdaspeed3
1. Disassemble in the order indicated in the table.
1
Weather strip parting seal
2
Weather strip shroud seal
...
Other materials:
Oil Seal (Differential) Replacement [A26 M R]
1. On level ground, jack up the vehicle and support it evenly on safety stands.
2. Drain the oil from the transaxle..
3. Remove the front tires..
4. Remove the splash shield..
5. Remove the aerodynamic under cover No.2..
6. Separate the drive shaft and joint shaft from the transaxle..
7 ...
Roof Carrier Bracket Removal/Installation
4SD
1. Disconnect the negative battery cable..
2. Remove the following parts:
a. Sunroof seaming welt (vehicles with sunroof)
b. Front scuff plate.
c. Rear scuff plate.
d. A-pillar trim.
e. B-pillar lower trim.
f. Upper anchor of the front seat belt installation bolt.
g. B-pillar up ...
Radar Sensors (Rear)
The radar sensors (rear) for the rear vehicle monitoring system are equipped
inside the rear
bumper, one each on the left and right sides.
Sedan
Hatchback
The surface area of the rear bumper near the radar sensors (rear) should
always be clean so
that the rear vehicle monitoring sys ...
