Mazda 3 Service Manual: Front Door Module Panel Removal/Installation
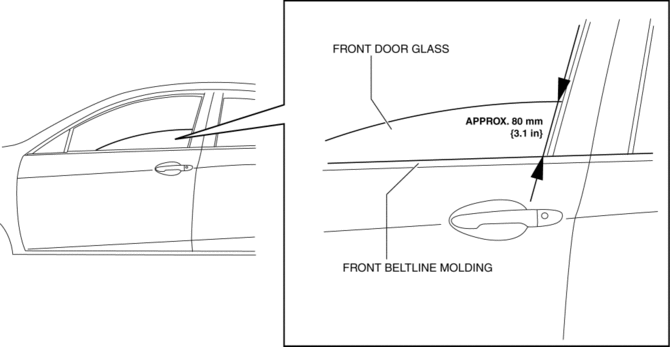
1. To access the glass installation bolt, position the front door glass so that the distance from the top of the front door glass to the upper part of the front beltline molding is approx. 80 mm {3.1 in}
.
2. Disconnect the negative battery cable..
3. Remove the following parts:
a. Inner garnish.
b. Front door trim.
c. Front door speaker.
d. Front door glass.
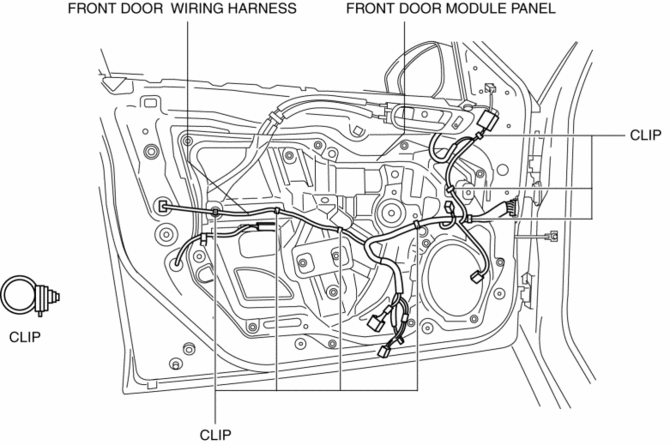
4. Disconnect the front door wiring harness connector.
5. Remove the clips securing the front door wiring harness from the front door module panel.
CAUTION:
-
If the front door wiring harness is placed on the floor after removing the front door wiring harness from the front door module panel, it could be damaged by the front door closing or stepped on while moving. Connect the connector shown in the figure after removing the front door wiring harness and do not place the front door wiring harness on the floor.
6. Remove the bolts.
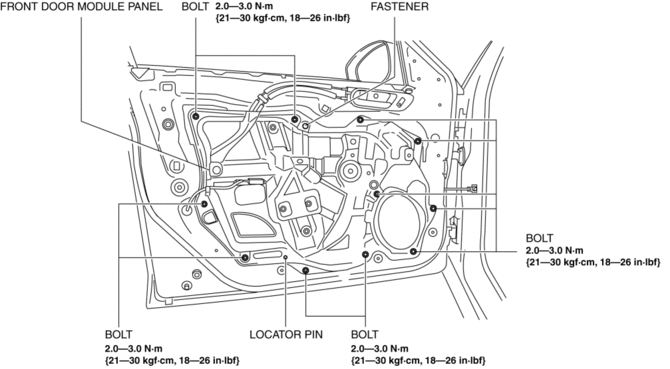
7. Remove the fastener.
8. Remove the front door module panel.
9. Remove the front power window motor..
10. Remove the front power window regulator..
11. Install in the reverse order of removal.
 Front Door Latch Switch Inspection
1. To access the glass installation bolt, position the front door glass so that
the distance from the top of the front door glass to the upper part of the front
beltline molding is approx. 80 mm { ...
 Front Door Removal/Installation
WARNING:
Removing the front door without supporting it could cause the front door
to fall and cause serious injury. Always perform the procedure with at least
another person to prevent t ...
Other materials:
Engine Oil Replacement [Mzr 2.0, Mzr 2.5]
WARNING:
Hot engines and engine oil can cause severe burns. Turn off the engine and
wait until it and the engine oil have cooled.
A vehicle that is lifted but not securely supported on safety stands is dangerous.
It can slip or fall, causing death or serious injury. Never work ...
Liftgate Side Trim Removal/Installation
1. Remove the liftgate upper trim..
2. Pull the point A of the strap hanger as shown in the figure.
3. Remove the strap hanger.
4. Remove the fastener.
5. Pull the liftgate side trim in the direction of arrow then remove clip A.
6. Detach tab B and C while pulling the liftgate sid ...
Before driving
Before operating your Subaru Solterra, carefully follow the recommendations
below to ensure maximum safety, proper vehicle control, and a confident driving
experience in all conditions.
Installing floor mats
Always use floor mats that are specifically engineered for the Subaru Solterra,
matc ...
