Mazda 3 Service Manual: Antenna Feeder No.7 Inspection
1. Disconnect the negative battery cable..
2. Remove the liftgate upper trim..
3. Disconnect the connector A and B..
4. Verify that the continuity between antenna feeder No.7 terminals is as indicated in the table.
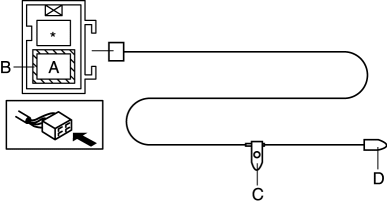
-
If not as indicated in the table, replace antenna feeder No.7.

 Antenna Feeder No.6 Removal/Installation
NOTE:
Antenna feeder No.6 is integrated with the vehicle wiring harness.
1. Refer to CAR-NAVIGATION UNIT REMOVAL/INSTALLATION. ...
 Antenna Feeder No.7 Removal/Installation
1. Disconnect the negative battery cable..
2. Remove the liftgate upper trim..
3. Disconnect the connector A.
4. Disconnect the connector B..
5. Remove the bolt.
6. Remove the antenna fe ...
Other materials:
Parking in an Emergency
The hazard warning lights should always
be used when you stop on or near a
roadway in an emergency
The hazard warning lights warn other
drivers that your vehicle is a traffic hazard
and that they must take extreme caution
when near it.
Depress the hazard warning flasher and
all the t ...
Battery Removal/Installation [Skyactiv G 2.0]
1. Remove in the order indicated in the table.
2. Install in the reverse order of removal.
1
Battery cover
(See Battery Cover Removal Note.)
(See Battery Cover Installation Note.)
2
Negative battery cable
3
...
Security Setting (Type A)
If a passcode is set, the system cannot be
activated unless the passcode is input.
NOTE
Do this function only when parked. It is
too distracting to attempt while driving
and you may make too many errors to be
effective.
Passcode setting
Press the pick-up button or talk button
with a sho ...
