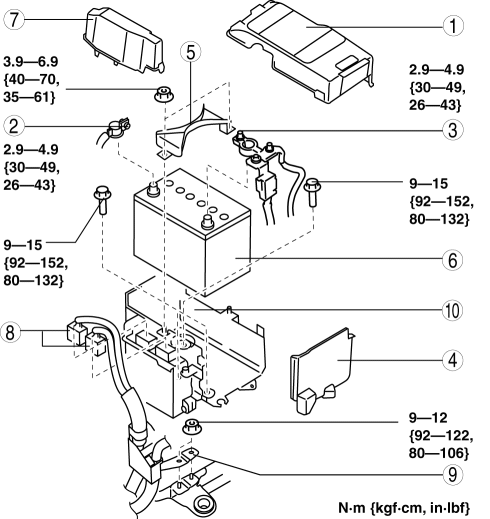
Mazda 3 Service Manual: Battery Removal/Installation [Mzr 2.3 Disi Turbo]
1. Remove in the order indicated in the table.
2. Install in the reverse order of removal.
|
1 |
Battery cover (See Battery Cover Removal Note.) (See Battery Cover Installation Note.) |
|
2 |
Negative battery cable |
|
3 |
Positive battery cable |
|
4 |
Battery box (See Battery Box Installation Note.) |
|
5 |
Battery clamp (See Battery Clamp Installation Note.) |
|
6 |
Battery (See Battery Installation Note.) |
|
7 |
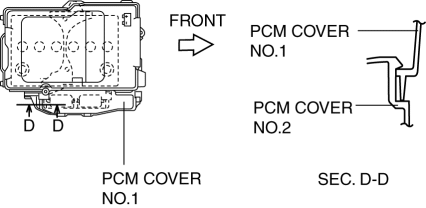
PCM cover No.1 (See PCM Cover No.1 Installation Note.) |
|
8 |
PCM connectors . |
|
9 |
Wiring harness bracket |
|
10 |
Battery tray and PCM component |
Battery Cover Removal Note
CAUTION:
-
To prevent component damage, stand at the front of the vehicle and remove the battery cover one side at a time.
-
When pulling the clips, do not apply excessive force to a clip using the screwdriver or pair of pliers.
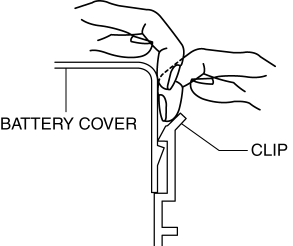
-
If excessive force is applied to the clips, they could be damaged. When removing the battery cover, use the following procedure to prevent damaging the clips.
1. Remove the battery cover using the following procedure.
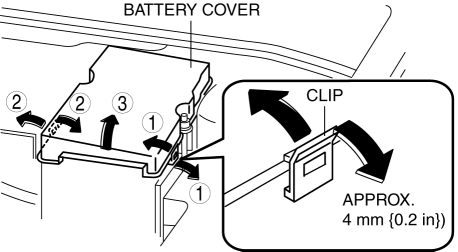
a. Pull the clip (LH) in the outward direction approx.4 mm {0.2 in}
and disengage the battery cover tabs.
b. Pull the clip (RH) in the outward direction approx.4 mm {0.2 in}
and disengage the battery cover tabs.
c. Remove the battery cover.
PCM Cover No.1 Installation Note
1. Install the PCM cover No.1 hook to the PCM cover No.2 holes.
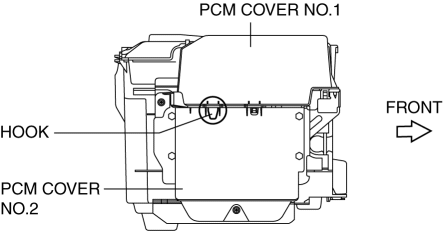
2. Install with PCM cover No.1 hooks A aligned with the PCM cover No.2 and PCM bracket holes.
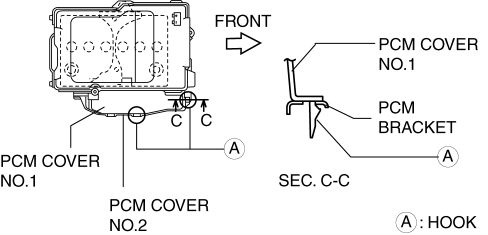
3. Install the PCM cover No.1 to the PCM cover No.2 hook.
Battery Installation Note
CAUTION:
-
To prevent damaging the clips on the battery tray, install the battery carefully so that it does not contact the clips.
Battery Clamp Installation Note
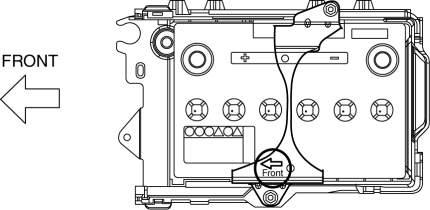
1. Assemble the battery clamp so that the arrow on it is pointed toward the front of the vehicle.
Battery Box Installation Note
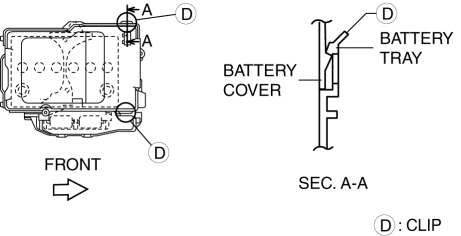
1. Assemble with battery box hooks B aligned with the battery tray holes at two points.
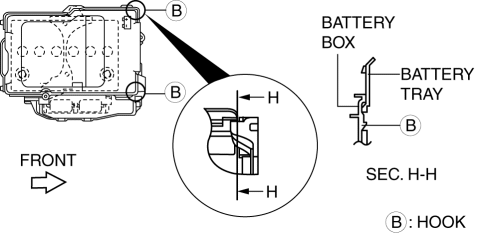
Battery Cover Installation Note
1. Install with battery cover hooks C aligned with the battery tray holes at two points.
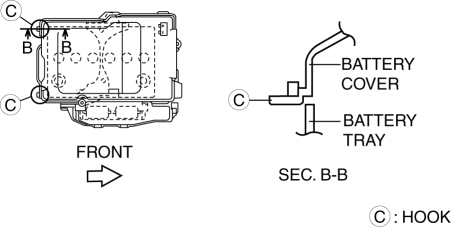
2. Set the battery cover to battery tray clips D at two points.
 Battery Removal/Installation [Mzr 2.0, Mzr 2.5]
1. Remove in the order indicated in the table.
2. Install in the reverse order of removal.
1
Battery cover
(See Battery Cover Removal Note.)
(See Battery Cover In ...
 Battery Removal/Installation [Skyactiv G 2.0]
1. Remove in the order indicated in the table.
2. Install in the reverse order of removal.
1
Battery cover
(See Battery Cover Removal Note.)
(See Battery Cover In ...
Other materials:
Blower Motor Removal [Full Auto Air Conditioner]
NOTE:
The blower motor is located on the A/C unit as shown in the figure.
Perform the work from the front passenger side in the posture shown in the
figure.
1. Set the air intake mode to FRESH.
2. Disconnect the negative battery cable.
3. Remove the following ...
Drive Belt Removal/Installation [Skyactiv G 2.0]
WARNING:
A hot engine can cause severe burns. Turn off the engine and wait until it
is cool before servicing.
NOTE:
Remove/install the drive belt from the underside of the vehicle.
Generator Drive Belt Removal/Installation
CAUTION:
To prevent damage to the dri ...
Drive Shaft Removal/Installation
CAUTION:
Performing the following procedures without first removing the ABS wheel-speed
sensor may possibly cause an open circuit in the wiring harness if it is pulled
by mistake. Before performing the following procedures, disconnect the ABS wheel-speed
sensor connector (axle side) ...
