Mazda 3 Service Manual: Rear Seat Belt Removal/Installation
CAUTION:
-
The ELR (emergency locking retractor) has a spring that will unwind if the retractor cover is removed. The spring cannot be rewound by hand. If this occurs, the ELR will not work properly. Therefore, do not disassemble the retractor.
4SD
1. Remove the following parts:
a. Rear scuff plate.
b. Rear seat cushion.
c. Rear seat back.
d. Tire house trim.
e. C-pillar trim..
f. Rear package trim..
2. Remove the bolts.
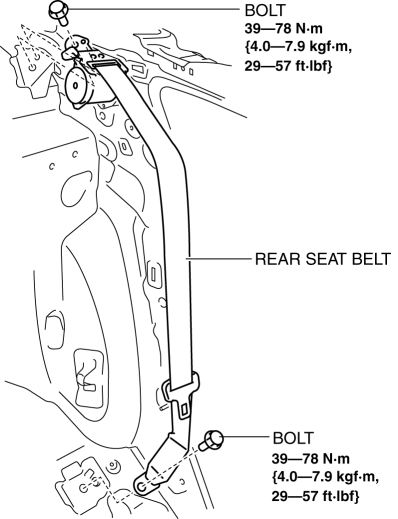
3. Remove the rear seat belt.
4. Install in the reverse order of removal.
5HB
1. Remove the following parts:
a. Rear scuff plate.
b. Rear seat cushion.
c. Rear seat back.
d. Tire house trim.
e. Trunk side upper trim..
f. C-pillar trim..
2. Remove the bolts.
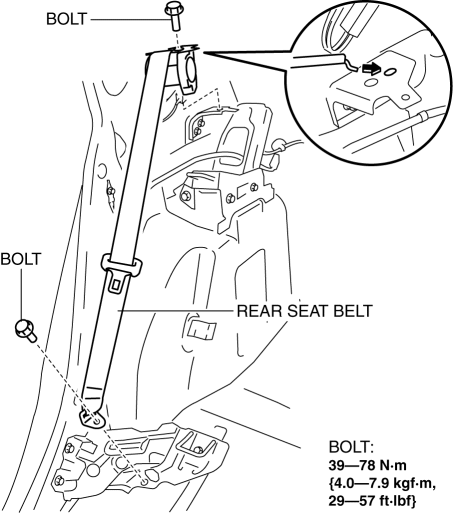
3. Remove the rear seat belt.
4. Install in the reverse order of removal.
 Rear Buckle Removal/Installation
Rear Buckle (RH) and Rear Buckle (Center)
1. Remove the rear seat cushion..
2. Remove the bolt.
3. Remove the rear buckle (RH) and rear buckle (center).
4. Install in the reverse order of ...
 Seat Belt Inspection
Belt
1. Verify that the belt is installed properly with no twists or kinks.
2. Verify that there is no damage to the seat belt and no deformation of the
metal fittings.
If there is any ...
Other materials:
Antenna Feeder No.5 Inspection
1. Disconnect the negative battery cable..
2. Remove the following parts:
a. Front scuff plate (RH).
b. Front side trim (RH).
c. Rear seat cushion.
d. Rear scuff plate (RH).
e. Tire house trim (RH).
3. Disconnect the antenna feeder No.4.
4. Disconnect the antenna feeder No.3.
...
Driveline/Axle SST
49 F027 004
Attachment ø80
49 U027 005
Bearing installer
49 H027 002
Bearing remover
49 H034 201
Support block
49 H028 203
Block S
...
Lighting Control
Headlights
Turn the headlight switch to turn the headlights, other exterior lights and
dashboard
illumination on or off.
When the lights are turned on, the lights-on indicator light in the instrument
cluster turns on.
NOTE
If the light switch is left on, the lights will automatical ...
