Mazda 3 Service Manual: DRL (Daytime Running Light) Bulb Removal/Installation
MZR 2.0, MZR 2.5, MZR 2.3 DISI Turbo
1. Disconnect the negative battery cable..
2. Disconnect the connector.
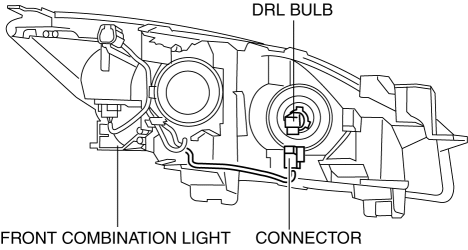
3. Rotate the DRL bulb in the direction of the arrow shown in the figure to remove it.

4. Remove the DRL bulb.
5. Install in the reverse order of removal.
SKYACTIV-G 2.0
1. Disconnect the negative battery cable..
2. Rotate the socket in the direction of the arrow shown in the figure to remove it.
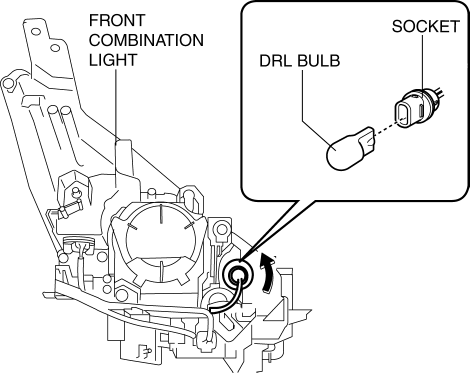
3. Remove the DRL bulb from the socket.
4. Install in the reverse order of removal.
 Brake/Taillight Bulb Removal/Installation
4SD
1. Disconnect the negative battery cable..
2. Remove the following parts:
a. Trunk mat.
b. Trunk board.
c. Trunk end trim.
3. Partially peel back the trunk side trim..
4. Remove in th ...
 Discharge Headlight Control Module Removal/Installation
CAUTION:
Incorrect servicing of the discharge headlights could result in electrical
shock. Before servicing the discharge headlights, always refer to the discharge
headlight service warn ...
Other materials:
Back Up Light Switch Removal/Installation [C66 M R]
1. Remove the battery cover..
2. Disconnect the negative battery cable..
3. Remove the aerodynamic under cover No.2..
4. Remove in the order indicated in the table.
5. Install in the reverse order of removal.
1
Back-up light switch connector
2
...
Gate operator/Canadian
Programming
Canadian radio-frequency laws require
transmitter signals to “time-out” (or quit)
after several seconds of transmission
— which may not be long enough for
HomeLink to pick up the signal during
programming. Similar to this Canadian
law, some U.S. gate operators are designed
to “time-ou ...
When charging cannot be carried out
If charging of the Subaru Solterra does not begin even after correctly
following the standard procedure, carefully review each of the following checks.
If any notification appears on the multi-information display, it should be used
as the primary reference for identifying the issue.
When char ...
