Mazda 3 Service Manual: Brake/Taillight Bulb Removal/Installation
4SD
1. Disconnect the negative battery cable..
2. Remove the following parts:
a. Trunk mat.
b. Trunk board.
c. Trunk end trim.
3. Partially peel back the trunk side trim..
4. Remove in the order indicated in the table.

|
1 |
Connector |
|
2 |
Socket |
|
3 |
Brake/taillight bulb |
5. Install in the reverse order of removal.
5HB
1. Disconnect the negative battery cable..
2. Remove the service hole cover.
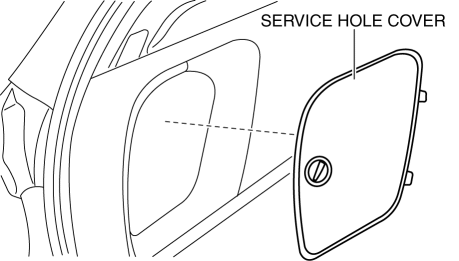
3. Remove in the order indicated in the table.
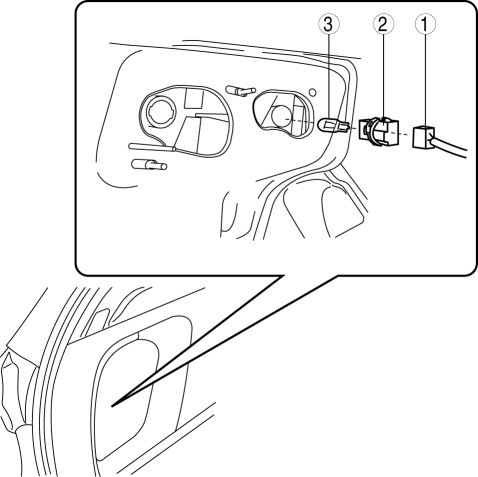
|
1 |
Connector |
|
2 |
Socket |
|
3 |
Brake/taillight bulb |
4. Install in the reverse order of removal.
 Back Up Light Bulb Removal/Installation
4SD
1. Disconnect the negative battery cable..
2. Remove the trunk rid trim..
3. Disconnect the connector.
4. Rotate the socket in the direction of the arrow as shown in the figure to
rem ...
 DRL (Daytime Running Light) Bulb Removal/Installation
MZR 2.0, MZR 2.5, MZR 2.3 DISI Turbo
1. Disconnect the negative battery cable..
2. Disconnect the connector.
3. Rotate the DRL bulb in the direction of the arrow shown in the figure to remove ...
Other materials:
Inside Trunk Release Lever
(4-Door)
Your vehicle is equipped with an inside
trunk release lever that provides a means
of escape for children and adults in the
event they become locked inside the trunk.
No matter how careful adults might be
with keys and locking their cars, parents
should be aware that children may be
tempted ...
Oil Pump Removal/Installation [Mzr 2.0, Mzr 2.5]
WARNING:
Hot engines and engine oil can cause severe burns. Turn off the engine and
wait until it and the engine oil have cooled.
A vehicle that is lifted but not securely supported on safety stands is dangerous.
It can slip or fall, causing death or serious injury. Never work ...
Rear Coil Spring Removal/Installation
1. Disconnect the auto leveling sensor lower side. (Vehicles with AFS).
2. Remove in the order indicated in the table.
3. Install in the reverse order of removal.
4. Inspect the wheel alignment and adjust it if necessary..
1
Rear stabilizer control link upper nut
...
