Mazda 3 Service Manual: Electro Hydraulic Power Assist Steering (EHPAS) Control Module Configuration
CAUTION:
-
If the EHPAS CM configuration is not completed, the EHPAS will not operate properly. If the EHPAS CM is replaced, always carry out the EHPAS CM configuration so that the EHPAS operates properly.
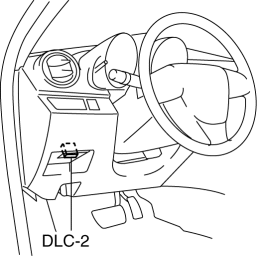
1. Connect the M-MDS (IDS) to the DLC-2.
2. After the vehicle is identified, select the following items from the initialization screen of the IDS.
-
Select the “Module Programming”.
3. Then, select items from the screen menu in the following order.
-
Select “Programmable Module Installation”.
-
Select “EPS”.
4. Perform the configuration according to the directions on the screen.
5. Retrieve DTCs by the IDS, then verify that there is no DTC present.
-
If a DTC (s) is detected, perform the applicable DTC inspection..
 Electric Power Steering Oil Pump Component Removal/Installation
CAUTION:
Be careful not to drop the electric power steering oil pump component as
the internal parts of the EHPAS CM could be damaged. Replace the electric power
steering oil pump compon ...
 Electro Hydraulic Power Assist Steering (EHPAS) Control Module Inspection
Terminal Voltage Table (Reference)
Terminal
Signal name
Connected to
Measured item
Measured terminal (measured condition)
...
Other materials:
Steering Switch Inspection
Without Bluetooth System
WARNING:
Handling the air bag module improperly can accidentally deploy the air bag
module, which may seriously injure you. Read the air bag system service warnings
and cautions before handling the air bag module..
1. Disconnect the negative battery cabl ...
Non Return Valve Inspection [Mzr 2.0, Mzr 2.5]
WARNING:
Fuel is very flammable liquid. If fuel spills or leaks from the pressurized
fuel system, it will cause serious injury or death and facility breakage. Fuel
can also irritate skin and eyes. To prevent this, always complete the “Fuel
Line Safety Procedure”, while referring ...
Front Stabilizer Control Link Inspection
1. Remove the front stabilizer control link from the vehicle.. (See FRONT STABILIZER
REMOVAL/INSTALLATION [MZR 2.3 DISI Turbo]
2. Inspect for bending or damage. If there is any malfunction, replace the stabilizer
control link.
3. Rotate the ball joint stud 10 times and shake it side to side ...
