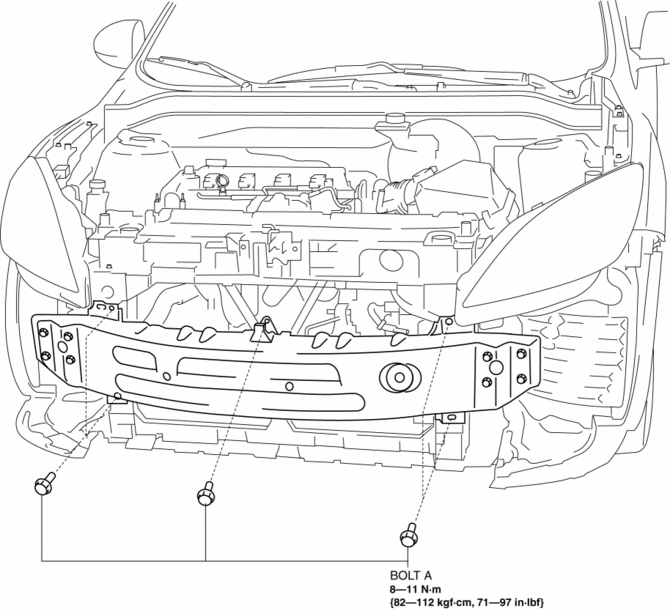
Mazda 3 Service Manual: Front Bumper Reinforcement Removal/Installation
1. Disconnect the negative battery cable..
2. Remove the following parts:
a. Front bumper.
b. Seal plate.
3. Remove the bolts A.
4. Remove the bolts B.
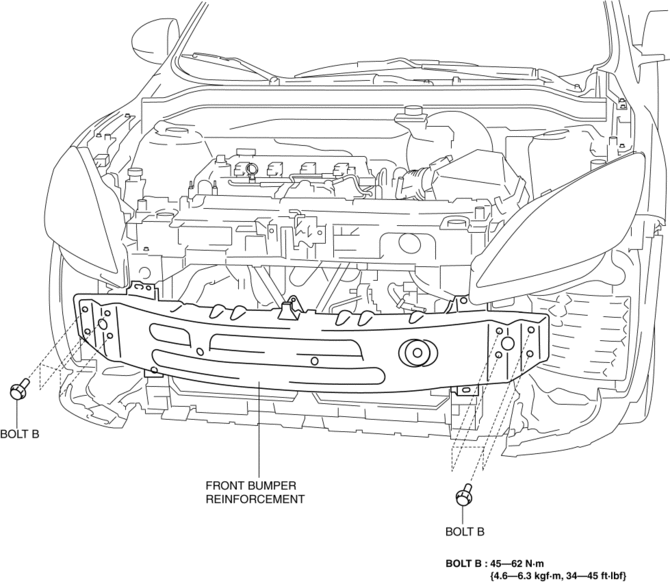
5. Remove the front bumper reinforcement.
6. Install in the reverse order of removal.
 Front Bumper Disassembly/Assembly
Standard Type
Except SKYACTIV-G 2.0
1. Disassemble in the order indicated in the table.
1
Screw A
2
Guard cover
3
...
 Front Bumper Removal/Installation
1. Disconnect the negative battery cable..
2. Remove the screw A and fasteners B.
3. Remove the screws C.
4. Remove the bolts D.
5. Remove the fasteners E, screw F and fastener G. ...
Other materials:
System
The system operates only when the driver
is in the vehicle or within operational
range while the key is being carried.
NOTE
When the battery power is low, or in
places where there are high-intensity radio
waves or noise, the operational range
may become narrower or the system may
not operate ...
Smart key system
In the Subaru Solterra, a wide range of vehicle operations can be
performed effortlessly simply by carrying the electronic key on your person, such
as in a pocket or bag. For optimal functionality and security, the driver should
always keep the electronic key within reach.
Locking and unlo ...
Seat Weight Sensor Control Module Removal/Installation [Two Step Deployment
Control System]
CAUTION:
When the seat weight sensor control module is replaced with a new one, perform
the seat weight sensor calibration using the M–MDS..
1. Switch the ignition to off.
2. Disconnect the negative battery cable and wait for 1 min or more..
3. Disconnect the connectors.
...
