Mazda 3 Service Manual: Front Side Trim Removal/Installation
1. Remove the front scuff plate..
2. Partially peel back the seaming welt.
3. Remove the fastener.
4. Pull the front side trim in the direction of the arrow and detach the clip.
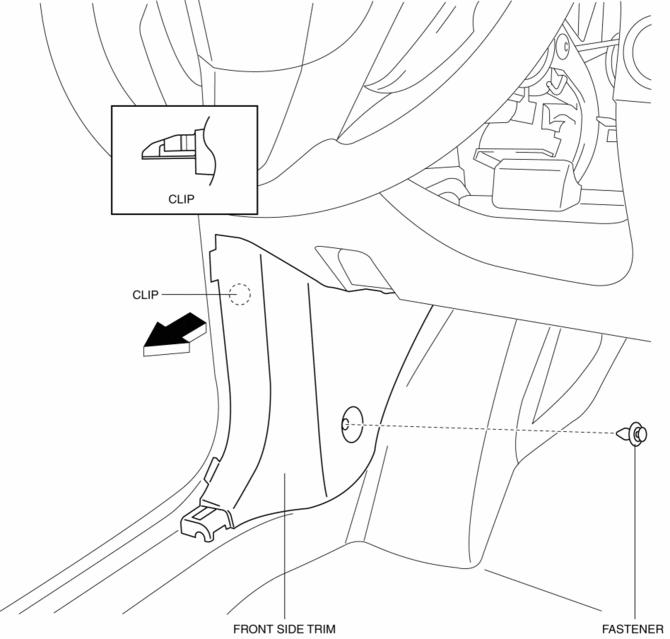
5. Install in the reverse order of removal.
 Front Scuff Plate Removal/Installation
1. Detach tab A while pulling the front scuff plate in the direction of the arrow
(1) shown in the figure, then detach hook B, clips C, and pins D while pulling in
the direction of the arrow (2). ...
 Headliner Removal/Installation
1. Shift to the D (ATX) or 4th gear (MTX) position. (4SD)
2. Disconnect the negative battery cable..
3. Remove the rain sensor cover. (Vehicles with auto light/wiper system).
4. Disconnect the r ...
Other materials:
Flywheel Inspection [C66 M R]
1. Remove the flywheel..
2. Perform the following procedures to inspect the flywheel.
If there is any malfunction or it exceeds the maximum specification, replace
the flywheel..
a. Inspect the surface that contacts the clutch disc for scratches, nicks, and
discoloration.
...
Air Bleeding
CAUTION:
If the strainer is removed, impurities may penetrate the power steering system
and damage it. To prevent this, always bleed air with the strainer installed.
Do not maintain the steering wheel fully turned for 5 s or more. The oil
temperature could rise and damage ...
Back Up Light Bulb Removal/Installation
4SD
1. Disconnect the negative battery cable..
2. Remove the trunk rid trim..
3. Disconnect the connector.
4. Rotate the socket in the direction of the arrow as shown in the figure to
remove it.
5. Remove the back-up light bulb.
6. Install in the reverse order of removal.
...
