Mazda 3 Service Manual: Front Scuff Plate Removal/Installation
1. Detach tab A while pulling the front scuff plate in the direction of the arrow (1) shown in the figure, then detach hook B, clips C, and pins D while pulling in the direction of the arrow (2).
2. Detach tab E while pulling the front scuff plate in the direction of the arrow (3) shown in the figure, pull the front scuff plate in the direction of the arrow (4), and remove it while detaching hook F.
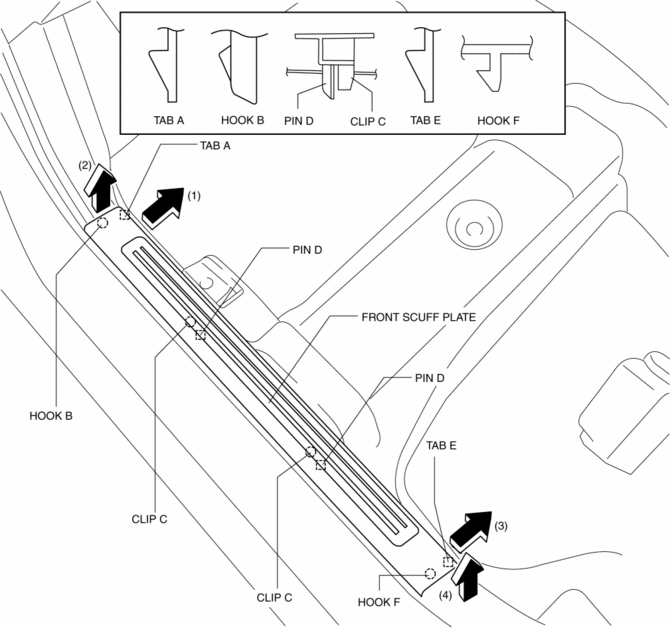
3. Remove the front scuff plate.
4. Install in the reverse order of removal.
 Floor Covering Removal/Installation
1. Disconnect the negative battery cable..
2. Remove the following parts:
a. Front seat.
b. Audio amplifier (Vehicles with Bose®).
c. Front scuff plate.
d. Joint cover.
e. Front side trim ...
 Front Side Trim Removal/Installation
1. Remove the front scuff plate..
2. Partially peel back the seaming welt.
3. Remove the fastener.
4. Pull the front side trim in the direction of the arrow and detach the clip.
5. Instal ...
Other materials:
Units
Electric current
A (ampere)
Electric power
W (watt)
Electric resistance
ohm
Electric voltage
V (volt)
Length
mm (millimeter)
in (inch)
...
Wheels
For the Subaru Solterra, any wheel that shows signs of bending, cracking,
or severe corrosion must be replaced immediately. Continuing to use a damaged wheel
can lead to tire separation or a serious loss of vehicle control while driving.
Wheel selection
When selecting replacement wheels for th ...
Dashboard Disassembly/Assembly
1. Remove the ventilator grilles..
2. Remove the Passenger-side air bag module..
3. Disassemble in the order indicated in the table.
4. Assemble in the reverse order of disassembly.
1
Wiring harness
2
Screw
3
...
