Mazda 3 Owners Manual: Identification Numbers
Vehicle Identification Number
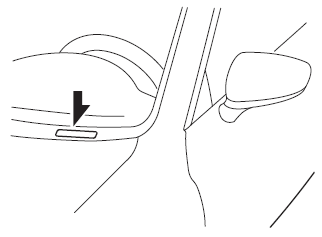
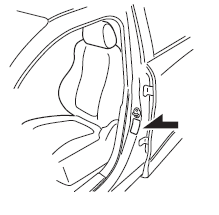
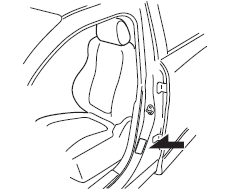
The vehicle identification number legally identifies your vehicle. The number is on a plate attached to the cowl panel located on the left corner of the dashboard. This plate can easily be seen through the windshield
Motor Vehicle Safety Standard Label (U.S.A. and Canada)
For vehicle identification number beginning with JM1
For vehicle identification number beginning with 3MZ *
*1 Check the vehicle identification number on the vehicle identification number plate. Refer to Vehicle Identification Number on .
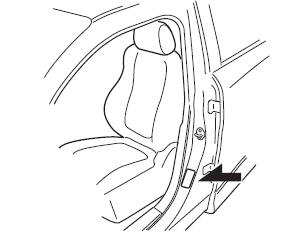
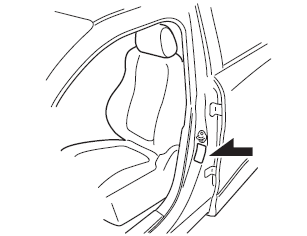
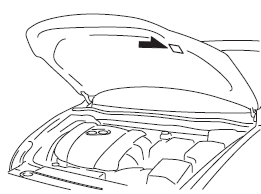
Chassis Number
Open the cover shown in the figure to check the chassis number.
Vehicle Emission Control Information Label (U.S.A. and Canada)
Tire Pressure Label
For vehicle identification number beginning with JM1
For vehicle identification number beginning with 3MZ *1
*1 Check the vehicle identification number on the vehicle identification number plate. Refer to Vehicle Identification Number on .
Engine Number

 Specifications
...
 Specifications
Engine
Electrical System
*1 Q-85 is designed for i-ELOOP system. Only Q-85 should be used to ensure
correct operation of i-ELOOP
system. Consult an Authorized Mazda Dealer for details.
...
Other materials:
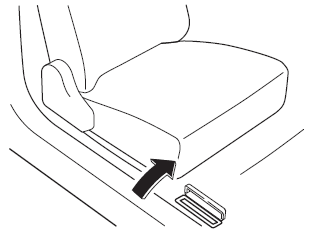
A Pillar Trim Removal/Installation
1. Partially peel back the seaming welt.
2. Pull the upper end of the A-pillar trim in the direction of the arrow shown
in the figure and remove clip A and B.
3. Cut the lead wire connecting clip B and grommet using a nipper and pull out
the A-pillar trim in the direction of the arrow sh ...
Keyless Control Module Configuration
1. Connect the M-MDS (IDS) to DLC-2.
2. After the vehicle is identified, select the following items from the initialization
screen of the IDS.
Select “Module Programming”.
3. Then, select items from the screen menu in the following order.
Select “Programmable Modu ...
Parking Support Brake function (moving vehicles rear of the vehicle)
In the Subaru Solterra, the Parking Support Brake system utilizes
rear radar sensors to continuously monitor traffic approaching from either side
behind the vehicle. When a moving vehicle is detected and the system determines
that the likelihood of a collision is significant, automatic brake c ...
