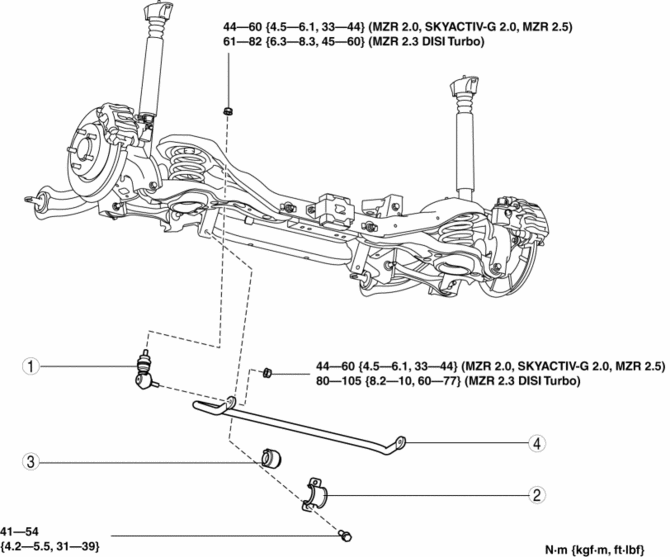
Mazda 3 Service Manual: Rear Stabilizer Removal/Installation
1. Remove in the order indicated in the table.
2. Install in the reverse order of removal.
|
1 |
Rear stabilizer control link |
|
2 |
Rear stabilizer bracket . |
|
3 |
Rear stabilizer bushing (See Rear Stabilizer, Rear Stabilizer Bushing and Rear Stabilizer Bracket Installation Note.) |
|
4 |
Rear stabilizer (See Rear Stabilizer, Rear Stabilizer Bushing and Rear Stabilizer Bracket Installation Note.) |
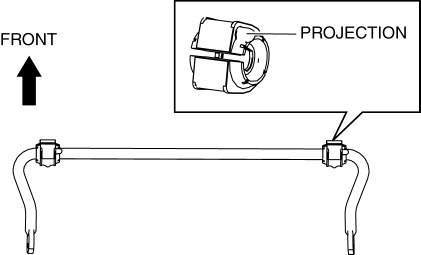
Rear Stabilizer, Rear Stabilizer Bushing and Rear Stabilizer Bracket Installation Note
1. Install the rear stabilizer bushing so that the projection points to the left side of the vehicle.
2. Install the rear stabilizer bracket.
3. Install the rear stabilizer component to the vehicle.
 Rear Stabilizer Control Link Inspection
1. Remove the rear stabilizer control link from the vehicle..
2. Inspect for bending or damage. If there is any malfunction, replace the rear
stabilizer control link.
3. Rotate the ball joint st ...
 Rear Upper Arm Removal/Installation
1. When working on the right side of the vehicle, disconnect the canister vent
(CV) solenoid valve from the rear crossmember. (MZR 2.0 (Except Mexico), SKYACTIV-G
2.0, MZR 2.3 DISI Turbo, MZR 2.5 ...
Other materials:
PCM Inspection [Mzr 2.0, Mzr 2.5]
Using M-MDS
NOTE:
PIDs for the following parts are not available on this model. Go to the appropriate
part inspection page.
CMP sensor
Main relay
1. Connect the M-MDS to the DLC-2.
2. Switch the ignition to ON.
3. Measure the PID value.
...
Child restraint system fixed with a seat belt
In the Subaru Solterra, a child restraint system for infants or small children
must be properly secured using the lap portion of the lap/shoulder seat belt. Correct
installation is essential to ensure that the system provides effective protection
in all driving conditions.
■ Installing chil ...
Afs (Adaptive Front Lighting System) Control Module Removal/Installation
NOTE:
Perform the auto leveling system initialization after newly replacing the
AFS control module to assure that the auto leveling system operates correctly.
1. Disconnect the negative battery cable..
2. Remove the following parts:
a. Passenger-side front scuff plate.
b. Pass ...
