Mazda 3 Service Manual: Rear Upper Arm Removal/Installation
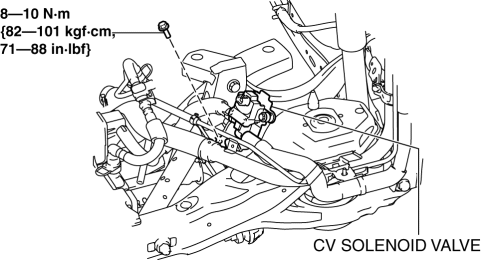
1. When working on the right side of the vehicle, disconnect the canister vent (CV) solenoid valve from the rear crossmember. (MZR 2.0 (Except Mexico), SKYACTIV-G 2.0, MZR 2.3 DISI Turbo, MZR 2.5 (Except Mexico))
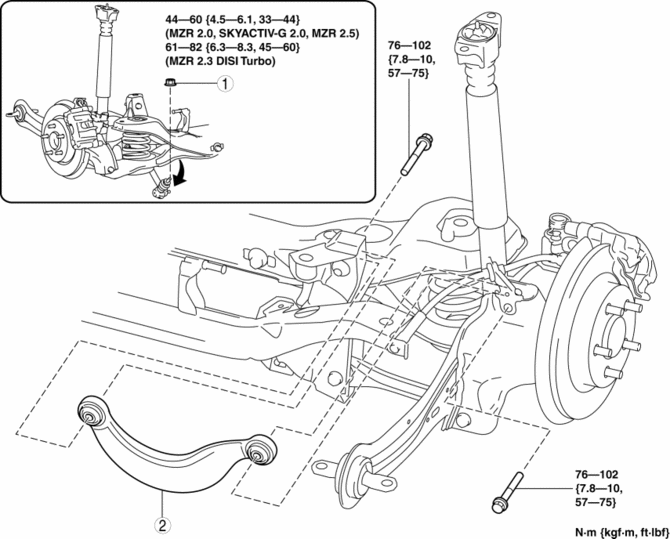
2. Remove in the order indicated in the table.
3. Install in the reverse order of removal.
4. Inspect the wheel alignment and adjust it if necessary..
|
1 |
Rear stabilizer control link upper side nut |
|
2 |
Rear upper arm (See Rear Upper Arm Removal Note.) (See Rear Upper Arm Installation Note.) |
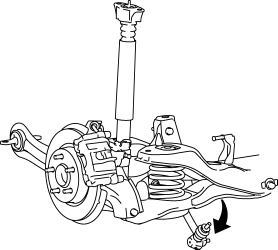
Rear Upper Arm Removal Note
1. Rotate the rear stabilizer component downwards as shown in the figure.
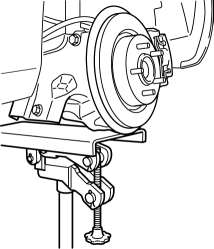
2. Jack up the vehicle to the unloaded condition, and support the trailing link using a jack.
3. Remove the rear upper arm.
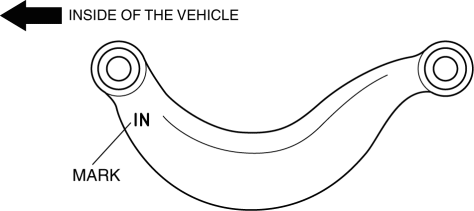
Rear Upper Arm Installation Note
1. Install the rear upper arm so that IN mark is facing toward the inside of the vehicle.
 Rear Stabilizer Removal/Installation
1. Remove in the order indicated in the table.
2. Install in the reverse order of removal.
1
Rear stabilizer control link
2
Rear stabilizer ...
 Wheels, Tires
...
Other materials:
Front Stabilizer Control Link Inspection
1. Remove the front stabilizer control link from the vehicle.. (See FRONT STABILIZER
REMOVAL/INSTALLATION [MZR 2.3 DISI Turbo]
2. Inspect for bending or damage. If there is any malfunction, replace the stabilizer
control link.
3. Rotate the ball joint stud 10 times and shake it side to side ...
Manifold Absolute Pressure (Map) Sensor/Boost Air Temperature Sensor Removal/Installation
[Mzr 2.3 Disi Turbo]
NOTE:
Because the boost air temperature sensor is integrated in the MAP sensor,
replacing the boost air temperature sensor includes replacement of the MAP sensor/boost
air temperature sensor.
1. Remove the battery cover..
2. Disconnect the negative battery cable..
3. Remove t ...
Rear Spoiler Removal/Installation
4SD
1. Remove the trunk lid trim..
2. Remove the nuts.
3. While cutting the double-sided adhesive tape using a flathead screwdriver
or a razor, separate the rear spoiler from the trunk lid.
WARNING:
Using a razor with bare hands can cause injury. Always wear gloves when usin ...
