Mazda 3 Service Manual: Keyless Control Module Configuration
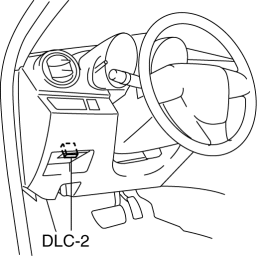
1. Connect the M-MDS (IDS) to DLC-2.
2. After the vehicle is identified, select the following items from the initialization screen of the IDS.
-
Select “Module Programming”.
3. Then, select items from the screen menu in the following order.
-
Select “Programmable Module Installation”.
-
Select “RKE”.
4. Perform the configuration according to the directions on the screen.
5. Retrieve DTCs by the M-MDS, then verify that there is no DTC present.
-
If a DTC (s) is detected, perform the applicable DTC inspection..
 Keyless Beeper Removal/Installation
1. Disconnect the negative battery cable..
2. Slightly bend back the front mudguard..
3. Disconnect the connector.
4. Remove the keyless beeper in the direction of the arrow shown in the fig ...
 Keyless Control Module Inspection
1. Remove the following parts:
a. Passenger-side front scuff plate.
b. Passenger-side front side trim.
c. Grove compartment.
d. Passenger-side lower panel.
2. Measure the voltage according t ...
Other materials:
Automatic Transaxle Removal/Installation [FS5 A EL]
CAUTION:
Secure the steering wheel using tape or a cable to prevent the steering shaft
from rotating after disconnecting the steering shaft. If the steering wheel
rotates after the steering shaft and the steering gear and linkage are disconnected,
the internal parts of the clock spr ...
Scheduled Maintenance (U.S.A., Canada, and Puerto Rico)
Follow Schedule 1 if the vehicle is operated mainly where none of the
following conditions
(severe driving conditions)apply.
Repeated short-distance driving
Driving in dusty conditions
Driving with extended use of brakes
Driving in areas where salt or other corrosive materials are used
...
Power Brake Unit Inspection
NOTE:
The following inspection methods are simple inspection methods to judge the
function of the power brake unit.
If there is any malfunction in the power brake unit, replace the power brake
unit as a single unit.
Without Using SST
Operation inspection
1. With the eng ...
