Mazda 3 Owners Manual: Operating Tips for CD Player
Condensation phenomenon
Immediately after turning on the heater when the vehicle is cold, the CD or optical components (prism and lens) in the CD player may become clouded with condensation. At this time, the CD will eject immediately when placed in the unit.
A clouded CD can be corrected simply by wiping it with a soft cloth. Clouded optical components will clear naturally in about an hour. Wait for normal operation to return before attempting to use the unit.
Handling the CD player
The following precautions should be observed.
- Do not use deformed or cracked CDs.
The disc may not eject resulting in a malfunction.
- Do not use non-conventional discs such
as heart-shaped, octagonal discs, etc.
The disc may not eject resulting in a malfunction

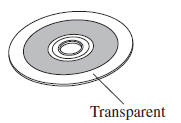
- If the memory portion of the CD is transparent or translucent, do not use the disc.
- A new CD may have rough edges on its
inner and outer perimeters. If a disc with
rough edges is used, proper setting will
not be possible and the CD player will
not play the CD. In addition, the disc
may not eject resulting in a malfunction.
Remove the rough edges in advance by using a ball-point pen or pencil as shown below. To remove the rough edges, rub the side of the pen or pencil against the inner and outer perimeter of the CD.

- When driving over uneven surfaces, the sound may jump.
- CDs bearing the logo shown in the illustration can be played. No other discs can be played.

- Use discs that have been legitimately produced. If illegally-copied discs such as pirated discs are used, the system may not operate properly.
- Be sure never to touch the signal surface when handling the CDs. Pick up a CD by grasping the outer edge or the edge of the hole and the outer edge.
- Do not stick paper or tape on the CD.
Avoid scratching the reverse side (the side without a label). The disc may not eject resulting in a malfunction.
- Dust, finger smudges, and dirt can decrease the amount of light reflected from the signal surface, thus affecting sound quality. If the CD should become soiled, gently wipe it with a soft cloth from the center of the CD to the edge.
- Do not use record sprays, antistatic
agents, or household spray cleaners.
Volatile chemicals such as benzine and thinner can also damage the surface of the CD and must not be used. Anything that can damage, warp, or fog plastic should never be used to clean CDs.
- The CD player ejects the CD if the CD is inserted upside down. Also dirty and/ or defective CDs may be ejected.
- Do not insert cleaning discs in the CD player.
- Do not insert any disc with a peel-off seal affixed to it.
- This unit may not be able to play certain CD-R/CD-RWs made using a computer or music CD recorder due to disc characteristics, scratches, smudges, dirt, etc., or due to dust or condensation on the lens inside the unit.
- Storing CDs in the vehicle exposed to direct sunlight or high temperature may damage the CD-R/CD-RWs, and make them unplayable.
- CD-R/CD-RW exceeding 700 MB cannot be played.
- This unit may not be able to play certain discs made using a computer due to the application (writing software) setting used. (For details, consult the store where the application was purchased.)
- It is possible that certain text data, such as titles, recorded on a CD-R/CD-RW may not be displayed when musical data (CD-DA) is playing.
- The period from when a CD-RW is inserted to when it begins playing is longer than a normal CD or CD-R.
- Completely read the instruction manual and cautions for CD-R/CD-RWs.
- Do not use discs with cellophane tape adhering, partially peeled off labels, or adhesive material exuding from the edges of the CD label. Also, do not use discs with a commercially-available CD-R label affixed. The disc may not eject resulting in a malfunction.
 Radio Reception
AM characteristics
AM signals bend around such things as
buildings or mountains and bounce off the
ionosphere.
Therefore, they can reach longer distances
than FM signals.
Because of this, tw ...
 Operating Tips for MP3
MP3 stands for MPEG Audio Layer 3,
which is standardized voice compression
established by the ISO *1 working group
(MPEG).
Use of MP3 allows for audio data to be
compressed to approximately a t ...
Other materials:
Hood Adjustment
Gap Adjustment
1. Verify that the gap between the hood and the body is within the specification.
Standard clearance
a: -2.8—0.8 mm {-0.11—0.03 in}
b: –1.2—1.2 mm {–0.047—0.0.47 in}
2. Disconnect the negative battery cable..
3. Remove the following parts:
...
Mass Air Flow (MAF) Sensor/Intake Air Temperature (Iat) Sensor No.1 Removal/Installation
[Skyactiv G 2.0]
CAUTION:
Be careful not to hit the sensor element or allow foreign matter to get on
it during sensor removal/installation. If the sensor element is hit or foreign
matter gets on it, an error may occur in the sensor output signal resulting
in deterioration in the engine control.
...
Oil Seal (Differential) Replacement [C66 M R]
1. Remove the aerodynamic under cover No.2 and the splash shield as a single
unit..
2. Drain the manual transaxle oil..
3. Disconnect the drive shaft (LH) from the MTX..
4. Disconnect the drive shaft (RH) from the joint shaft..
5. Remove the joint shaft..
6. Remove the oil seal (LH).
...
