Mazda 3 Service Manual: Rear Combination Light Removal/Installation
4SD
1. Disconnect the negative battery cable..
2. Remove the following parts:
a. Trunk mat.
b. Trunk board.
c. Trunk end trim.
d. Trunk side trim.
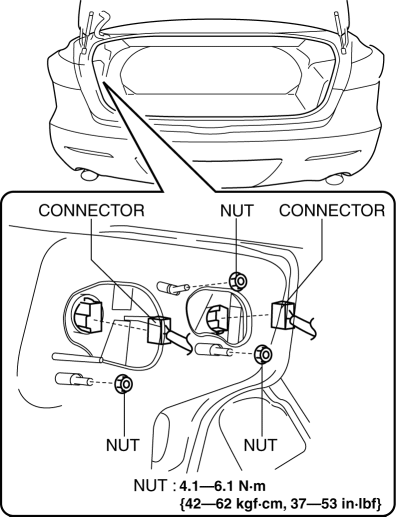
3. Disconnect the connectors shown in the figure and remove the nuts.
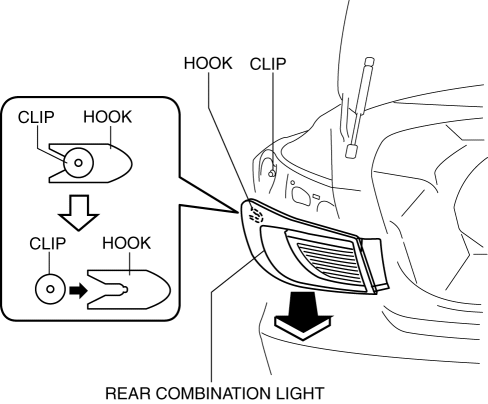
4. Pull the rear combination light in the direction of the arrow to detach it from the hook.
5. Remove the rear combination light.
6. Install in the reverse order of removal.
5HB
1. Disconnect the negative battery cable..
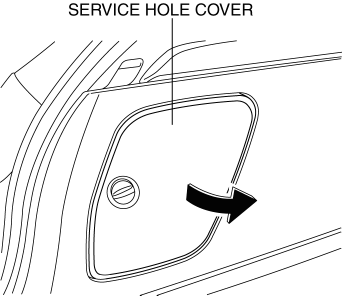
2. Remove the service hole cover.
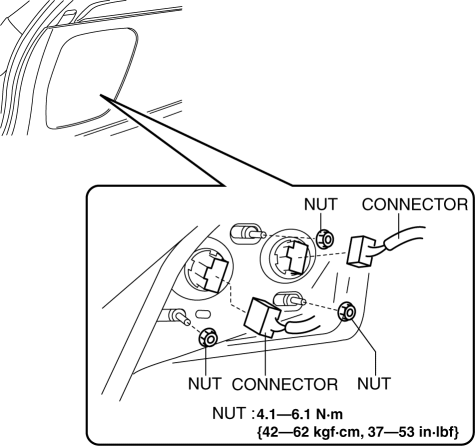
3. Disconnect the connectors shown in the figure and remove the nuts.
4. Pull the rear combination light in the direction of the arrow to detach it from the hook.
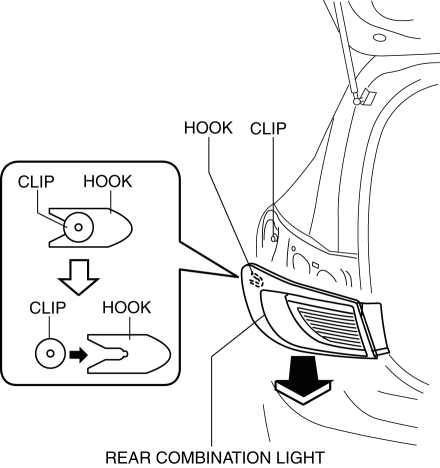
5. Remove the rear combination light.
6. Install in the reverse order of removal.
 Parking/Front Side Marker/Front Turn Light Bulb Removal/Installation
1. Disconnect the negative battery cable..
2. Slightly bend back the front mudguard..
3. Rotate the parking/front side marker/front turn light socket in the direction
of the arrow shown in the f ...
 Back Up Light Switch Inspection
1. Disconnect the negative battery cable..
2. Remove the battery component. (ex: battery, battery tray and PCM component)
(G35-MR,G66M-R).
3. Remove the aerodynamic under cover No.2. (G35-MR,G66 ...
Other materials:
Charcoal Canister Inspection [Mzr 2.0, Mzr 2.5]
Leakage Inspection
1. Perform the following procedures:
Assemble the hose used for inspection to port A.
Cover ports B and C with the caps.
Except for Mexico
Mexico
CAUTION:
Do not apply a pressure 20 kPa {150 mmHg, 5.91 inHg} or more to the charcoal
cani ...
Automatic air conditioning system
In the Subaru Solterra, the automatic air conditioning system intelligently
regulates airflow distribution and fan speed in real time, ensuring that the interior
climate remains consistent with the selected temperature settings for maximum comfort
and efficiency.
Air conditioning controls
...
Variable Valve Timing Actuator Inspection [Mzr 2.3 Disi Turbo]
CAUTION:
Variable valve timing actuator cannot be disassembled because it is a precision
unit.
1. Remove the battery cover..
2. Disconnect the negative battery cable..
3. Remove the charge air cooler..
4. Remove the ignition coils..
5. Disconnect the ventilation hose from th ...
