
Mazda 3 Service Manual: Parking/Front Side Marker/Front Turn Light Bulb Removal/Installation
1. Disconnect the negative battery cable..
2. Slightly bend back the front mudguard..
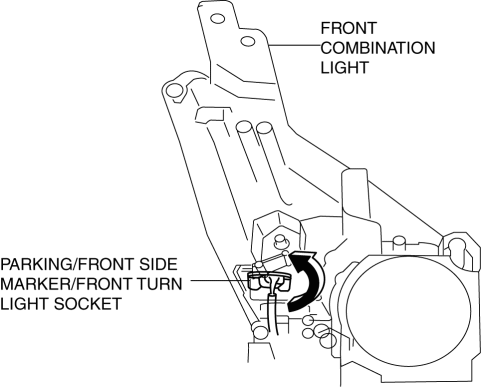
3. Rotate the parking/front side marker/front turn light socket in the direction of the arrow shown in the figure.
4. Remove the parking/front side marker/front turn light bulb.
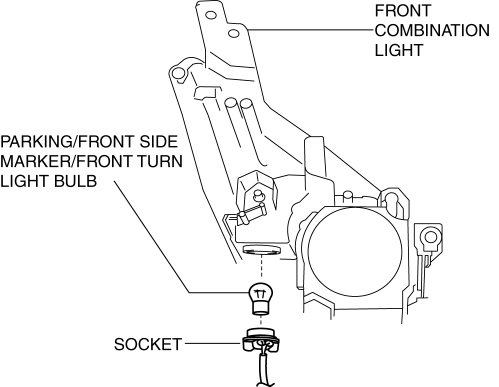
5. Install in the reverse order of removal.
 Parking Light Bulb Removal/Installation
1. Disconnect the negative battery cable..
2. Rotate the parking light socket in the direction of the arrow shown in the
figure to remove it.
3. Remove the parking light bulb.
4. Install i ...
 Rear Combination Light Removal/Installation
4SD
1. Disconnect the negative battery cable..
2. Remove the following parts:
a. Trunk mat.
b. Trunk board.
c. Trunk end trim.
d. Trunk side trim.
3. Disconnect the connectors shown in th ...
Other materials:
Push-Starting
Do not push-start your Mazda.
WARNING
Never tow a vehicle to start it:
Towing a vehicle to start it is
dangerous. The vehicle being towed
could surge forward when its engine
starts, causing the two vehicles to
collide. The occupants could be injured.
CAUTION
...
Starter Cut Relay Removal/Installation [MTX]
Advanced Keyless Entry And Push Button Start System Only
1. Disconnect the negative battery cable..
2. Remove the following parts:
Front scuff plate (LH).
Front side trim (LH).
Side wall.
Console.
3. Set the hood release lever out of the way..
4. Remove the ...
Vacuum Hose Removal/Installation [Mzr 2.3 Disi Turbo]
1. Remove the charge air cooler cover..
2. Remove the charge air cooler..
3. Insert a thin flathead screwdriver at the point indicated by the arrow in
the figure, push the ring down and disconnect the vacuum hose from the intake manifold.
4. Remove the vacuum hose from the vacuum hose c ...
