Mazda 3 Service Manual: Rear Seat Back Removal/Installation
1. Remove the rear seat cushion..
2. Remove the rear buckle installation bolt..
3. Fold the rear seat back.
4. Remove the bolts.

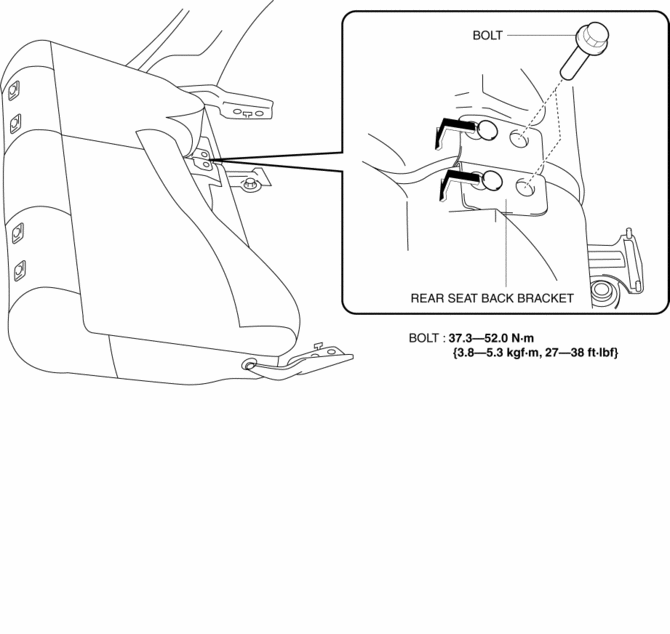
5. Remove the rear seat back from the rear seat back bracket by pulling the rear seat back in the direction of the arrow shown in the figure.
6. Remove the bolts, remove the hinge.
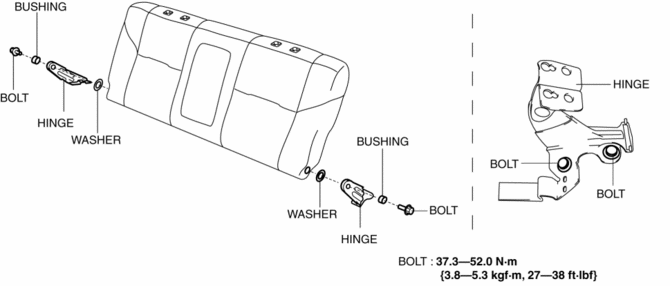
7. Install in the reverse order of removal.
 Rear Seat Back Frame Removal/Installation
1. Remove the rear seat cushion..
2. Remove the rear buckle installation bolt..
3. Remove the rear seat back..
4. Remove the headrest.
5. Open the fasteners.
6. Detach the hooks.
7. ...
 Rear Seat Back Trim Removal/Installation
1. Remove the rear seat back frame..
2. Remove rings C, then remove the seat back trim from the seat back pad.
3. Install in the reverse order of removal. ...
Other materials:
Spark Plug Removal/Installation [Skyactiv G 2.0]
CAUTION:
If a spark plug that is not as specified is installed, engine performance
will be deteriorated. Install only the specified spark plug when replacing.
1. Remove the battery cover..
2. Disconnect the negative battery cable..
3. Remove the plug hole plate..
4. Remove the ...
Throttle Body Inspection [Mzr 2.0, Mzr 2.5]
Resistance Inspection
1. Remove the battery cover..
2. Disconnect the negative battery cable..
3. Disconnect the throttle body connector.
4. Measure the resistance between throttle body terminals E and F.
Throttle body resistance
0.3—100 ohms [20°C {68 °F}]
If no ...
Checking and replacing fuses
If any electrical system in your Subaru Solterra stops functioning,
it may be caused by a blown fuse. In such cases, inspect the fuse and replace it
if necessary to restore proper operation.
Checking and replacing fuses
1. Switch the power OFF in your Subaru Solterra completely before starting ...
