
Subaru Solterra 2023-2026 Owner's Manual: Selecting wheel set
The Subaru Solterra is equipped with an advanced tire pressure warning system that supports registration of two separate wheel sets. This feature allows you to conveniently switch between different configurations, such as summer and winter tires, without reprogramming the system each time.
This functionality significantly enhances flexibility and usability of the Subaru Solterra, especially in regions with seasonal driving conditions.
- The Subaru Solterra can switch between wheel sets only if both sets have
been properly registered in the system. If a second set has not been stored,
a notification will appear and switching will not be possible.
It is possible to register ID codes independently, allowing Subaru Solterra owners to configure additional wheel sets without visiting a service center.
- The system supports switching only between fully registered wheel sets. Mixing components between sets is not supported in the Subaru Solterra system.
- If ID code registration is currently in progress, switching between wheel sets may not function correctly. In this case, cancel the registration process before attempting to change the wheel set.
■ How to change between wheel sets
1. Install the desired wheel set on your Subaru Solterra.
2. Start the EV system.
Note that the Subaru Solterra does not allow wheel set selection while the vehicle is in motion.
3. Press
 or
or
 on the meter control switches and select
 .
.
4. Press
 or
or
 to highlight "Vehicle Settings", then press and hold "OK" to confirm.
5. Press
 or
or
 to select "TPWS Setting", then press "OK".
6. Press
 or
or
 to choose "Tire Set Switching", then press "OK".
7. Press
 or
or
 to select "Register Valve/ID", then press "OK" to proceed.
8. Press
 or
or
 to choose the desired configuration ("Tire Set 1" or "Tire Set 2") for your Subaru
Solterra.
to choose the desired configuration ("Tire Set 1" or "Tire Set 2") for your Subaru
Solterra.
9. Press
 or
or
 to highlight "OK", then press "OK" to confirm the wheel set change.
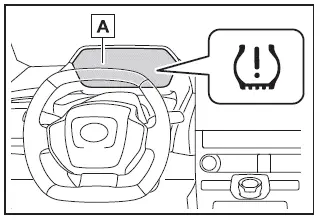
Once initiated, the Subaru Solterra tire pressure warning light will blink slowly three times, and a message will appear on the display indicating that the system is switching wheel sets.
The warning light will then blink continuously for approximately 1 minute before remaining illuminated, indicating that the Subaru Solterra is processing the change.
During this phase, "--" will be shown for tire pressure values as the system recalibrates.
After approximately 2 minutes, the Subaru Solterra will complete the wheel set change. The warning light will turn off, and a confirmation message will appear on the multi-information display.
If the switching process is not completed within approximately 4 minutes, a message will appear indicating that the operation has failed.
In this case, verify that the correct wheel set is installed on the Subaru Solterra and repeat the procedure from the beginning.
- "Setting Pressure Wait a Moment"
10. If the specified tire pressure of the installed wheel set differs from the previously used set, you must perform the tire pressure setting procedure again in the Subaru Solterra to ensure accurate monitoring.
If the pressure values are identical, recalibration is not required, and the system will continue to operate normally.
11. After switching, complete the process by registering the position of each wheel to ensure that the Subaru Solterra tire pressure monitoring system correctly identifies all sensors and provides accurate readings.
 Setting the tire pressure
■ When you need to setting the tire pressure
For the Subaru Solterra, recalibration of the tire pressure system is required
in specific situations to ensure accurate monitoring and optimal drivin ...
 Replacing the tire
When performing tire replacement on the Subaru Solterra yourself,
it is essential to prepare all required tools in advance and ensure that a suitable
jack is available for safe operation.
The S ...
Other materials:
My Settings
In the Subaru Solterra, the My Settings function enables personalized
driver recognition using various authentication devices, automatically restoring
individual driving preferences and vehicle configurations upon entry.
By linking a specific device—such as an electronic key—to a registered ...
Battery Electric Vehicle driving tips
When operating the Subaru Solterra, it is important to understand
that battery electric vehicles behave differently from conventional gasoline-powered
cars. At sustained high speeds—such as on highways or freeways—the efficiency
of electricity consumption decreases, which can significantly ...
Voice Recognition (Type A)
In this section, the basic operation of the
voice recognition is explained.
Activating Voice Recognition
To Activate the Main Menu: Press the
pick-up button or talk button with a short
press.
Ending Voice Recognition
Use one of the following methods:
Press and hold the talk-button.
Pres ...
