Subaru Solterra 2023-2026 Owner's Manual: Setting the tire pressure
■ When you need to setting the tire pressure
For the Subaru Solterra, recalibration of the tire pressure system is required in specific situations to ensure accurate monitoring and optimal driving safety. The tire pressure setting procedure should be performed whenever system conditions change.
- When the specified tire inflation pressure is modified due to additional load, cargo distribution, or driving conditions in the Subaru Solterra.
- When tire pressure values are adjusted, including cases where tire size or type is changed.
Once the tire pressure has been correctly adjusted to the recommended level for your Subaru Solterra, complete the system calibration by selecting the appropriate pressure setting through the multi-information display.
If the tire pressure differs from standard specifications—such as when using non-standard tires—set the system based on the current measured pressure to maintain accurate monitoring in the Subaru Solterra.
Before initiating the procedure, ensure that each tire is properly inflated to the desired level, as the tire pressure warning system relies on this baseline for correct operation.
The Subaru Solterra tire pressure monitoring system will use the selected or measured pressure values as a reference for all future alerts and adjustments.
■ Setting by selecting a specified tire inflation pressure
1. Start the EV system of your Subaru Solterra.
Note that tire pressure configuration cannot be performed while the vehicle is in motion.
2. Press
 or
or
 on the meter control switches and select
 .
.
3. Use the meter control switches to highlight "Vehicle Settings", then press and hold "OK" to confirm the selection in the Subaru Solterra interface.
4. Press
 or
or
 to select "TPWS Setting", then press "OK".
5. Press
 or
or
 to choose "Tire Pressure Setting", then press "OK".
6. Press
 or
or
 to select "Setting by Specified Pressure", then press "OK".
Select the desired front and rear tire pressure values according to the Subaru Solterra recommended specifications or your driving requirements.
7. Press
 or
or
 to highlight "OK", then press "OK" to finalize the process.
After confirmation, the tire pressure warning light will blink slowly three times, and a message indicating that the Subaru Solterra tire pressure setting is in progress will appear on the display.
Once the procedure is completed, a confirmation message will be shown on the multi-information display.
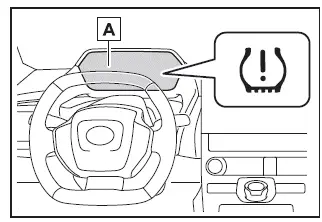
- "Setting Pressure Wait a Moment"
■ Setting using the current tire inflation pressure
1. Adjust all tires on the Subaru Solterra to the desired cold tire inflation pressure.
Ensure that the pressure is accurate, as the system calibration will use these values as a reference for monitoring and alerts.
2. Start the EV system.
The Subaru Solterra does not allow pressure setting adjustments while driving, so ensure the vehicle remains stationary.
3. Press
 or
or
 on the meter control switches and select
 .
.
4. Press
 or
or
 on the meter control switches and select "Vehicle Settings", then press and hold
"OK" to enter the configuration menu of the Subaru Solterra.
on the meter control switches and select "Vehicle Settings", then press and hold
"OK" to enter the configuration menu of the Subaru Solterra.
5. Press
 or
or
 to highlight "TPWS Setting", then confirm by pressing "OK".
6. Press
 or
or
 to select "Tire Pressure Setting", then press "OK" to proceed.
7. Press
 or
or
 to choose "Setting by Current Pressure", then confirm with "OK". This allows the
Subaru Solterra system to register the present tire pressure values as the new baseline
reference.
to choose "Setting by Current Pressure", then confirm with "OK". This allows the
Subaru Solterra system to register the present tire pressure values as the new baseline
reference.
8. Press
 or
or
 to highlight "OK", then press "OK" once again to finalize the tire pressure calibration
process in the Subaru Solterra.
to highlight "OK", then press "OK" once again to finalize the tire pressure calibration
process in the Subaru Solterra.
Once the process begins, the tire pressure warning light will blink slowly three times, and a message indicating that tire inflation pressure is being configured will appear on the Subaru Solterra multi-information display.
After completion, the system will display a confirmation message indicating that the new pressure values have been successfully stored.
During this procedure, the Subaru Solterra may briefly repeat the indication cycle to ensure accurate calibration, reinforcing system reliability and precision.
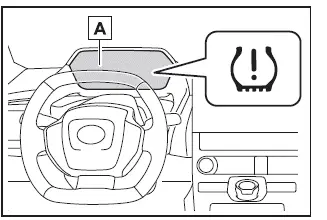
- "Setting Pressure Wait a Moment"
■ Warning performance of the tire pressure warning system (Setting using the current tire inflation pressure)
- When the Subaru Solterra tire pressure system is calibrated using current pressure values, the sensitivity and warning thresholds are adjusted based on those exact conditions. As a result, even minor decreases or increases in tire pressure may trigger alerts, depending on the baseline established during calibration.
- To ensure accurate performance, always perform the tire pressure setting
procedure after adjusting all tires to the correct levels.
Additionally, it is strongly recommended that tires on the Subaru Solterra are cold before calibration, as temperature variations can affect pressure readings and system accuracy.
■ Tire inflation pressure setting procedure (Setting using the current tire inflation pressure)
- If the power switch of the Subaru Solterra is turned OFF during the pressure setting process, the system will automatically resume the procedure the next time the vehicle is powered ON, eliminating the need to restart from the beginning.
- If the tire pressure setting process was initiated unintentionally, adjust all tires to the recommended cold pressure values, then either perform the specified pressure setting procedure or repeat the current pressure calibration to restore correct system operation in the Subaru Solterra.
■ If the tire inflation pressure cannot be set properly
- Under normal conditions, the Subaru Solterra tire pressure calibration process is completed within approximately 2 to 3 minutes.
- If the tire pressure warning light does not blink three times when starting the procedure, it indicates that the process may not have initiated correctly. In such cases, repeat the entire procedure from the beginning.
- If the Subaru Solterra system still fails to complete the calibration after multiple attempts, contact an authorized SUBARU dealer for professional assistance and system diagnostics.
WARNING
■ When setting using the current tire inflation pressure
Before initiating the tire pressure calibration in the Subaru Solterra, always ensure that each tire is inflated to the correct and uniform pressure level. If this step is neglected, the tire pressure warning system may behave incorrectly — for example, it may fail to activate when pressure drops or may trigger alerts even when tire pressure is within нормального діапазону.
Registering ID codes (if equipped)
■ When registering ID codes
Each tire pressure warning valve and transmitter installed in the Subaru Solterra is assigned a unique identification code. This ID allows the system to correctly monitor and associate pressure data with each specific wheel.
Whenever new sensors or transmitters are installed, the corresponding ID codes must be registered in the Subaru Solterra tire pressure monitoring system to ensure accurate operation and system reliability.
■ How to register ID code
1. Park your Subaru Solterra in a safe location and allow it to remain stationary for approximately 15 minutes to stabilize system conditions before beginning the registration process.
2. Start the EV system.
The ID code registration process cannot be performed while the Subaru Solterra is in motion.
3. Press
 or
or
 on the meter control switches and select
 .
.
4. Press
 or
or
 to select "Vehicle Settings", then press and hold "OK" to confirm.
5. Press
 or
or
 to choose "TPWS Setting", then press "OK".
6. Press
 or
or
 to select "Tire Set Switching", then press "OK".
7. Press
 or
or
 to highlight "Register New Valve/ID", then press "OK" to proceed with the Subaru
Solterra sensor registration process.
to highlight "Register New Valve/ID", then press "OK" to proceed with the Subaru
Solterra sensor registration process.
8. Confirm which wheel set ("Tire Set 1" or "Tire Set 2") is currently displayed on the screen.
The new ID codes will be assigned to the selected wheel set in the Subaru Solterra system.
If you need to switch between wheel sets, press
 or
or
 and choose the desired configuration.
If ID codes are already stored for the selected wheel set, the Subaru Solterra system will signal a change by blinking the tire pressure warning light three times and displaying a message indicating that the system is updating.
- "Setting Pressure Wait a Moment"
9. Press
 or
or
 to select "OK", then press "OK" again to finalize the process.
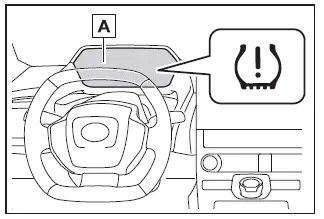
During this stage, the Subaru Solterra tire pressure warning light will blink slowly three times, and a message will appear on the multi-information display indicating that ID code registration is in progress.
At this point, the previously selected wheel set configuration will be replaced, and the Subaru Solterra system will begin registering the new sensor IDs automatically.
While the ID code registration process is active in the Subaru Solterra, the tire pressure warning light will flash for approximately 1 minute and then remain steadily illuminated. During this period, the multi-information display will show "--" for each tire’s inflation pressure, indicating that the system is temporarily recalibrating and identifying each sensor.

- "Setting Pressure Wait a Moment"
10. To complete the registration in the Subaru Solterra, drive the vehicle in a straight line while occasionally making gentle left and right turns at a speed of approximately 25 mph (40 km/h) or higher for about 10 to 30 minutes. This movement allows the system to accurately detect and assign each tire sensor.
Once registration is successfully completed, the tire pressure warning light will turn off, and a confirmation message will appear on the Subaru Solterra multi-information display indicating that the process has finished.
If driving conditions do not allow maintaining a speed of approximately 25 mph (40 km/h), the Subaru Solterra may require more time to complete the registration. If the process is not completed after more than 1 hour of driving, repeat the entire procedure from the beginning to ensure proper system operation.
■ When registering ID codes
- Under normal conditions, the Subaru Solterra ID code registration process is completed within approximately 30 minutes of driving.
- The system performs registration while the vehicle is driven at speeds of approximately 25 mph (40 km/h) or above.
- Although Subaru Solterra allows self-registration of ID codes, actual completion time may vary depending on traffic conditions, road surfaces, and surrounding environment.
- If you are switching to a previously registered wheel set, the Subaru Solterra system can complete the transition quickly without requiring full re-registration.
■ If ID codes are not registered properly
In certain cases, ID code registration in the Subaru Solterra may take longer than expected or may not complete successfully. These situations include:
- If the vehicle was not parked for at least 15 minutes prior to starting
the registration process
- If the Subaru Solterra is not driven at speeds of approximately 25 mph (40 km/h) or higher
- If the vehicle is driven primarily on rough or unpaved roads
- If the Subaru Solterra is operated close to other vehicles, causing signal interference between tire pressure transmitters
- If a wheel equipped with a tire pressure sensor is located inside or very close to the vehicle during the process
- If the Subaru Solterra is driven in reverse during registration, all collected data will be cleared and the process must be restarted.
- If the process does not complete after extended driving (1 hour or more), repeat the ID code registration procedure from the beginning.
- If the tire pressure warning light does not blink three times at the start of the procedure, the Subaru Solterra system may not have initiated the process correctly. Restart the procedure.
- If ID codes still cannot be registered after multiple attempts, contact an authorized SUBARU dealer for further assistance and diagnostics.
Canceling ID code registration (if equipped)
To cancel an ongoing ID code registration process in the Subaru Solterra, select "Register New Valve / ID" again via the multi-information display menu.
Once canceled, the tire pressure warning light should turn off, indicating that the Subaru Solterra system has exited the registration mode.
If the warning light remains illuminated, the cancellation may not have been successful. In such cases, repeat the cancellation procedure using the same menu option to ensure proper system reset.
 Tire rotation
To maintain balanced performance and ensure even wear across all wheels, rotate
the tires of your Subaru Solterra according to the recommended pattern illustrated
below.
Regular tire rotation on ...
 Selecting wheel set
The Subaru Solterra is equipped with an advanced tire pressure warning system
that supports registration of two separate wheel sets. This feature allows you to
conveniently switch between differen ...
Other materials:
Relay Block Inspection [With Advanced Keyless Entry And Push Button Start System]
1. Disconnect the negative battery cable..
2. Remove the following parts:
a. Driver-side front scuff plate.
b. Driver-side front side trim.
c. Hood release lever.
d. Upper panel.
e. Shift knob (MTX)(See MANUAL TRANSAXLE SHIFT MECHANISM REMOVAL/INSTALLATION
[G66M-R].)(See MANUAL TRANSAX ...
Rear Bumper Removal/Installation
4SD
1. Disconnect the negative battery cable..
2. Remove the rear combination light..
3. Remove the fastener A and screw B.
4. Remove the rear splash shield..
5. Remove the screws C.
6. Remove the bolts D.
7. Affix the protective tape to the position shown in the figure.
...
Garage door opener
The integrated HomeLink system in the Subaru Solterra allows seamless
programming and control of various devices such as garage doors, entry gates, home
lighting, security systems, and other compatible automation equipment, providing
enhanced convenience and smart functionality directly from y ...
