Mazda 3 Service Manual: Rear Bumper Removal/Installation
4SD
1. Disconnect the negative battery cable..
2. Remove the rear combination light..
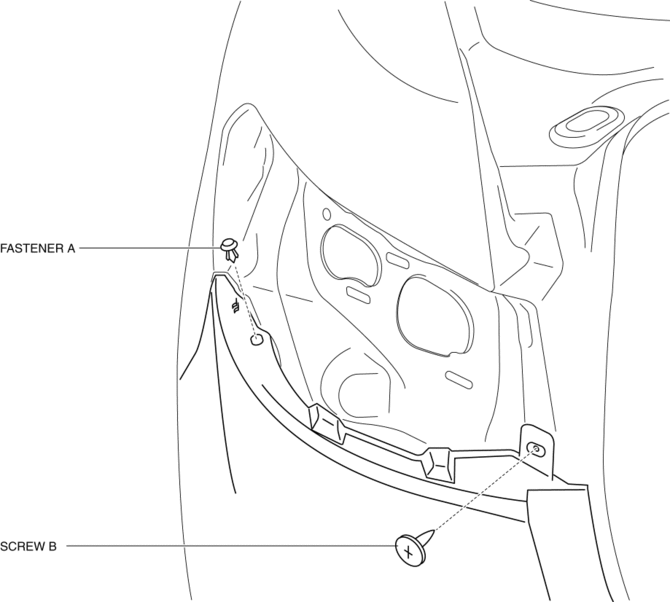
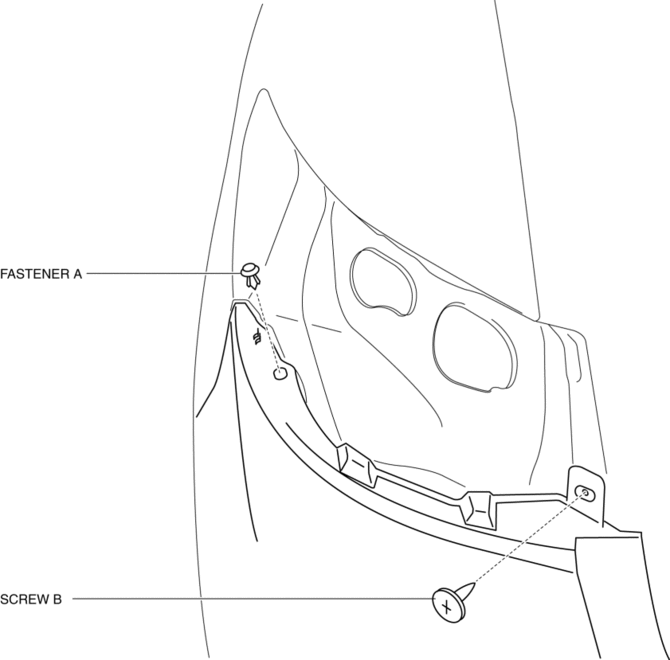
3. Remove the fastener A and screw B.
4. Remove the rear splash shield..
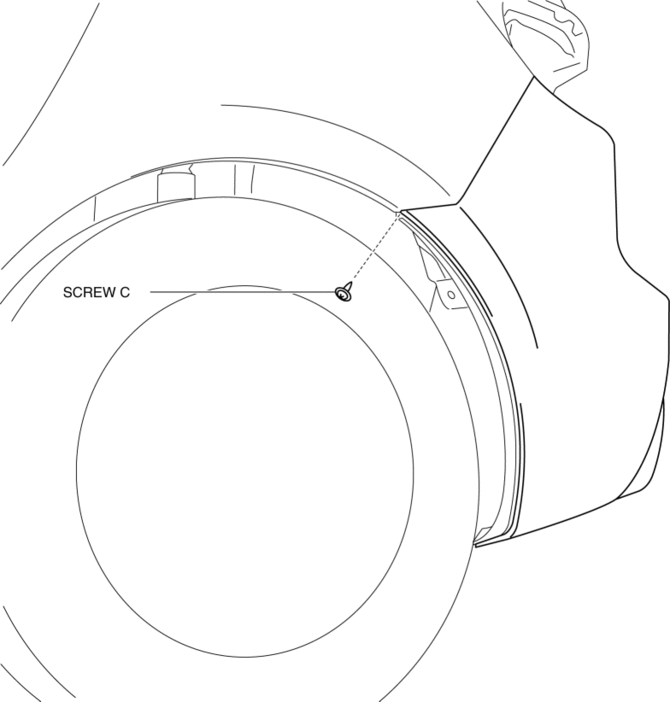
5. Remove the screws C.
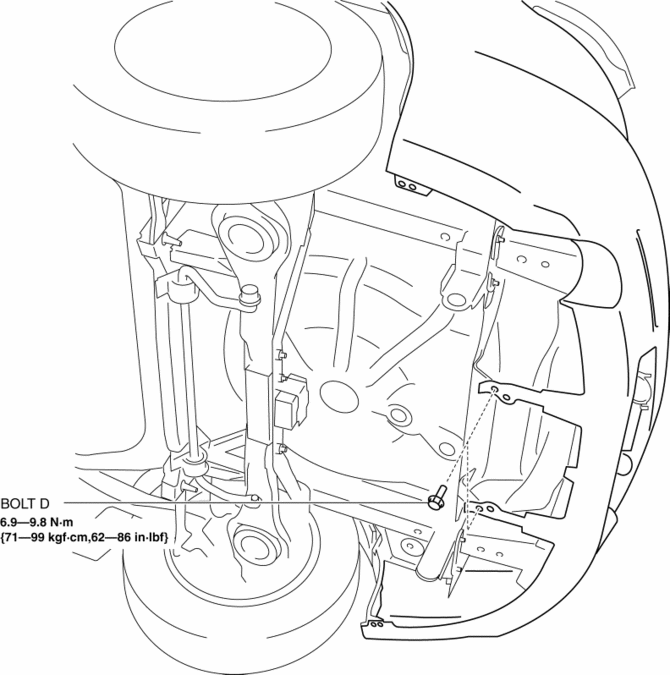
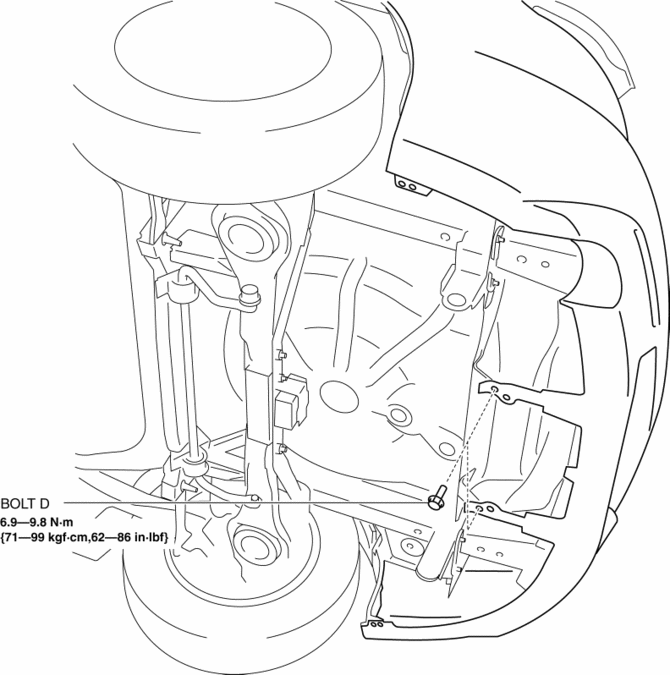
6. Remove the bolts D.
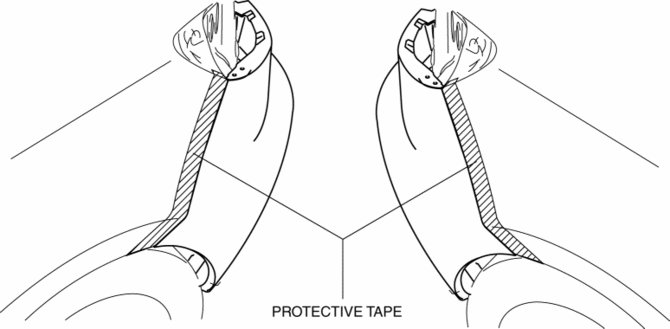
7. Affix the protective tape to the position shown in the figure.
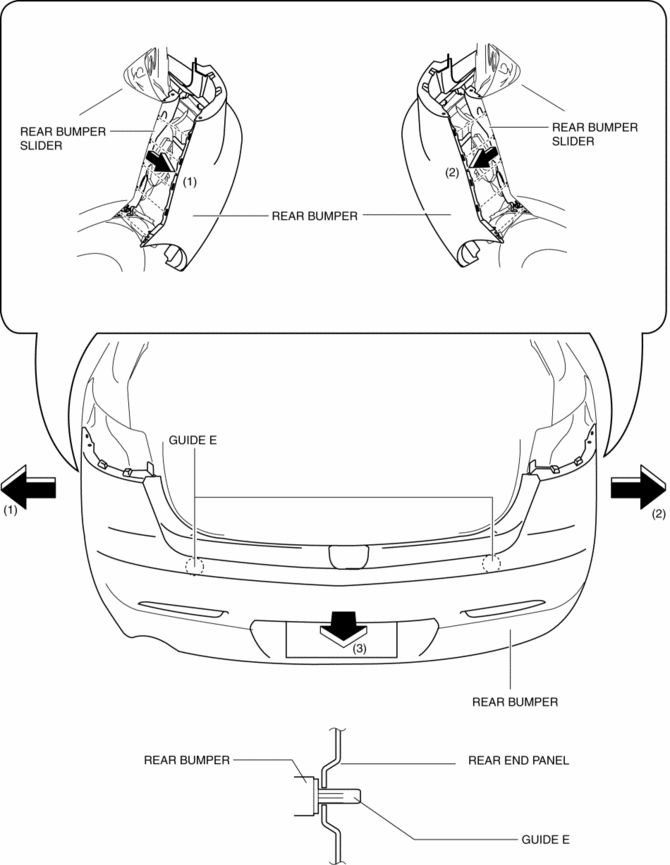
8. Pull the rear bumper in the direction of arrow (1), (2) shown in the figure to disengage the rear bumper from the rear bumper slider.
9. Pull the rear bumper in the direction of arrow (3), then remove the guide E.
CAUTION:
-
When disengaging the rear bumper from the rear bumper slider, the rear bumper could fall and be damaged. Support the rear bumper so that it does not fall.
10. Disconnect the license plate light connector.
11. Install in the reverse order of removal.
5HB
1. Disconnect the negative battery cable..
2. Remove the rear combination light..
3. Remove the fastener A and screw B.
4. Remove the rear splash shield..
5. Remove the screws C.
6. Remove the bolts D.
7. Affix the protective tape to the position shown in the figure.
8. Pull the rear bumper in the direction of arrow (1), (2) shown in the figure to disengage the rear bumper from the rear bumper slider.
9. Pull the rear bumper in the direction of arrow (3), then remove the guide E.

CAUTION:
-
When disengaging the rear bumper from the rear bumper slider, the rear bumper could fall and be damaged. Support the rear bumper so that it does not fall.
10. Disconnect the license plate light connector.
11. Install in the reverse order of removal.
 Rear Bumper Reinforcement Removal/Installation
1. Disconnect the negative battery cable..
2. Remove the rear combination light..
3. Remove the rear bumper..
4. Remove the nuts and remove the rear bumper reinforcement.
5. Install in the ...
 Rear Spoiler Removal/Installation
4SD
1. Remove the trunk lid trim..
2. Remove the nuts.
3. While cutting the double-sided adhesive tape using a flathead screwdriver
or a razor, separate the rear spoiler from the trunk lid. ...
Other materials:
Add-On Non-Genuine Parts and
Accessories
Non-genuine parts and accessories for Mazda vehicles can be found in stores.
These may fit your vehicle, but they are not approved by Mazda for use with
Mazda
vehicles. When you install non-genuine parts or accessories, they could affect
your vehicle's
performance or safety systems; the Maz ...
Starter Cut Relay Removal/Installation [MTX]
Advanced Keyless Entry And Push Button Start System Only
1. Disconnect the negative battery cable..
2. Remove the following parts:
Front scuff plate (LH).
Front side trim (LH).
Side wall.
Console.
3. Set the hood release lever out of the way..
4. Remove the ...
If you have a flat tire
The Subaru Solterra is designed without a conventional spare wheel
and instead comes equipped with an advanced emergency tire puncture repair kit,
providing a modern and space-efficient solution for unexpected tire damage.
In the Subaru Solterra, minor punctures caused by objects such as nail ...
