Mazda 3 Service Manual: A Pillar Trim Removal/Installation
1. Partially peel back the seaming welt.
2. Pull the upper end of the A-pillar trim in the direction of the arrow shown in the figure and remove clip A and B.
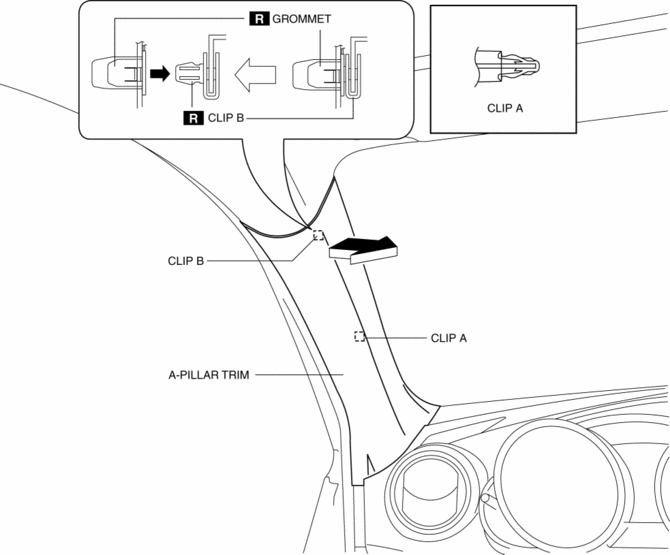
3. Cut the lead wire connecting clip B and grommet using a nipper and pull out the A-pillar trim in the direction of the arrow shown in the figure.
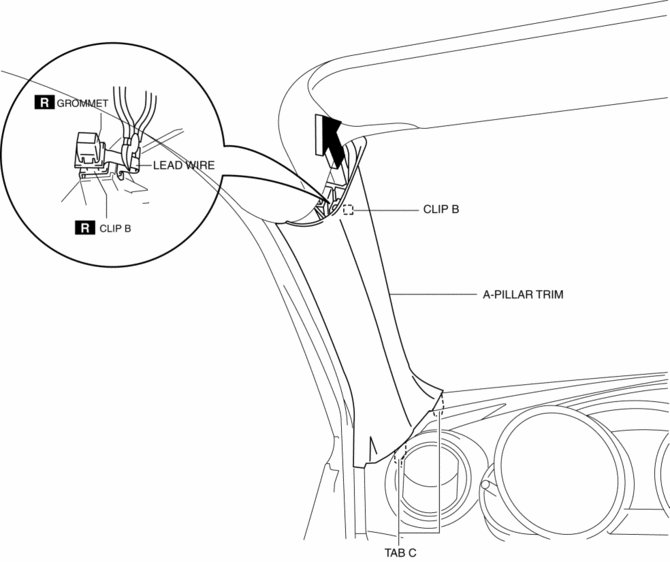
CAUTION:
-
When pulling out the A-pillar trim, be careful not to damage the tabs C.
4. Move the hook in the direction of arrows (1) and (2) shown in the figure using a flathead screwdriver and detach it from the A-pillar inner panel.
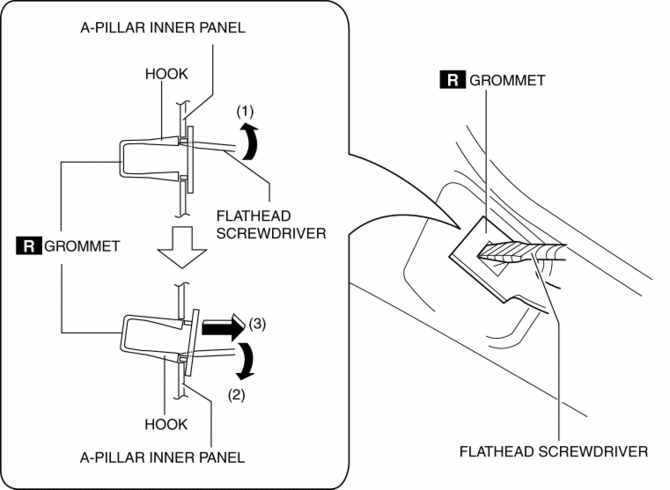
5. Remove the grommet in the direction of the arrow (3) shown in the figure.
6. When installing the A-pillar, install the new clip B and grommet to the A-pillar trim in advance.
7. Install in the reverse order of removal.
 Body Interior
...
 B Pillar Lower Trim Removal/Installation
1. Remove the front scuff plate..
2. Remove the rear scuff plate..
3. Partially peel back the seaming welt.
4. Pull the B-pillar lower trim in the direction of the arrow (1), (2) shown
in the ...
Other materials:
Front Door Key Cylinder Removal/Installation
1. To access the glass installation bolt, position the front door glass so that
the distance from the top of the front door glass to the upper part of the front
beltline molding is approx. 80 mm {3.1 in}.
2. Disconnect the negative battery cable..
3. Remove the following parts:
a. Inne ...
Brake Hose (Front) Removal/Installation [Mzr 2.3 Disi Turbo]
1. Remove in the order indicated in the table.
2. Install in the reverse order of removal.
3. Add brake fluid, bleed the brakes, and inspect for leakage after the installation
has been completed..
1
Brake pipe
2
Clip
3
...
Windshield Defrosting and
Defogging
Press the windshield defroster switch.
In this position, the outside air position
is automatically selected, and the air
conditioner automatically turns on. The
air conditioner will directly dehumidify
the air to the front windshield and side
windows (on ). Airflow
amount will be increased. ...
