Mazda 3 Service Manual: B Pillar Lower Trim Removal/Installation
1. Remove the front scuff plate..
2. Remove the rear scuff plate..
3. Partially peel back the seaming welt.
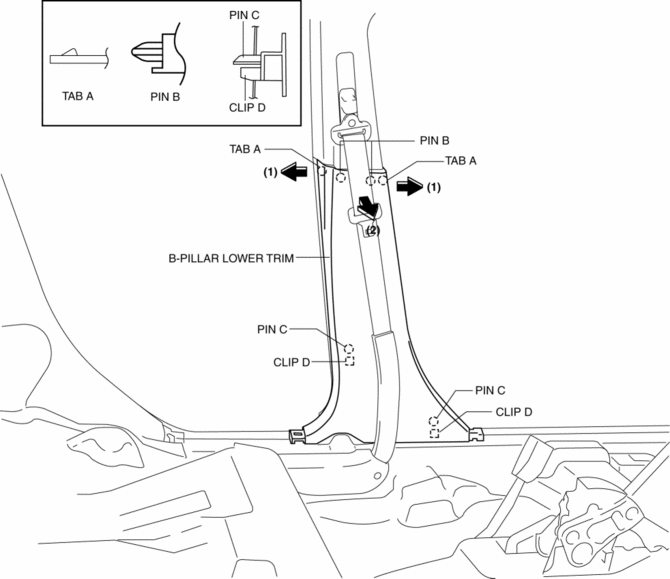
4. Pull the B-pillar lower trim in the direction of the arrow (1), (2) shown in the figure, detach tab A, pin B, pin C, clip D.

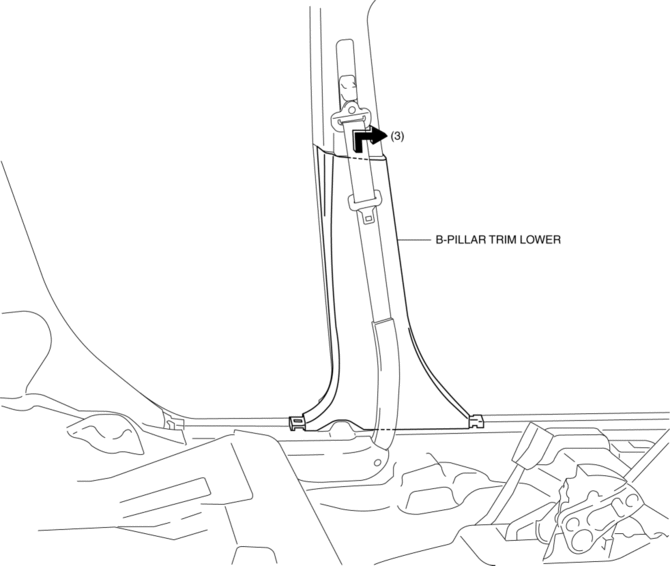
5. Remove the B-pillar lower trim in the direction of the arrow (3) shown in the figure.

6. Install in the reverse order of removal.
 A Pillar Trim Removal/Installation
1. Partially peel back the seaming welt.
2. Pull the upper end of the A-pillar trim in the direction of the arrow shown
in the figure and remove clip A and B.
3. Cut the lead wire connecting ...
 B Pillar Upper Trim Removal/Installation
1. Remove the following parts:
a. Adjuster anchor cover.
b. Upper anchor installation bolts on the front seat belt.
c. Front scuff plate.
d. Rear scuff plate.
2. Partially peel back the seam ...
Other materials:
Installation Of Radio System
The control modules and control unit have been designed with sufficient attention
to radio wave disturbances from the outside. However, observe the following precautions
when installing the radio set to the vehicle to prevent adverse effects on the control
modules and control unit.
Inst ...
Input/Turbine Speed Sensor Removal/Installation [FS5 A EL]
CAUTION:
Always use a new bolt. If the removed input/turbine speed sensor installation
bolt is reused, it may cause oil leakage.
A sealant coating is applied to the input/turbine speed sensor installation
bolt to prevent oil leakage from the installation bolt hole which passes ...
Front Door Latch And Lock Actuator Inspection
1. The following actuators and switches are integrated with the front door latch
and lock actuator. Inspect the front door latch and lock actuator according to each
inspection procedure for the following items.
Front door lock actuator.
Door lock-link switch.
Door latch s ...
