Mazda 3 Service Manual: Brake/Taillight Bulb Removal/Installation
4SD
1. Disconnect the negative battery cable..
2. Remove the following parts:
a. Trunk mat.
b. Trunk board.
c. Trunk end trim.
3. Partially peel back the trunk side trim..
4. Remove in the order indicated in the table.

|
1 |
Connector |
|
2 |
Socket |
|
3 |
Brake/taillight bulb |
5. Install in the reverse order of removal.
5HB
1. Disconnect the negative battery cable..
2. Remove the service hole cover.
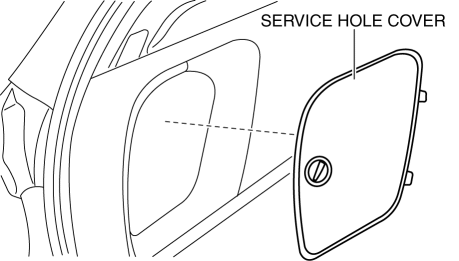
3. Remove in the order indicated in the table.
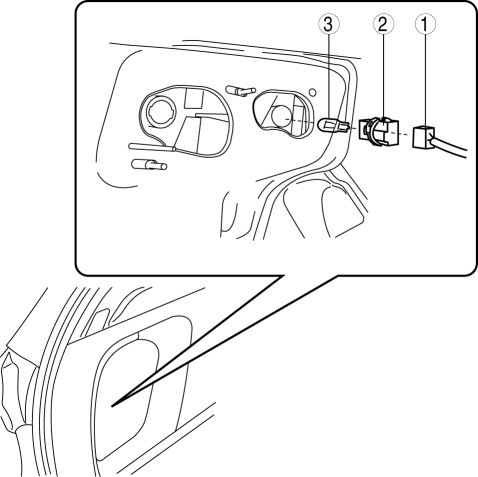
|
1 |
Connector |
|
2 |
Socket |
|
3 |
Brake/taillight bulb |
4. Install in the reverse order of removal.
 Back Up Light Bulb Removal/Installation
4SD
1. Disconnect the negative battery cable..
2. Remove the trunk rid trim..
3. Disconnect the connector.
4. Rotate the socket in the direction of the arrow as shown in the figure to
rem ...
 DRL (Daytime Running Light) Bulb Removal/Installation
MZR 2.0, MZR 2.5, MZR 2.3 DISI Turbo
1. Disconnect the negative battery cable..
2. Disconnect the connector.
3. Rotate the DRL bulb in the direction of the arrow shown in the figure to remove ...
Other materials:
Air Bag Module And Pre Tensioner Seat Belt Deployment Procedures [Standard Deployment
Control System]
WARNING:
A live (undeployed) air bag module or pre-tensioner seat belt may accidentally
operate (deploy) when it is disposed of and cause serious injury. Do not dispose
of a live (undeployed) air bag module and pre-tensioner seat belt. If the SSTs
(Deployment tool and Adapter harnes ...
Electric Variable Valve Timing Actuator, Hydraulic Variable Valve Timing Actuator
Removal/Installation [Skyactiv G 2.0]
WARNING:
A hot engine can cause severe burns. Turn off the engine and wait until it
is cool before servicing.
CAUTION:
Do not disassemble the electric variable valve timing actuator and hydraulic
variable valve timing actuator because they are precision units.
If ...
Driving range
The driving range displayed on the multi-information display of the
Subaru Solterra represents an estimated reference distance based on current conditions.
The actual distance that can be traveled may vary depending on multiple factors
and may differ from the displayed value.
Displayed value
...
