Mazda 3 Service Manual: Back Up Light Bulb Removal/Installation
4SD
1. Disconnect the negative battery cable..
2. Remove the trunk rid trim..
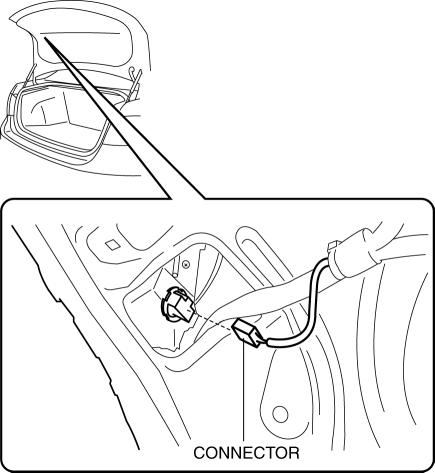
3. Disconnect the connector.
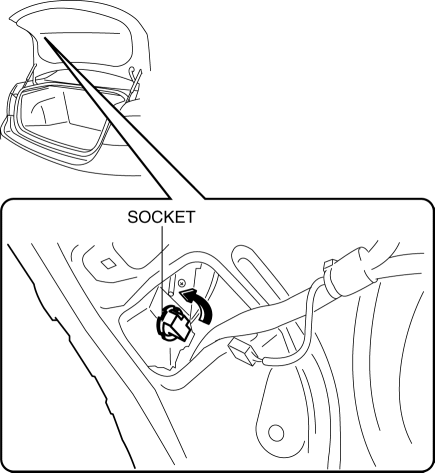
4. Rotate the socket in the direction of the arrow as shown in the figure to remove it.
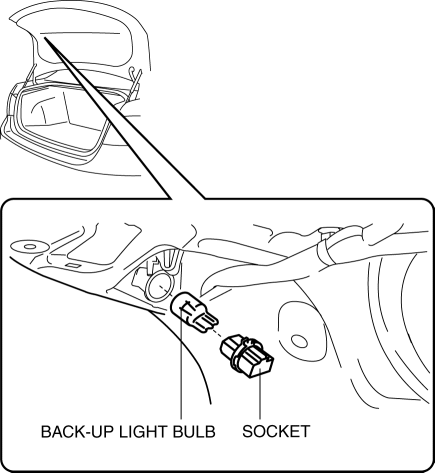
5. Remove the back-up light bulb.
6. Install in the reverse order of removal.
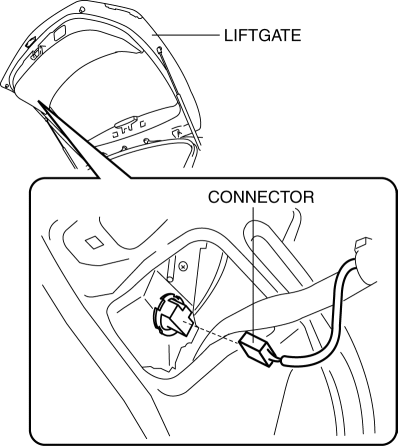
5HB
1. Disconnect the negative battery cable..
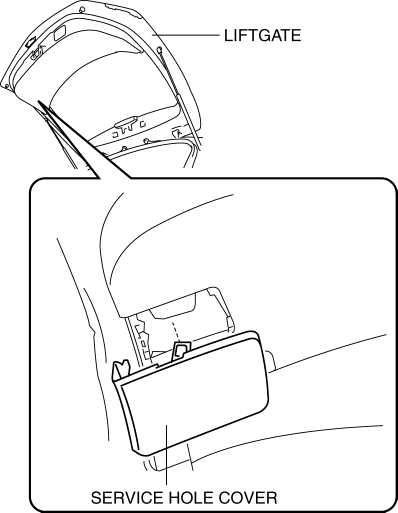
2. Remove the service hole cover.
3. Disconnect the connector.
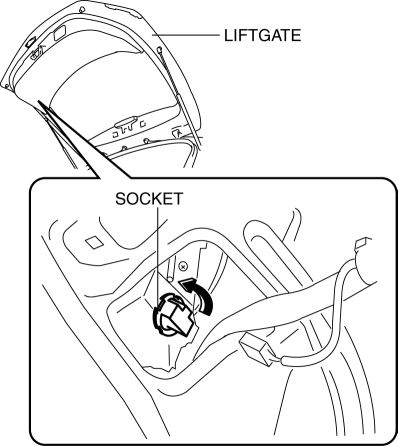
4. Rotate the socket in the direction of the arrow as shown in the figure to remove it.
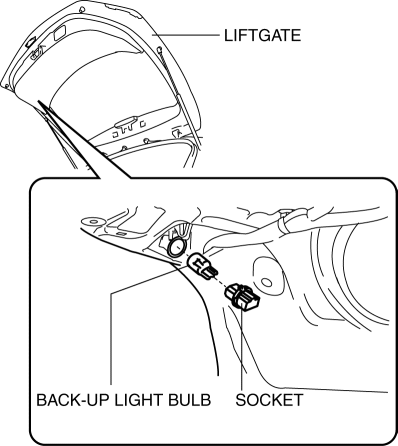
5. Remove the back-up light bulb.
6. Install in the reverse order of removal.
 Afs (Adaptive Front Lighting System) Off Switch Removal/Installation
1. Disconnect the negative battery cable..
2. Remove the switch panel in the direction of the arrow shown in the figure.
3. Disconnect the connector.
4. Remove the AFS OFF switch in the dir ...
 Brake/Taillight Bulb Removal/Installation
4SD
1. Disconnect the negative battery cable..
2. Remove the following parts:
a. Trunk mat.
b. Trunk board.
c. Trunk end trim.
3. Partially peel back the trunk side trim..
4. Remove in th ...
Other materials:
Antenna Feeder No.1 Removal/Installation
1. Disconnect the negative battery cable..
2. Remove the following parts:
a. Front scuff plate.
b. Front side trim.
c. Upper panel.
d. Shift lever knob (MTX).
e. Selector lever knob (ATX).
f. Shift panel.
g. Side wall.
h. Console.
i. Shift lever component (MTX).
j. Selector lev ...
Disc Pad (Front) Replacement [Mzr 2.3 Disi Turbo]
1. Remove in the order indicated in the table.
2. Install in the reverse order of removal.
3. After installation, pump the brake pedal a few times and verify that the brakes
do not drag.
1
Clip
2
Retaining clip
(See FRONT BRAKE (DISC ...
Rear Scuff Plate Removal/Installation
1. Detach tab A while pulling the rear scuff plate in the direction of the arrow
(1) shown in the figure, then detach hook B, clips C, pins D while pulling in the
direction of the arrow (2).
2. Detach tab E while pulling the rear scuff plate in the direction of the arrow
(3) shown in the fig ...
