Mazda 3 Service Manual: Brake/Taillight Bulb Removal/Installation
4SD
1. Disconnect the negative battery cable..
2. Remove the following parts:
a. Trunk mat.
b. Trunk board.
c. Trunk end trim.
3. Partially peel back the trunk side trim..
4. Remove in the order indicated in the table.
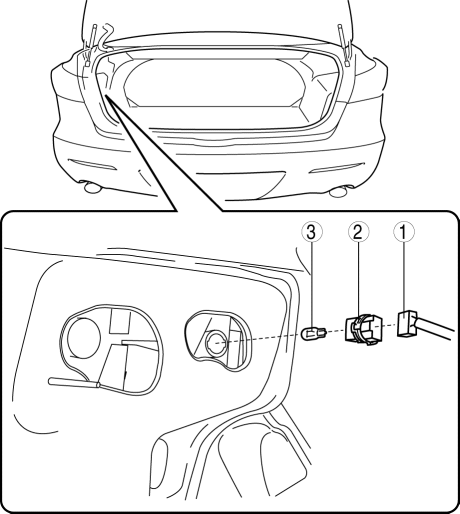
|
1 |
Connector |
|
2 |
Socket |
|
3 |
Brake/taillight bulb |
5. Install in the reverse order of removal.
5HB
1. Disconnect the negative battery cable..
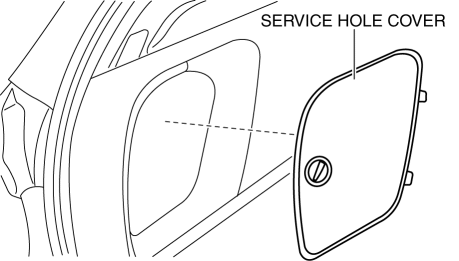
2. Remove the service hole cover.
3. Remove in the order indicated in the table.
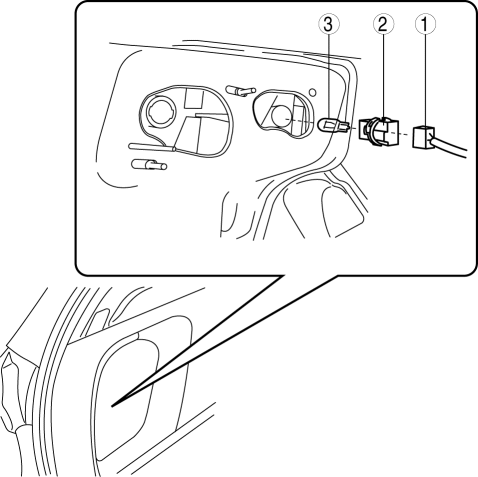
|
1 |
Connector |
|
2 |
Socket |
|
3 |
Brake/taillight bulb |
4. Install in the reverse order of removal.
 Brake Pedal Removal/Installation
CAUTION:
The clearance between the brake switch and the brake pedal is automatically
adjusted to the correct amount when the brake switch is inserted into the installation
hole on the br ...
 Brakes SST
49 D043 0A0
Adapter set
49 U043 0A0A
Oil pressure gauge set
49 0221 600C
Disc brake expand tool
...
Other materials:
Keyless Entry System
This system uses the key buttons to
remotely lock and unlock the doors and
the liftgate/trunk lid, and opens the trunk
lid.
The system can start the engine without
having to take the key out of your purse or
pocket.
It can also help you signal for attention.
Operating the theft-deterre ...
Headliner Removal/Installation
1. Shift to the D (ATX) or 4th gear (MTX) position. (4SD)
2. Disconnect the negative battery cable..
3. Remove the rain sensor cover. (Vehicles with auto light/wiper system).
4. Disconnect the rain sensor connector. (Vehicles with auto light/wiper system)
5. Partially peel back the seaming ...
Front Seat Belt Pretensioner and Load Limiting Systems
For optimum protection, the driver and
front passenger seat belts are equipped
with pretensioner and load limiting
systems. For both these systems to work
properly you must wear the seat belt
properly.
Pretensioners:
When a collision is detected, the
pretensioners deploy simultaneously wit ...
