Mazda 3 Service Manual: Discharge Headlight Control Module Removal/Installation
CAUTION:
-
Incorrect servicing of the discharge headlights could result in electrical shock. Before servicing the discharge headlights, always refer to the discharge headlight service warnings..
1. Disconnect the negative battery cable..
2. Remove the front bumper..
3. Remove the front combination light..
4. Remove the screws.
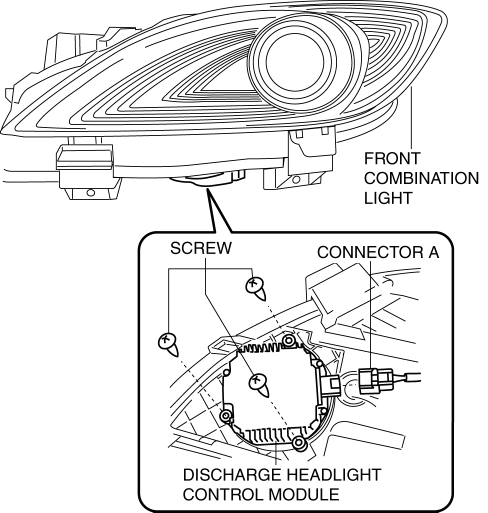
5. Disconnect the connector A.
6. Remove the screw.
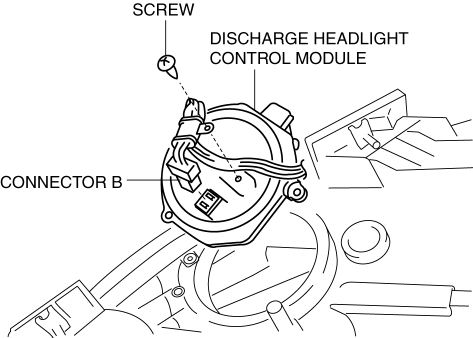
7. Disconnect the connector B.
8. Remove the discharge headlight control module.
9. Rotate the cover in the direction of the arrow shown in the figure to remove it.
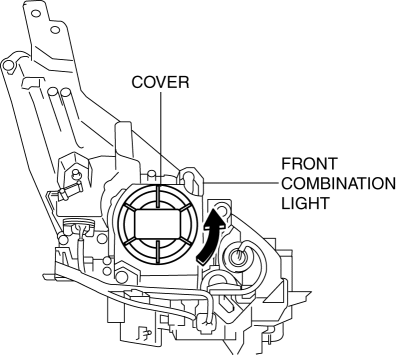
10. Rotate the connector in the direction of the arrow shown in the figure to remove it.
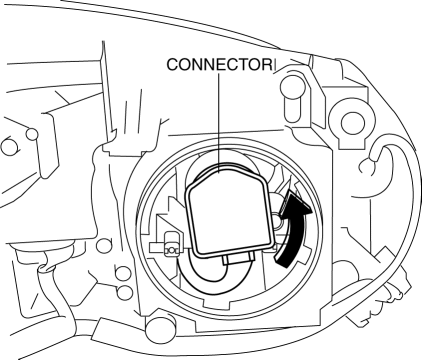
11. Remove the short cord.
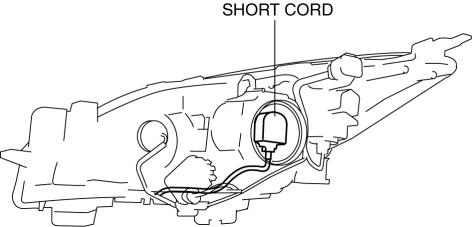
12. Install in the reverse order of removal.
 DRL (Daytime Running Light) Bulb Removal/Installation
MZR 2.0, MZR 2.5, MZR 2.3 DISI Turbo
1. Disconnect the negative battery cable..
2. Disconnect the connector.
3. Rotate the DRL bulb in the direction of the arrow shown in the figure to remove ...
 Discharge Headlight Service Warnings
Discharge Headlight Service Warnings
To prevent electrical shock when replacing the discharge headlight bulb,
always perform the servicing with dry hands and in an area where it does not
...
Other materials:
General Procedures (Steering)
Wheel and Tire Installation
1. When installing the wheels and tires, tighten the wheel nuts in a criss-cross
pattern to the following tightening torque.
Tightening torque
88—118 N·m {9.0—12 kgf·m, 65—87 ft·lbf}
Connector Disconnection
1. Disconnect the negative battery cable ...
Air Intake Actuator Removal/Installation [Full Auto Air Conditioner]
1. Set the air intake mode to FRESH.
2. Disconnect the negative battery cable..
3. Remove the following parts:
a. Front scuff plate (Passenger-side).
b. Front side trim (Passenger-side).
c. Dashboard under cover.
d. Glove compartment.
e. Lower panel (Passenger-side).
f. Shower duct ( ...
Shift Lock System Inspection
Shift-Lock System Inspection
1. Switch the ignition to ON.
2. Shift the selector lever to the P position.
3. Perform the following procedures to inspect the shift-lock system.
If there is any malfunction, inspect the shift-lock solenoid and P position
switch..
a. Verify that th ...
