Mazda 3 Service Manual: Electro Hydraulic Power Assist Steering (EHPAS) Control Module Configuration
CAUTION:
-
If the EHPAS CM configuration is not completed, the EHPAS will not operate properly. If the EHPAS CM is replaced, always carry out the EHPAS CM configuration so that the EHPAS operates properly.
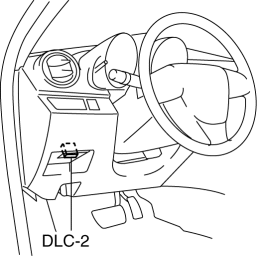
1. Connect the M-MDS (IDS) to the DLC-2.
2. After the vehicle is identified, select the following items from the initialization screen of the IDS.
-
Select the “Module Programming”.
3. Then, select items from the screen menu in the following order.
-
Select “Programmable Module Installation”.
-
Select “EPS”.
4. Perform the configuration according to the directions on the screen.
5. Retrieve DTCs by the IDS, then verify that there is no DTC present.
-
If a DTC (s) is detected, perform the applicable DTC inspection..
 Electric Power Steering Oil Pump Component Removal/Installation
CAUTION:
Be careful not to drop the electric power steering oil pump component as
the internal parts of the EHPAS CM could be damaged. Replace the electric power
steering oil pump compon ...
 Electro Hydraulic Power Assist Steering (EHPAS) Control Module Inspection
Terminal Voltage Table (Reference)
Terminal
Signal name
Connected to
Measured item
Measured terminal (measured condition)
...
Other materials:
On Board Diagnostic System PID/Data Monitor Inspection [Fw6 A EL]
1. Connect the M-MDS (IDS) to the DLC-2.
2. After the vehicle is identified, select the following items from the initialization
screen of the IDS.
a. Select “DataLogger”.
b. Select “Modules”.
c. Select “TCM”.
3. Select the applicable PID from the PID table.
4. Verify th ...
Front Brake (Disc) Removal/Installation [Mzr 2.0, Skyactiv G 2.0, Mzr 2.5]
1. Remove in the order indicated in the table.
2. Install in the reverse order of removal.
3. After installation, pump the brake pedal a few times and verify that the brakes
do not drag.
1
Brake hose
(See Brake Hose Installation Note.)
2
...
Steering Gear And Linkage Disassembly
CAUTION:
To prevent damage to the steering gear, secure it to the vise using a copper
plate or clean cloth.
1. Disassemble in the order indicated in the table.
1
Floor seal
2
Oil pipe
3
Tie-rod end ...
