Mazda 3 Service Manual: Front Bumper Reinforcement Removal/Installation
1. Disconnect the negative battery cable..
2. Remove the following parts:
a. Front bumper.
b. Seal plate.
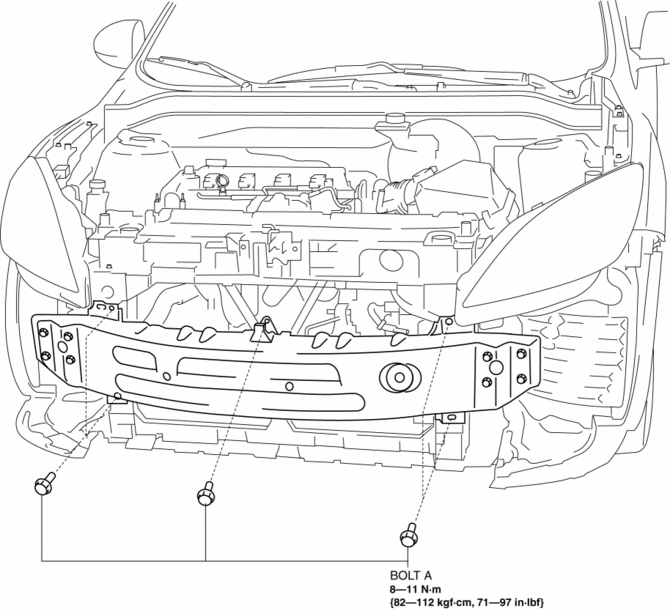
3. Remove the bolts A.
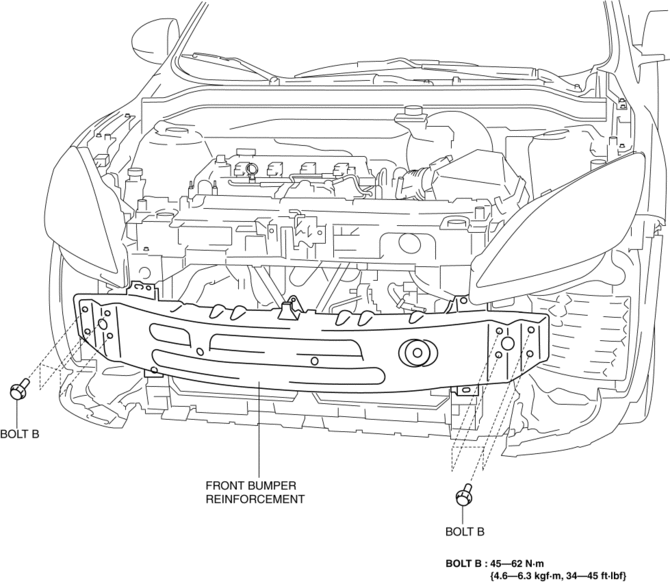
4. Remove the bolts B.
5. Remove the front bumper reinforcement.
6. Install in the reverse order of removal.
 Front Bumper Disassembly/Assembly
Standard Type
Except SKYACTIV-G 2.0
1. Disassemble in the order indicated in the table.
1
Screw A
2
Guard cover
3
...
 Front Bumper Removal/Installation
1. Disconnect the negative battery cable..
2. Remove the screw A and fasteners B.
3. Remove the screws C.
4. Remove the bolts D.
5. Remove the fasteners E, screw F and fastener G. ...
Other materials:
Mazda Radar Cruise Control
(MRCC)
The Mazda Radar Cruise Control (MRCC) system is designed to maintain headway
control *1
according to the vehicle speed using a radar sensor (front) to detect the
distance to a vehicle
ahead, and by presetting the vehicle speed between 30 km/h (19 mph) and 145 km/h
(90
mph), the driver is fr ...
Antenna Feeder No.4 Removal/Installation
Removal
NOTE:
The antenna feeder No.4 is integrated with the dashboard wiring harness.
1. Refer to DASHBOARD DISASSEMBLY/ASSEMBLY.
Installation
CAUTION:
If the antenna feeder No.4 is installed with tension on the cable and wiring
harness it could result in loosening of t ...
Steering Gear And Linkage Removal/Installation
CAUTION:
Performing the following procedures without first removing the ABS wheel-speed
sensor may possibly cause an open circuit in the wiring harness if it is pulled
by mistake. Before performing the following procedures, disconnect the ABS wheel-speed
sensor connector (axle side) ...
