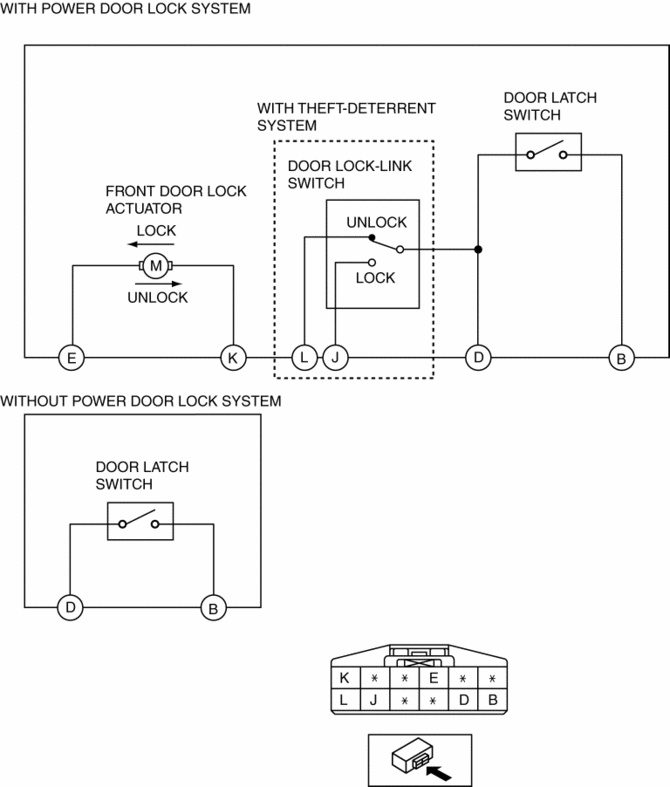
Mazda 3 Service Manual: Front Door Latch And Lock Actuator Inspection
1. The following actuators and switches are integrated with the front door latch and lock actuator. Inspect the front door latch and lock actuator according to each inspection procedure for the following items.
-
Front door lock actuator.
-
Door lock-link switch.
-
Door latch switch.
-
Front door key cylinder.
LH
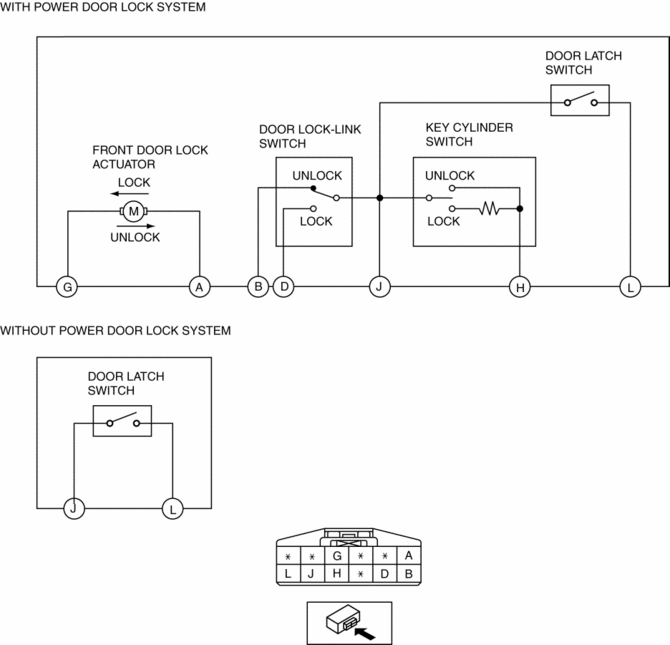
RH
 Front Door Key Cylinder Switch Inspection
1. To access the glass installation bolt, position the front door glass so that
the distance from the top of the front door glass to the upper part of the front
beltline molding is approx. 80 mm { ...
 Front Door Latch And Lock Actuator Removal/Installation
1. To access the glass installation bolt, position the front door glass so that
the distance from the top of the front door glass to the upper part of the front
beltline molding is approx. 80 mm { ...
Other materials:
Front Combination Light Bracket Replacement
NOTE:
Verify that the front combination light is not damaged before using the repair
bracket for installation when the original brackets are damaged. If the front
combination light component is damaged, replace the light as a single unit.
1. Cut off the front combination light br ...
Input/Turbine Speed Sensor Inspection [FS5 A EL]
CAUTION:
Water or foreign objects entering the connector can cause a poor connection
or corrosion. Be sure not to drop water or foreign objects on the connector
when disconnecting it.
On-Vehicle Inspection
1. Perform the following procedures.
a. Remove the battery cover..
b. ...
Automatic Transaxle Removal/Installation [Fw6 A EL]
CAUTION:
Secure the steering wheel using tape or a cable to prevent the steering shaft
from rotating after disconnecting the steering shaft. If the steering wheel
rotates after the steering shaft and the steering gear and linkage are disconnected,
the internal parts of the clock spr ...
