Mazda 3 Service Manual: Fuel Filler Lid Opener And Lever Removal/Installation
Fuel-filler Lid Opener
4SD
1. Open the fuel-filler lid.
2. Remove the following parts:
a. Trunk end trim.
b. Trunk side trim (RH).
3. Remove the nut.
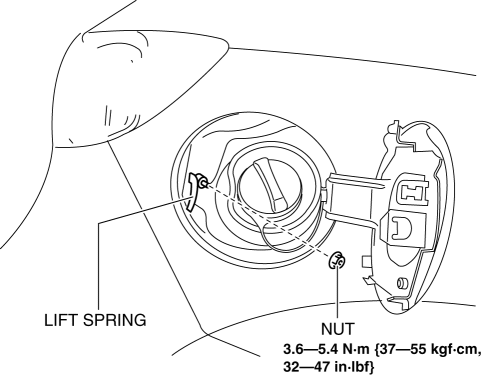
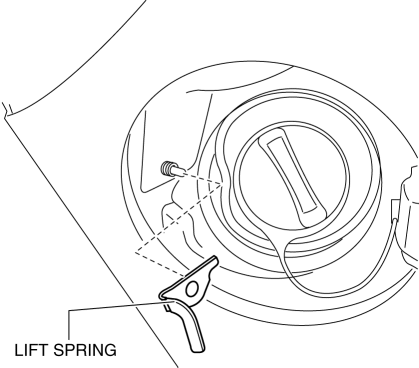
4. Remove the lift spring.
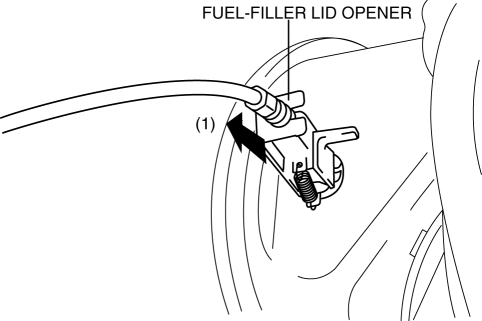
5. Pull out the fuel-filler lid opener in the direction of the arrow (1).
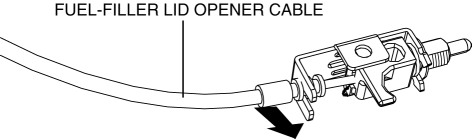
6. Disconnect the fuel-filler lid opener from the fuel-filler lid opener cable.
7. Install in the reverse order of removal.
5HB
1. Open the fuel-filler lid.
2. Remove the following parts:
a. Rear scuff plate (RH).
b. Rear seat cushion.
c. Rear seat back.
d. Tire house trim (RH).
e. Trunk side upper trim (RH).
f. Trunk end trim.
g. Trunk side trim (RH).
3. Remove the nut.

4. Remove the lift spring.
5. Pull out the fuel-filler lid opener in the direction of the arrow (1).
6. Disconnect the fuel-filler lid opener from the fuel-filler lid opener cable.
7. Install in the reverse order of removal.
Fuel-filler Lid Opener Lever
1. Remove the front scuff plate (LH)..
2. Remove the front side trim (LH)..
3. Remove the fuel-filler lid opener bezel..
4. Partially peel back the floor covering.
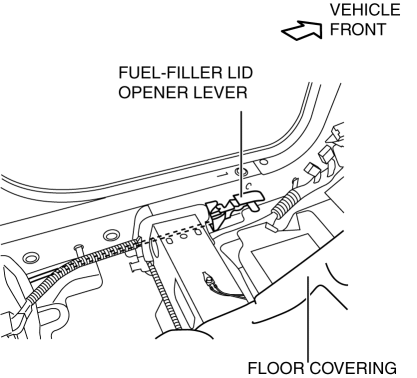
5. Remove the bolts.
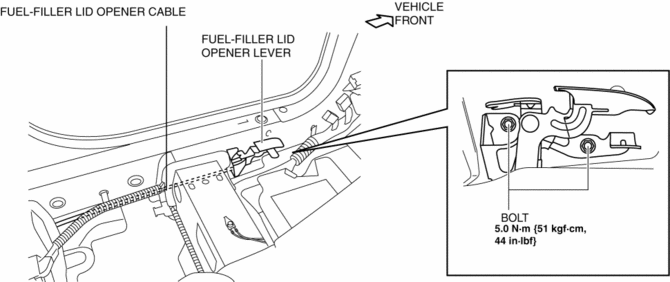
6. Disconnect the cable and fuel-filler lid opener lever.
7. Install in the reverse order of removal.
 Fuel Filler Lid Adjustment
1. Measure the gap and height difference between the fuel-filler lid and the
body.
2. Loosen the fuel-filler lid installation bolts, and adjust the fuel-filler
lid.
Standard clearance
...
 Fuel Filler Lid Opener Bezel Removal/Installation
1. Remove the screw.
2. Pull the fuel-filler lid opener bezel in the direction of the arrow (1) then
remove the tab.
3. Move the fuel-filler lid opener bezel in the direction of the arrow (2 ...
Other materials:
Aluminum Wheel Maintenance
A protective coating is provided over the
aluminum wheels. Special care is needed
to protect this coating.
CAUTION
Do not use any detergent other than
mild detergent. Before using any
detergent, verify the ingredients.
Otherwise, the product could discolor
or stain the alumi ...
i-ELOOP
On conventional vehicles, the kinetic energy that is generated when the
vehicle is
decelerated by applying the brakes or during engine braking ends up being
discarded as
heat. By utilizing this discarded kinetic energy to generate electricity and use
it to power the
vehicle's electrical dev ...
Drive Belt Auto Tensioner Inspection [Mzr 2.0, Mzr 2.5]
MZR 2.0
1. Remove the generator drive belt with the A/C drive belt still installed and
set it out of the way..
2. Verify that the drive belt auto tensioner moves smoothly in the operational
direction.
If it does not move smoothly, replace the drive belt auto tensioner..
3. T ...
