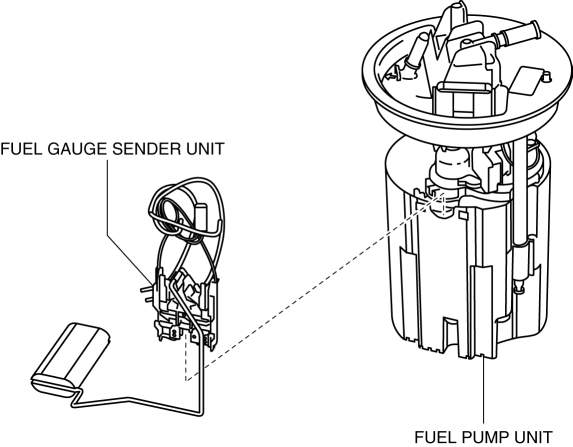
Mazda 3 Service Manual: Fuel Pump Unit Disassembly/Assembly [Mzr 2.0, Mzr 2.5]
WARNING:
-
Fuel is very flammable liquid. If fuel spills or leaks from the pressurized fuel system, it will cause serious injury or death and facility breakage. Fuel can also irritate skin and eyes. To prevent this, always complete the “Fuel Line Safety Procedure”, while referring to “BEFORE SERVICE PRECAUTION”.
-
A person charged with static electricity could cause a fire or explosion, resulting in death or serious injury. Before draining fuel, make sure to discharge static electricity by touching the vehicle body.
1. Complete the “BEFORE SERVICE PRECAUTION”..
2. Remove the battery cover..
3. Disconnect the negative battery cable..
4. Remove the rear seat cushion..
5. Remove the fuel pump unit..
6. Disassemble the fuel pump unit and fuel gauge sender unit.
7. Assemble the fuel pump unit and fuel gauge sender unit.
 Fuel Line Pressure Inspection [Mzr 2.0, Mzr 2.5]
WARNING:
Fuel line spills and leakage from the pressurized fuel system are dangerous.
Fuel can ignite and cause serious injury or death and damage. To prevent this,
complete the followin ...
 Fuel Line Pressure Inspection [Skyactiv G 2.0]
WARNING:
Fuel line spills and leakage from the pressurized fuel system are dangerous.
Fuel can ignite and cause serious injury or death and damage. To prevent this,
complete the followin ...
Other materials:
Purge Solenoid Valve Removal/Installation [Mzr 2.0, Mzr 2.5]
1. Remove the battery cover..
2. Disconnect the negative battery cable..
3. Remove in the order indicated in the table.
1
Purge solenoid valve connector
2
Evaporative hose
(See Evaporative Hose Installation Note.)
3
...
Antenna Feeder No.4 Inspection
1. Disconnect the negative battery cable..
2. Remove the following parts:
a. Upper column cover.
b. Instrument cluster.
c. Center panel.
d. Audio unit (Vehicles with audio unit).
e. Center cover.
f. Dashboard upper panel.
g. Front scuff plate (RH).
h. Front side trim (RH).
3. Dis ...
i-ELOOP
On conventional vehicles, the kinetic energy that is generated when the
vehicle is
decelerated by applying the brakes or during engine braking ends up being
discarded as
heat. By utilizing this discarded kinetic energy to generate electricity and use
it to power the
vehicle's electrical dev ...
