Mazda 3 Service Manual: Glass Antenna Inspection
4SD
1. Disconnect the negative battery cable..
2. Disconnect the antenna amplifier connector B..
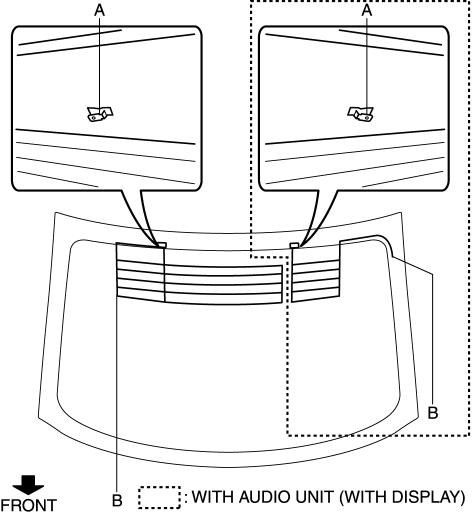
3. Disconnect the antenna feeder No.3 connector C. (with audio unit (with display)).
4. Inspect the glass antenna for damage visually.
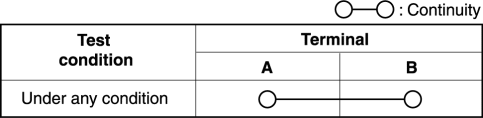
5. Inspect for continuity between the glass antenna terminals using an ohmmeter.
-
If not as specified, repair the glass antenna..
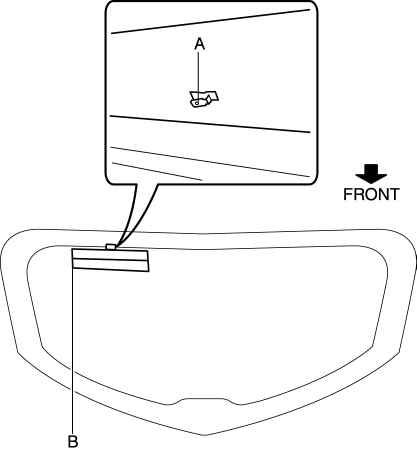
5HB (with audio unit (with display))
1. Disconnect the negative battery cable..
2. Remove the liftgate upper trim..
3. Disconnect the antenna feeder No.7 connector B..
4. Inspect the glass antenna for damage visually.
5. Inspect for continuity between the glass antenna terminals using an ohmmeter.
-
If not as specified, repair the glass antenna..
 Glass Antenna
Purpose, Function
4SD
The AM/FM radio waves and RDS-TMC (Radio Data System-Traffic Message Channel)
radio waves are converted to an electrical signal and the signal is sent to
the audio ...
 Power Window Main Switch Inspection
1. Disconnect the negative battery cable.
2. Remove the inner garnish. (driver's side).
3. Remove the front door trim. (driver's side).
4. Remove the main switch panel. (driver's sid ...
Other materials:
Oil Seal (Differential) Replacement [G35 M R]
1. On level ground, jack up the vehicle and support it evenly on safety stands.
2. Remove the aerodynamic under cover No.2..
3. Drain the oil from the transaxle..
4. Remove the front splash shield..
5. Separate the drive shaft and joint shaft from the transaxle..
6. Remove the oil seals u ...
Driveline/Axle SST
49 F027 004
Attachment ø80
49 U027 005
Bearing installer
49 H027 002
Bearing remover
49 H034 201
Support block
49 H028 203
Block S
...
Headlight switch
In the Subaru Solterra, the headlight system can be controlled either
manually or automatically, offering flexibility and intelligent adaptation to changing
driving conditions.
Turning on the headlights
By operating
the switch, the lighting system of the Subaru Solterra activates in differ ...
