Mazda 3 Service Manual: Inboard Light Removal/Installation
4SD
1. Disconnect the negative battery cable..
2. Remove the trunk lid trim..
3. Disconnect the connector.
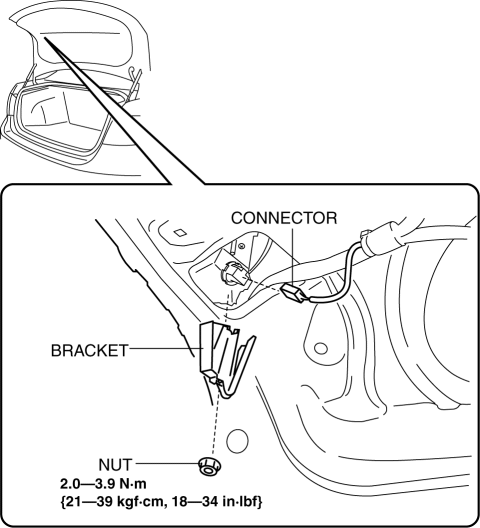
4. Remove the nut.
5. Remove the bracket.
6. Remove the inboard light as shown in the figure.
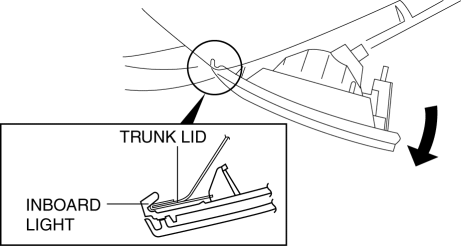
7. Install in the reverse order of removal..
5HB
1. Disconnect the negative battery cable..
2. Remove the service hole cover.
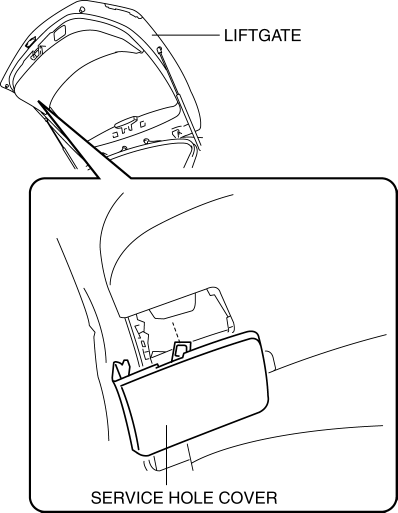
3. Disconnect the connector.
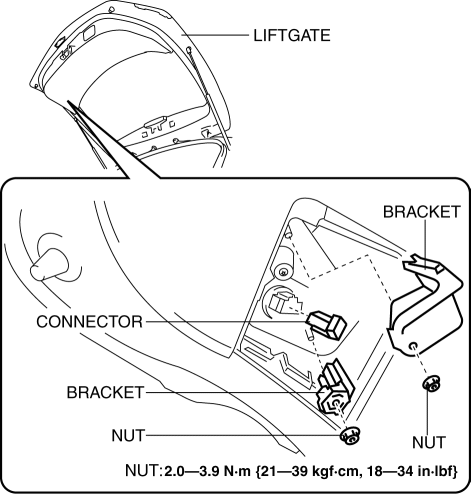
4. Remove the nut.
5. Remove the bracket.
6. Remove the inboard light as shown in the figure.
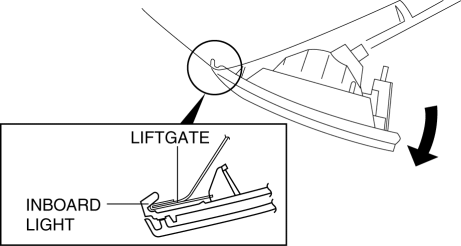
7. Remove the request switch. (With Advanced keyless entry and push button start system).
8. Install in the reverse order of removal..
Inboard Light Installation Note
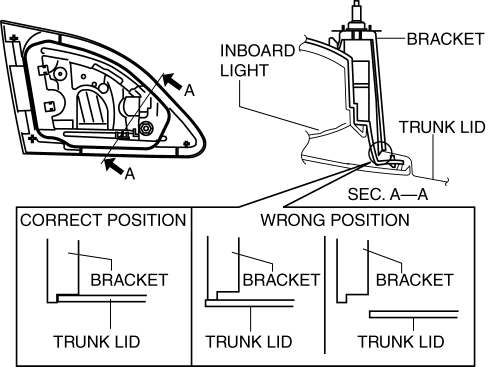
4SD
1. Push the bracket onto the trunk lid as shown in the figure and install.
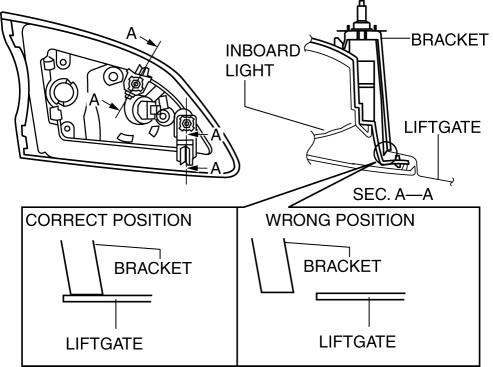
5HB
1. Push the bracket into the liftgate as shown in the figure and install.
 Ignition Key Illumination Removal/Installation
1. Disconnect the negative battery cable..
2. Remove the column cover upper..
3. Remove the ignition key illumination bulb.
4. Install in the reverse order of removal. ...
 Indirect Illumination Removal/Installation
Power Window Switch (With power window switch indirect illumination)
1. Disconnect the negative battery cable..
2. Remove the assist handle cover..
3. Remove in the order indicated in the table. ...
Other materials:
Camshaft Position (CMP) Sensor Removal/Installation [Mzr 2.0, Mzr 2.5]
CAUTION:
When replacing the CMP sensor, make sure there is no foreign material on
it such as metal shavings. If it is installed with foreign material, the sensor
output signal will malfunction resulting from fluctuation in magnetic flux and
cause a deterioration in engine control.
...
Compression Inspection [Mzr 2.3 Disi Turbo]
WARNING:
Hot engines and oil can cause severe burns. Be careful not to burn yourself
during removal/installation of each component.
Fuel vapor is hazardous. It can very easily ignite, causing serious injury
and damage. Always keep sparks and flames away from fuel.
Fuel ...
Camshaft Position (CMP) Sensor Removal/Installation [Mzr 2.0, Mzr 2.5]
CAUTION:
When replacing the CMP sensor, make sure there is no foreign material on
it such as metal shavings. If it is installed with foreign material, the sensor
output signal will malfunction resulting from fluctuation in magnetic flux and
cause a deterioration in engine control.
...
