Mazda 3 Owners Manual: Maintenance Monitor (Type A audio)
“Oil Change” with a flexible setting *1 is available. Consult your Authorized Mazda Dealer when you want to change the setting *2 . Once the system turns on, the wrench indicator light in the instrument cluster will be illuminated when remaining oil life becomes less than 500 km (300 mile), or remaining days are less than 15 (whichever comes first).
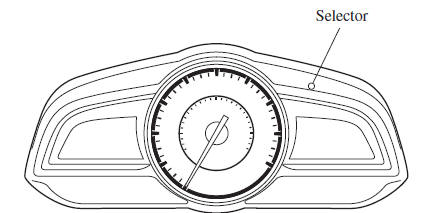
Reset method
Press and hold the selector with the ignition switched off, then switch it on. Keep pressing the selector for more than 5 seconds. The master warning light will flash for a few seconds when the reset is completed.
*1 The flexible setting is available in the United States and Puerto Rico. Based on the engine operating conditions, the onboard computer in your vehicle calculates the remaining oil life. Mazda Genuine 0W-20 oil and Castrol ® 0W-20 oil are required to achieve optimum calculation performance.
*2 Once the Flexible Oil Maintenance Setting is selected, the system must be reset whenever replacing the engine oil.

 Maintenance Monitor (Type B audio)
Select the icon on the
home screen to display the “Applications” screen.
Select “Maintenance” to display the maintenance list screen.
Switch the tab and select the setting item you ...
Other materials:
Transaxle Range (TR) Switch Adjustment [FS5 A EL]
CAUTION:
Water or foreign objects entering the connector can cause a poor connection
or corrosion. Be sure not to drop water or foreign objects on the connector
when disconnecting it.
1. Engage the parking brake and use wheel chocks at the front and rear of the
wheels.
2. Shi ...
Maintaining the Finish
Washing
CAUTION
When the wiper lever is in the
position and the ignition is switched ON,
the wipers may move automatically in
the following cases:
If the windshield above the rain
sensor is touched or wiped with a
cloth.
If the windshield is struc ...
Keyless Entry System
This system uses the key buttons to
remotely lock and unlock the doors and
the liftgate/trunk lid, and opens the trunk
lid.
The system can start the engine without
having to take the key out of your purse or
pocket.
It can also help you signal for attention.
Operating the theft-deterre ...
