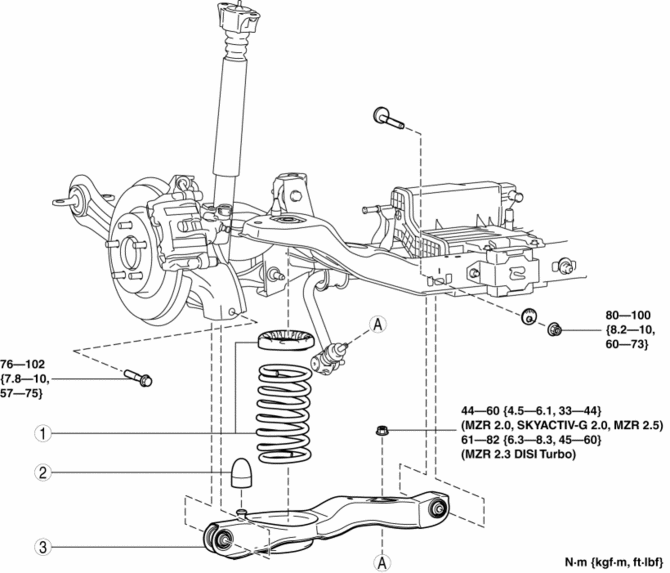
Mazda 3 Service Manual: Rear Lower Arm Removal/Installation
1. Disconnect the auto leveling sensor link lower side. (Vehicles with AFS).
2. Remove in the order indicated in the table.
3. Install in the reverse order of removal.
4. Inspect the wheel alignment and adjust it if necessary..
|
1 |
Rear coil spring component . |
|
2 |
Bound stopper |
|
3 |
Rear lower arm (See Rear Lower Arm Removal Note (RH) (MZR 2.0 (Except Mexico), SKYACTIV-G 2.0, MZR 2.3 DISI Turbo, MZR 2.5 (Except Mexico)).) (See Rear Lower Arm Installation Note (RH) (MZR 2.0 (Except Mexico), SKYACTIV-G 2.0, MZR 2.3 DISI Turbo, MZR 2.5 (Except Mexico)).) |
Rear Lower Arm Removal Note (RH) (MZR 2.0 (Except Mexico), SKYACTIV-G 2.0, MZR 2.3 DISI Turbo, MZR 2.5 (Except Mexico))
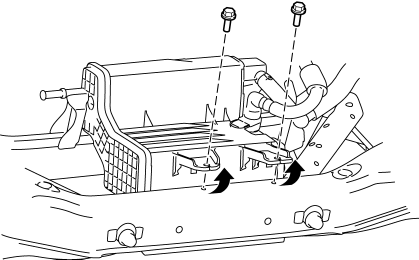
1. Remove the charcoal canister installation bolts (rear side), and push the charcoal canister up slightly.
2. Remove the rear lower arm inner bolt.
3. Remove the rear lower arm.
Rear Lower Arm Installation Note (RH) (MZR 2.0 (Except Mexico), SKYACTIV-G 2.0, MZR 2.3 DISI Turbo, MZR 2.5 (Except Mexico))
1. Push the charcoal canister up slightly.
2. Install the rear lower arm inner bolt.
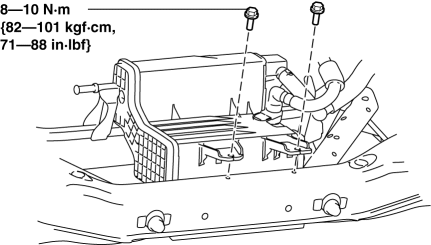
3. Tighten the charcoal canister installation bolts (rear side).
 Rear Lateral Link Removal/Installation
1. Remove in the order indicated in the table.
2. Install in the reverse order of removal.
3. Inspect the wheel alignment and adjust it if necessary..
1
Rear stabiliz ...
 Rear Shock Absorber Disposal
1. Clamp a rear shock absorber on a flat surface or with the piston pointing
downwards.
2. Drill a 2—3 mm {0.08—0.11 in} hole at a point 40—50 mm {1.6—1.9
in} from the bottom of the tube ...
Other materials:
Customization
Customizable features
The Subaru Solterra is equipped with a wide range of configurable
electronic systems that allow you to tailor vehicle behavior and comfort settings
according to your personal preferences. These adjustments can be performed via the
multi-information display, the multimedi ...
DSC HU/CM Inspection
1. Disconnect the DSC HU/CM connector..
2. Connect the negative battery cable..
3. Attach the tester lead to the DSC HU/CM wiring harness-side connector and
inspect voltage, continuity, or resistance according to the standard (reference)
on the table.
Standard (Reference)
...
Daytime Running Lights
Some countries require moving vehicles
to have their lights on (daytime running
lights) during the daytime.
Daytime running lights turn on
automatically when the ignition is
switched ON.
They turn off when the parking brake is
operated or the shift lever is shifted to the
P position (aut ...
