Mazda 3 Service Manual: Rear Package Trim Removal/Installation
1. Remove the following parts:
a. Rear seat cushion.
b. Rear scuff plate.
c. Tire house trim.
d. C-pillar trim.
2. Fold the rear seat back.
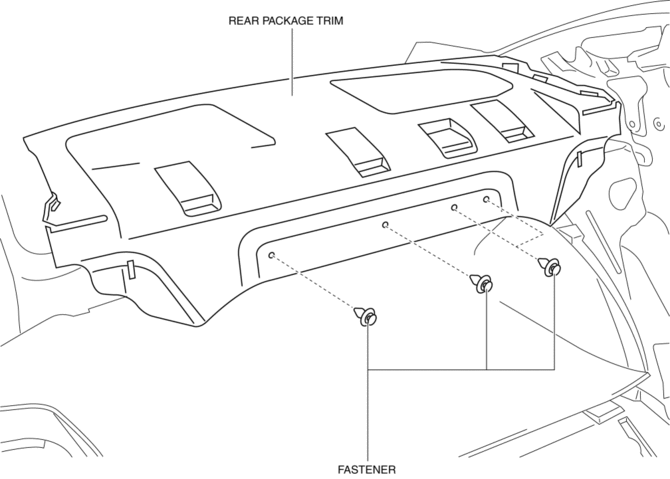
3. Remove the fasteners.
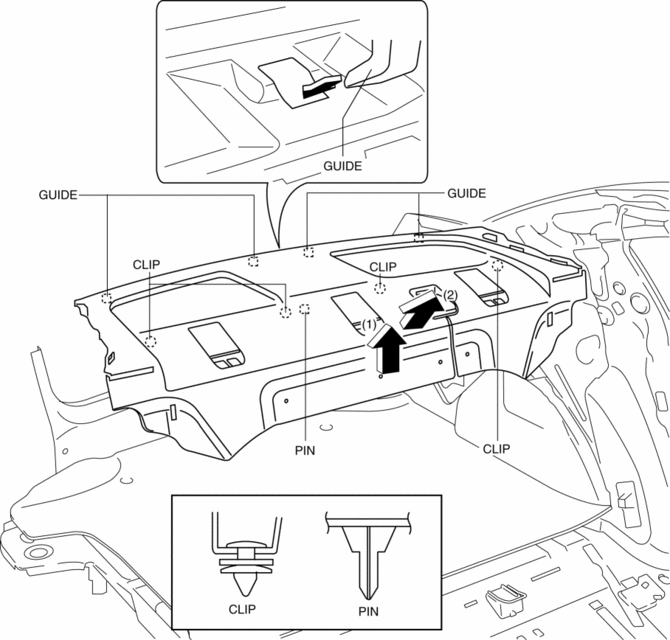
4. Pull up the rear package trim in the direction of the arrow (1) shown in the figure while remove the clips and pin, pull the rear package trim in the direction of the arrow (2), and remove it while pulling out the guides.
5. Install in the reverse order of removal.
 Lower Panel Removal/Installation
Driver-side
1. Disconnect the negative battery cable..
2. Remove the following parts:
a. Driver-side front scuff plate.
b. Driver-side front side trim.
c. Hood release lever.
d. Upper panel ...
 Rear Scuff Plate Removal/Installation
1. Detach tab A while pulling the rear scuff plate in the direction of the arrow
(1) shown in the figure, then detach hook B, clips C, pins D while pulling in the
direction of the arrow (2).
2. ...
Other materials:
Oil Seal (Differential) Replacement [C66 M R]
1. Remove the aerodynamic under cover No.2 and the splash shield as a single
unit..
2. Drain the manual transaxle oil..
3. Disconnect the drive shaft (LH) from the MTX..
4. Disconnect the drive shaft (RH) from the joint shaft..
5. Remove the joint shaft..
6. Remove the oil seal (LH).
...
Engine Oil Level Inspection [Mzr 2.0, Mzr 2.5]
1. Position the vehicle on level ground.
2. Warm up the engine.
3. Stop the engine and allow at least 5 min before continuing.
4. Remove the dipstick, wipe it cleanly, and reinstall it fully.
5. Remove the dipstick and verify that the oil level is between the F and L marks
on the dipstick. ...
Fog Lights
Use this switch to turn on the fog lights.
The fog lights will improve visibility at
night and during foggy conditions.
To turn the fog lights on, rotate the fog
light switch to the position.
The headlight switch must be in the
position before turning on the fog lights.
To turn t ...
