Mazda 3 Owners Manual: Replacing Rear Window Wiper Blade (5-Door)
When the wiper no longer cleans well, the blade is probably worn or cracked.
Replace it.
| CAUTION To prevent damage to the wiper arm and other components, do not move the wiper by hand. |
- Remove the cover
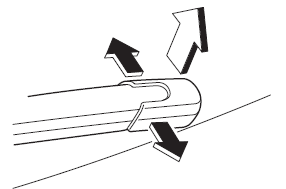
- ( With stopper type)
Remove the stopper and raise the wiper
arm.
(Without stopper type)
Raise the wiper arm.

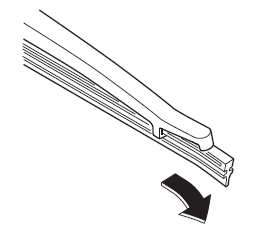
- Firmly rotate the wiper blade to the right until it unlocks, then remove the blade.
| CAUTION To prevent damage to the rear window, do not let the wiper arm fall on it. |
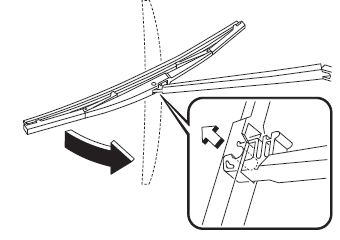
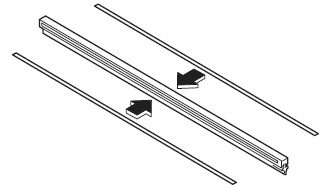
- Pull down the blade rubber and slide it out of the blade holder.
- Remove the metal stiffeners from the blade rubber and install them in the new blade.
| CAUTION
Do not bend or discard the stiff eners. You need to use them again. |
- Carefully insert the new blade rubber.
Then install the blade assembly in the reverse order of removal.

 Replacing Windshield Wiper Blades
When the wipers no longer clean well, the
blades are probably worn or cracked.
Replace them.
CAUTION
To prevent damage to the wiper arms
and other components, do not try to
sweep ...
 Battery
WARNING
Wash hands after handling the battery and related accessories:
Battery posts, terminals and related accessories contain lead and lead
compounds,
chemicals known to the Stat ...
Other materials:
Coupler Component Removal/Installation [Fw6 A EL]
WARNING:
A hot transaxle and ATF can cause severe burns. Turn off the engine and wait
until they are cool.
Always wear protective eye wear when using the air compressor. If the air
compressor is used, any particles of dirt or soiling could spatter and get into
the eyes.
...
Relay Block Removal/Installation [With Advanced Keyless Entry And Push Button
Start System]
1. Disconnect the negative battery cable..
2. Remove the following parts:
a. Driver-side front scuff plate.
b. Driver-side front side trim.
c. Hood release lever.
d. Upper panel.
e. Shift knob (MTX)(See MANUAL TRANSAXLE SHIFT MECHANISM REMOVAL/INSTALLATION
[G66M-R].)(See MANUAL TRANSAX ...
Variable Valve Timing Actuator Inspection [Mzr 2.0, Mzr 2.5]
CAUTION:
Variable valve timing actuator can not be disassembled because it is a precision
unit.
1. Remove the battery cover..
2. Disconnect the negative battery cable..
3. Remove the plug hole plate..
4. Disconnect the wiring harness.
5. Remove the ignition coils..
6. Remo ...
