Mazda 3 Owners Manual: Warning Light
The warning light turns on when the system has a malfunction.
Refer to Warning Lights on .
Brake Pad Wear Indicator
When the disc brake pads become worn, the built-in wear indicators contact the disc plates. This causes a screeching noise to warn that the pads should be replaced.
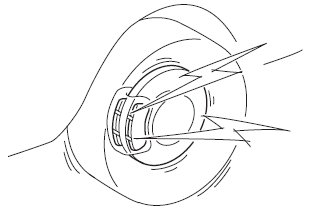
When you hear this noise, consult an Authorized Mazda Dealer as soon as possible.
| WARNING Do not drive with worn disc pads: Driving with worn disc pads is dangerous. The brakes could fail and cause a serious accident. As soon as you hear a screeching noise consult an Authorized Mazda Dealer. |
 Parking Brake
CAUTION
Driving with the parking brake on
will cause excessive wear of the brake
parts.
NOTE
For parking in snow, refer to Winter Driving regarding parking
brake use.
Setting ...
 Brake Assist
During emergency braking situations
when it is necessary to depress the brake
pedal with greater force, the brake assist
system provides braking assistance, thus
enhancing braking performance.
...
Other materials:
Parking Brake Lever Removal/Installation
1. Remove the following parts:
a. Upper panel.
b. Shift knob (MTX).
c. Selector lever knob (ATX).
d. Shift panel.
e. Side wall.
f. Console.
2. Remove in the order indicated in the table.
3. Install in the reverse order of removal.
4. After installation, inspect the parking brake le ...
Front Door Glass Removal/Installation
1. To access the glass installation bolt, position the front door glass so that
the distance from the top of the front door glass to the upper part of the front
beltline molding is approx. 80 mm {3.1 in}.
2. Disconnect the negative battery cable..
3. Remove the inner garnish..
4. Remov ...
Brake Hose (Rear) Removal/Installation [Mzr 2.5, Mzr 2.3 Disi Turbo]
1. Remove in the order indicated in the table.
2. Install in the reverse order of removal.
3. Add brake fluid, bleed the brakes, and inspect for leakage after the installation
has been completed..
1
Brake pipe
(See Clip and Brake Pipe Installation Note.)
...
