Mazda 3 Service Manual: Air Bag Module And Pre Tensioner Seat Belt Disposal Procedures
WARNING:
-
A live (undeployed) air bag module or pre-tensioner seat belt may accidentally operate (deploy) when it is disposed of and cause serious injury. Always refer to the “AIR BAG MODULE AND PRE-TENSIONER SEAT BELT DEPLOYMENT PROCEDURES” and dispose of air bag modules and pre-tensioner seat belts in a deployed condition.
-
The air bag modules and the pre-tensioner seat belts are very hot immediately after they are deployed. You can be burned. Do not touch an air bag module and pre-tensioner seat belt for at least 15 min after deployment.
-
Pouring water on the deployed air bag module and pre-tensioner seat belt is dangerous. The water will mix with the residual gases to form a gas that can make breathing difficult. Do not pour water on the deployed air bag module and pre-tensioner seat belt.
-
The deployed air bag module or pre-tensioner seat belt may contain deposits of sodium hydroxide, a caustic byproduct of the gas-generated combustion. If this substance gets into your eyes or on your hands, it can cause irritation and itching. When handling the deployed air bag module and pre-tensioner seat belt, wear gloves and safety glasses.
-
Due to the adoption of 2-step deployment control in both the driver and passenger-side air bag modules, depending on the impact force, it is possible that inflator No.2 might not operate (deploy). Before disposing of the air bag module, always follow the inflator deployment procedures and verify the complete operation (deployment) of inflators No.1 and 2.
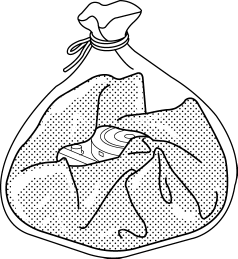
1. Remove the deployed air bag module or pre-tensioner seat belt.
2. Put the air bag module or pre-tensioner seat belt in a plastic bag, seal the bag, and then dispose of it.
 Air Bag Module And Pre Tensioner Seat Belt Deployment Procedures [Two Step Deployment
Control System]
Air Bag Module And Pre Tensioner Seat Belt Deployment Procedures [Two Step Deployment
Control System]
WARNING:
A live (undeployed) air bag module or pre-tensioner seat belt may accidentally
operate (deploy) when it is disposed of and cause serious injury. Do not dispose
of a live (unde ...
 Buckle Switch Inspection
Driver Side
1. Switch the ignition to off.
2. Disconnect the negative battery cable..
3. Remove the front seat..
4. Remove the front buckle..
5. Inspect for continuity between the buckle swit ...
Other materials:
Heater Core Inspection
1. Inspect the heater core for damage, cracks, and water leakage.
If there is any malfunction, replace the heater core.
2. Visually inspect the fins for bending.
If there is any bending, use the end of a flathead screwdriver to straighten
the fins.
3. Visually inspect ...
Front Wheel Hub Bolt Replacement
1. Remove the brake calliper component and disc plate..
2. Remove the wheel hub bolt using the SST as shown in the figure.
NOTE:
When removing the wheel hub bolts, perform the work between range A shown
in the figure to assure a space for the bolt removal.
3. Place a new whe ...
Front Door Trim Disassembly/Assembly
Driver-side
1. Disassemble in the order shown in the figure.
1
Screw A
2
Assist handle
3
Switch panel cover
4
Screw B
5
Power window main switch
...
