Mazda 3 Service Manual: Air Fuel Ratio (A/F) Sensor Inspection [Mzr 2.0, Mzr 2.5]
A/F Sensor Inspection
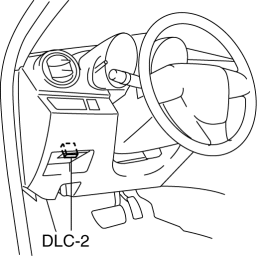
1. Connect the M-MDS to the DLC-2.
2. Switch the ignition to ON.
3. Warm up the engine to normal operating temperature.
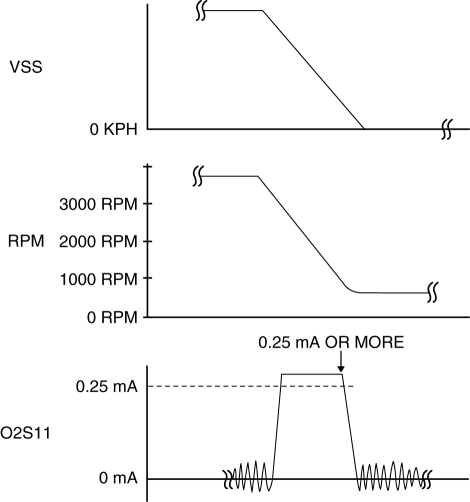
4. Access the following PIDs using the M-MDS..
-
VSS (Vehicle speed)
-
RPM (Engine speed)
-
O2S11 (A/F sensor output current)
5. Drive the vehicle and decelerate the engine speed by releasing the accelerator pedal fully when the engine speed is 3,000 rpm or more
.
6. Verify that the A/F sensor output current (PID: O2S11) is 0.25 mA or more
while decelerating as shown in the figure.
-
If not as specified, replace the A/F sensor..
A/F Sensor Heater Inspection
WARNING:
-
A hot engine and exhaust system can cause severe burns. Turn off the engine and wait until they are cool before removing the exhaust system.
1. Remove the battery cover..
2. Disconnect the negative battery cable..
3. Remove the plug hole plate..
4. Remove the air cleaner assembly. (MZR 2.5).
5. Disconnect the A/F sensor connector.
6. Measure the resistance between A/F sensor terminals A and E.

-
If not as specified, replace the A/F sensor..
-
A/F sensor heater resistance
-
1—10 ohms [normal temperature]
 Accelerator Pedal Position (App) Sensor Inspection [Mzr 2.0, Mzr 2.5]
Voltage Inspection
NOTE:
Because the APP sensor is integrated in the accelerator pedal, replacing
the APP sensor includes replacement of the accelerator pedal.
1. Connect the M-MDS t ...
 Air Fuel Ratio (A/F) Sensor Removal/Installation [Mzr 2.0, Mzr 2.5]
WARNING:
A hot engine and exhaust system can cause severe burns. Turn off the engine
and wait until they are cool before removing the exhaust system.
1. Remove the battery cover..
2 ...
Other materials:
Keyless Control Module Configuration
1. Connect the M-MDS (IDS) to DLC-2.
2. After the vehicle is identified, select the following items from the initialization
screen of the IDS.
Select “Module Programming”.
3. Then, select items from the screen menu in the following order.
Select “Programmable Module Ins ...
Drive Belt Inspection [Mzr 2.0, Mzr 2.5]
MZR 2.0
A/C drive belt
NOTE:
Drive belt deflection/tension inspection is not necessary because of the
use of the maintenance-free type A/C drive belt.
Replace the drive belt if it is found to be damaged during visual inspection,
or if there is a malfunction or noise in th ...
Engine Coolant Protection Inspection [Mzr 2.0, Mzr 2.5]
1. Measure the engine coolant temperature and specific gravity using a thermometer
and a hydrometer.
CAUTION:
Use engine coolant at a concentration that meets the environmental conditions
in which the vehicle is driven, otherwise engine damage could occur.
The engine has alumi ...
